

Blog
17 Dec. 2025
Should You Use Chemical Drain Cleaners in Sydney
The short answer is usually “no”. Start mechanical, not chemical.
In most Sydney homes, your safest first-line options are mechanical cleaning methods:
- Plunger for simple, local clogs.
- Drain snake (auger) / hand auger for hair and gunk close to the fixture.
- Hot water flush + better drain maintenance for ongoing buildup.
Why? Because chemical products often rely on caustic drain cleaner (alkali), acidic drain cleaner (acid), or oxidizing drain cleaner chemistry, meaning corrosive label risks, exothermic reaction heat, and higher odds of pipe corrosion, PVC pipe softening, and rubber seal degradation if misused.
If your drain is fully blocked and you’ve got standing water, adding chemicals can increase splash risk and make a later plumber visit harder (and more dangerous).
Below is a practical, Sydney-focused guide to help you decide what to do first, when chemicals might be acceptable, and when to stop and escalate.
What Actually Happens When You Use A Chemical Drain Cleaner?
Most drain openers work by making a blockage dissolve, react, or shift—sometimes by oxidise/irritate/corrode mechanisms, sometimes by heat.
- Caustic drain cleaner products commonly rely on sodium hydroxide (caustic soda) or potassium hydroxide. They can burn, saponify, and etch organic build-up.
- Acidic drain cleaner products can corrode, fume, and dissolve stubborn deposits (but can be harsh on fixtures and metals).
- Oxidizing drain cleaner products can oxidize, irritate, and react with organic material.
- Some products include aluminum granules that react, heat, and bubble, creating an exothermic reaction that can heat, boil, and splash.
That “works fast” feeling is exactly why they also demand caution.
Why Are Chemical Drain Cleaners Risky In Sydney Homes?
The biggest risks are safety, pipe compatibility, and what happens if the blockage isn’t where you think it is.
Personal injury risk (high):
- Strong products can cause caustic burns, they burn, erode, and blister skin/eyes quickly.
- If you need chemical burns first aid, the essentials are to rinse, remove contaminated clothing, and seek-care (and call for advice).
- Fumes can trigger inhalation irritation that irritate, cough, and worsen breathing.
Mixing risk (very high):
- Mixing chemicals is a hard “no”. You must avoid, prevent, and separate products.
- Sodium hypochlorite (bleach) mixed with acids can release chlorine gas, which can irritate and endanger airways.
- Ammonia and bleach combos can off-gas hazardous compounds.
Plumbing risk (often underestimated):
- Chemicals can accelerate pipe corrosion (pipes corrode, weaken, and leak).
- Heat and harsh chemistry may contribute to PVC pipe softening (soften, warp, fail) and rubber seal degradation (degrade, swell, leak).
- Older materials can suffer copper pipe pitting (pit, corrode, leak) and cast iron scaling (scale, restrict, clog).
And if the issue is deeper (a compromised sewer line, tree root intrusion, or poor pipe gradient), chemicals don’t fix the cause, they just add hazard.
What Should You Try Before Reaching For Caustic Or Acid Products?
If you want the lowest-drama approach, start with prevention and physical clearing.
Prevent it from forming again:
- Stop fats, oils and grease (FOG) from entering the drain (FOG can cool, harden, and clog).
- Keep food scraps out (they lodge, rot, and block) and avoid tipping coffee grounds (they settle, compact, and clog).
- Use a sink strainer (it catch, prevent, reduce solids) and maintain your shower grate (it can trap, collect, block).
Clear the clog mechanically:
- Use a plunger (it plunge, dislodge, clear) for localised clogs.
- Use a drain snake (auger) (it snake, hook, break) or hand auger (it insert, rotate, pull) for hair and gunk.
- Check the P-trap (it can trap, seal, block) and confirm the water seal still seal, block, prevent sewer gas that can vent, block, smell.
Use gentler maintenance when appropriate:
- A hot water flush can pour, soften, and rinse minor grease/soap residues.
- Baking soda + vinegar may fizz, loosen, and rinse small build-ups (not a miracle cure).
- An enzyme drain cleaner can digest, maintain, and reduce organic film over time.
If you see standing water that pool, stagnate, and smell, skip chemicals and move to tools or a tradie.
When Should You Call Sydney Water Or A Licensed Plumber?
Some warning signs mean “stop DIY”:
Call Sydney Water (or report) when:
- There’s a suspected wastewater overflow (it can overflow, contaminate, report) or a broader wastewater blockage that may block, back-up, and overflow across multiple fixtures.
- You’re concerned about stormwater drain contamination that can carry, discharge, pollute (especially if chemicals were misused).
Call a plumber when:
- The clog keeps returning (think tree root intrusion that can invade, crack, block).
- You need proper diagnosis via CCTV drain inspection (inspect, locate, diagnose) using a drain camera (view, identify, confirm).
- You need high-pressure water jetting (jet, scour, clear) or longer-term fixes like pipe relining (reline, seal, restore).
For compliance and safety in NSW, aim for a licensed plumber NSW, because licensing expectations can license, certify, and comply under NSW Fair Trading plumbing regulation which can regulate, require, and enforce standards. A good plumber will inspect, clear, and repair without turning your bathroom into a hazmat scene.
How Do You Handle Safety, First Aid, And Disposal In NSW?
If you decide to use any chemical product at all, treat it like a hazardous job.
Safety basics:
- Read the SDS (Safety Data Sheet): it should specify, warn, and instruct.
- Follow Safe Work Australia GHS principles that classify, label, and communicate hazards—watch for a corrosive label that will warn, indicate, and require-PPE.
- Use PPE: wear, protect, prevent injuries. At minimum, nitrile gloves (wear, resist, avoid-contact) and safety goggles (protect, shield, prevent). For higher splash risk, a face shield can shield, block, prevent.
- Maximise ventilation: ventilate, avoid-inhale, reduce fumes.
- Never attempt DIY neutralization (leave “neutralize, control, dispose” actions to professionals where relevant), and follow safe spill response to contain, rinse, and call.
First aid essentials:
- For eyes, use eye wash: flush, remove, seek-care.
- For skin, use skin rinse: rinse, remove-clothing, call.
- If there’s any exposure risk, contact the Poisons Information Centre (13 11 26): call, advise, triage.
Disposal in NSW:
- Treat leftovers as chemical waste that should classify, restrict, and manage properly.
- Prefer Community Recycling Centre options that drop-off, divert, and protect, or Household Chemical CleanOut events that dispose, collect, and protect.
- The simplest rule of thumb is: “Do not pour chemicals down drains”—avoid, collect, dispose—because it reduces stormwater pollution that can pollute, flow, and impact, and lowers environmental toxicity that can harm, pollute, and accumulate.
FAQs About Using Chemicals for Drain Cleaning
What is usually included in a drain cleaning quote, and what can cost extra?
A proper drain cleaning quote should clearly list what’s included, such as labour, standard equipment use, and basic cleanup. Extra costs can apply for things like after-hours work, emergency call-outs, travel time, specialised equipment hire, or disposal fees. Always ask what is not included so there are no surprises once work begins.
How can I identify hidden fees or upsells in a drain cleaning quote?
Be cautious of quotes that are unusually cheap or use vague wording like “starting from” or “standard service fee.” These often lead to extra charges later. Ask upfront about common add-ons such as emergency surcharges, overtime rates, travel fees, or equipment costs so you know the real price before agreeing.
How do I fairly compare multiple drain cleaning quotes?
Compare quotes only after confirming they cover the same scope of work. Check whether each one includes inspection, cleanup, warranties, and equipment use. Getting at least three detailed quotes helps you understand the typical price range and spot any quote that seems unrealistically low or inflated.
What should I confirm before accepting a drain cleaning quote?
Request a written quote after the plumber has inspected the issue. Confirm the timeline, warranty or guarantee, payment terms, and exactly what work is included. A detailed breakdown protects you from unexpected changes or extra charges later.
When is DIY drain cleaning acceptable, and when should I call a plumber?
Minor clogs caused by hair or soap buildup can sometimes be cleared with a plunger or hand snake. Ongoing blockages, multiple clogged drains, or deep obstructions usually require professional tools like drain cameras or hydro-jetting. Chemical cleaners can damage pipes and often provide only a temporary fix, so professional help is safer for recurring or serious issues.
Should a drain cleaning quote be itemised?
Yes. A trustworthy plumber provides an itemised quote showing labour, equipment, and any additional fees. Vague descriptions or flat fees without explanation can hide extra costs or reduced service quality. Ask for clarification on any unclear line items before proceeding.
Are travel and emergency call-out fees normally included?
Not always. Some plumbers charge a separate call-out or travel fee, especially if the job is outside standard hours or far from their service area. After-hours or weekend work often costs more. If these fees aren’t clearly stated, ask directly before booking.
Does a plumber’s licence and insurance affect pricing?
Licensed and insured plumbers often charge more because they meet regulatory standards and carry proper insurance. While cheaper, unlicensed options may seem appealing, they offer no protection if something goes wrong. Paying slightly more for a licensed professional helps protect your property and ensures compliant workmanship.
Can I negotiate a drain cleaning quote?
Yes. It’s reasonable to ask if the plumber can adjust the quote, offer bundled pricing, or suggest alternative options that reduce cost. Many reputable plumbers are open to discussion, especially if you’ve compared multiple quotes. Be clear about your budget and ask what flexibility exists.
Should I agree to the work immediately?
You should never feel pressured to sign or approve work on the spot. Always take time to review the written quote, check the details, and compare options if needed. Rushing is a red flag—reputable plumbers are happy to give you time to decide.
Discover More About Sydney’s Blocked Drain Problems
Step-by-Step Guide to Clearing a Blocked Drain
Blocked Stormwater Drains: Causes, Solutions, and Preventative Strategies
How to Deal with Hair Clogging Your Drains in Sydney, NSW
Secret Tips to Safely Cleaning a Smelly Drain in Sydney Home
10 Essentials Tips to Preventing Blocked Drains
Guide to Unclogging a Kitchen Sink in Sydney
Using a Plumber’s Snake to Unclog Drains in Sydney
Guide to Unclogging a Bathroom Sink in Sydney
Guide to Unclogging Outdoor Drains For Sydney Homes
How to Unclog a Shower Drain in Sydney
A Complete Guide to Unclogging a Toilet Without a Plunger
Using Bleach to Unblock Your Toilet in Sydney
Guide to Clearing Toilet Paper Blockages Without a Plunger
Don’t Be Fooled by Drain Clearing Quotes in Sydney: 2026 Pricing Guide
Should You Use Chemical Drain Cleaners in Sydney
Effective Ways to Get Rid of Drain Flies for Good – A Homeowner’s Guide
Why Does Your Shower Drain Smell? Causes, Fixes, And Prevention Tips
Tips For Clearing Blocked Roof Drains In Sydney
What To Do If Your Drain Overflows In Sydney
How To Unblock A Floor Drain Quickly
Causes of Burst Pipes and How to Prevent Them
Why You Shouldn’t Ignore a Blocked Drain: Key Risks and Solutions
Why CCTV Drain Inspections Are the Future of Plumbing Solutions
How Construction Debris Causes Drain Blockages
Do Blocked Drains Attract Pests in Sydney?
How to Use a Wet-Dry Vacuum to Clear a Blocked Drain
Guide to Solving Common Rainwater Harvesting Drain Problems
How Sediment Build-Up Causes Drain Blockages
How to Retrieve Toys Stuck in the Tub Drain
Understanding Where Stormwater Drains Go
Guide to Common Causes of Low Water Pressure
How to Prevent Costly Storm Plumbing Emergencies
How to Retrieve Items Lost Down the Drain
How Does UV Pipe Relining Provide a Modern Solution to Pipe Repairs?
Step-by-Step Guide for Unclogging a Toilet in Sydney
17 Dec. 2025
Don’t Be Fooled by Drain Clearing Quotes in Sydney: 2026 Pricing Guide
In Sydney, a blocked drain can go from annoying to urgent in minutes. That’s when a misleading drain clearing quote can hurt most, especially if the ad looks cheap but the final invoice balloons.
This article is written for Sydney homeowners, strata managers, and small business owners who want transparency: what a quote should include, which common tactics to watch for, and how to choose an ethical contractor.
What Does A Drain Clearing Quote Actually Mean?
A drain clearing quote should be more than a number. Done properly, it’s a written estimate that clearly defines the scope of work and the basis of pricing. If you only get a phone quote or a price range quote, treat it as a rough starting point until there’s an on-site inspection.
It’s also normal for a company to charge a diagnostic fee, service call fee, or trip charge to get a technician to you. Those fees aren’t automatically a rip-off, but they must be clearly disclosed up front and reflected on the paperwork.
Why Do “Starting At” Prices So Often Turn Into Bigger Bills?
A “starting at” price can simply mean “this is the cheapest scenario.” But it’s also commonly used as a loss leader, where the low number is designed to win the booking and then convert into a higher-priced job on site. When that practice becomes deliberately misleading, it drifts into bait-and-switch territory.
The behaviour often follows a pattern: you book based on an advertised number, the tech arrives, and an upsell begins, sometimes backed by high-pressure sales, a scare tactic, or a “limited time” discount that only applies if you approve immediately. That’s why it helps to know the red flags before anyone steps through your door.
Watch how they explain the quote. If the explanation leans heavily on fine print, or relies on “If needed” language without boundaries, you’re at higher risk of hidden fees and surprise add-on fee items.
How Does The Pricing Model Change What You Pay?
In Sydney, drain clearing commonly falls into three pricing styles.
With flat-rate pricing, the business uses a price book and charges set prices for typical tasks. With time-and-materials, your bill rises with the hourly rate plus parts and time. Some businesses combine both, or apply a minimum charge regardless of how quick the job is.
Then come the measuring rules. Your cost can be calculated as “per drain” pricing (each fixture), “per foot” pricing (how much line they clear), or for jetting jobs, “per hour” jetting. None of these are inherently wrong, but each can be abused if it isn’t explained clearly before the work starts.
Finally, ask about the extras that blow budgets: an equipment fee for a camera inspection or jetter, a line for consumables, a shop supplies fee, plus practical charges like a disposal fee or cleaning fee if there’s mess. And if you’re booking at night, on weekends, or on public holidays, confirm any after-hours fee, emergency rate, or weekend surcharge before anyone is dispatched. Even admin policies matter: a cancellation fee or no-show fee can apply if schedules shift.
What Should Be On The Paperwork Before You Authorise Anything?
If a provider is legitimate, the admin will feel boring, and that’s a good sign.
Before work begins, you should see a work order that mirrors the agreed scope of work, and you should give explicit authorization. Most companies will use signature capture on a phone or tablet; that signature matters, because it’s the line between “quote” and “approved job”.
If the situation changes, say the tech finds roots, a broken section, or no access point, you want the change written down as a change order. That change order should explain the new scope, new price, and why. This is where strong operators offer a not-to-exceed approach: they cap the price unless you approve anything beyond that.
Afterwards, insist on a line-item invoice. A lump-sum quote that turns into a lump-sum invoice is the easiest way for costs to hide.
Why Is Diagnosis The Difference Between Fair Pricing And A Rip-Off?
A drain can be slow because of a simple obstruction, or because the pipe is structurally compromised. Without diagnosis, you can’t tell the difference between clearing the symptom vs cause and fixing the actual root cause.
A good process starts before arrival. Proper dispatch screening asks which fixtures are affected, whether there’s odour, whether multiple toilets are gurgling, and whether there’s past overflow. A good company will also give a pre-arrival disclaimer: pricing depends on what’s found during an on-site inspection.
When the quote changes, you should be shown proof of clog. The strongest proof is usually camera inspection, sometimes paired with a locator to pinpoint the issue. A reputable tech can supply before/after video and clear documentation (photos and notes) so you’re not paying based on fear.
What Actually Causes Blocked Drains In Sydney?
Sydney properties see a familiar mix of everyday build-up and older-infrastructure surprises.
In kitchens, grease buildup is the classic culprit. In bathrooms, soap scum and hair clog issues build over time, especially in older apartments with narrower lines. In leafy suburbs, root intrusion is common, particularly where pipe joints or cracks invite roots to seek moisture.
Then there’s what the camera reveals in older systems: pipe scale, corrosion, offset joint problems, a pipe belly that holds solids, or in worse cases a partial or complete collapse. These are the situations where “just run a snake” stops being realistic and the quote should shift from simple clearing to repair planning.
Also pay attention to airflow and odours. A blocked vent stack can lead to slow draining and gurgling, and persistent sewer gas smells can indicate venting or trap issues. In that case, the issue may not be “a clog in the sink” at all.
Which Methods Should Be Used And When Are They Overused?
A quote is more trustworthy when the method matches the problem.
For straightforward clogs, a drain snake or auger may be enough. For tougher jobs and longer runs, a cable machine can be appropriate, especially on stubborn build-up. Where the pipe condition allows, hydro jetting is effective for scouring walls clean; some contractors also recommend preventive jetting for commercial sites to reduce downtime.
For recurring roots, root foaming may slow regrowth, but it isn’t a permanent structural fix. When the pipe itself is damaged, a camera-backed recommendation might shift to pipe lining, a targeted spot repair, or a full replacement if damage is extensive. Those bigger recommendations are exactly where you should slow down, request evidence, and get a second opinion.
What Parts Of The Drain System Affect The Quote Most?
The location of the blockage changes the work, the tools, and the access point, and that changes the quote.
Some issues are close to the fixture: a blocked trap or P-trap under a sink, or a bathroom blockage that could respond to a plunger or a toilet auger. Others sit deeper in the property system: a fixture drain feeding into a branch line, then into a vertical stack (common in multi-storey buildings).
Then you have boundary and access questions. A property might have a cleanout outside, or you may need to remove a sewer cleanout cap, and if no access exists, labour rises fast. Deeper still are the property’s lateral line and the main sewer line, where bigger tools and evidence-based decisions matter. If there’s flooding risk, discuss backflow and whether a backwater valve is sensible for your site.
For restaurants and cafés, a neglected grease trap can make every “drain clear” feel temporary, because the real restriction is upstream of the blockage you keep paying to remove.
In outer or semi-rural areas, it may not even be sewer-connected. A septic system can back up when it needs septic pumping, and failures can occur in the leach field—a totally different diagnosis from “snake the line”.
How Do You Check A Contractor Is Legit In NSW?
Legitimacy is not just about being friendly on the phone. In NSW, start with licensing, ask what class of licence covers their draining work. Then ask risk questions that protect you if something goes wrong: are they insured, do they carry liability insurance, are staff covered by worker’s comp, and are they bonded where relevant.
Reputation checks should go beyond star ratings. Online reviews are useful, but look for a repeated complaint pattern about upsells, unclear pricing, or no paperwork. Be aware of review gating, where businesses steer only happy customers to post, making the profile look cleaner than reality.
What Can You Do If You Think The Quote Was Misleading?
Start by grounding the dispute in documents. Ask for the itemized quote you were meant to receive, and match it against the line-item invoice. Identify every cost that wasn’t disclosed: the equipment fee, surcharges, shop supplies, and any add-ons. If the provider points to exclusions, demand that the exclusion and assumption were communicated clearly before you authorised. If they argue access or complexity, ask what site conditions and accessibility factors changed and why those changes weren’t put into a change order.
If the situation escalated into flooding, you may see charges relating to flood mitigation. When sewage is involved, it’s legitimately treated as a biohazard, which can drive costs, but again, it must be properly explained and documented.
If the quote was clearly inflated on the spot, protect yourself from sales psychology. Price anchoring is real: the first huge number makes the second “discounted” number feel reasonable. Instead, get comparative bidding and a second opinion, especially if excavation or replacement is being pushed.
Also look at the small print you might have missed: the quote validity window, the payment terms, whether a deposit was required, and what triggered surcharges. If you paid by card and believe the charge was unauthorised or materially misrepresented, a chargeback may be possible through your bank. If you believe conduct was misleading, keep all documentation and use the appropriate consumer protection pathway.
How Do You Avoid Getting Fooled Next Time?
The safest approach is a calm, repeatable routine, even in an emergency.
If you’ve made a DIY attempt and it didn’t work, be honest about what you used (including any drain chemicals) because that affects safety and approach. Then, when you call a plumber, insist on clear disclosure of fees and surcharges, and ask what evidence they use to justify upgrades. Don’t be swayed by a headline “free estimate” unless they also explain call-out and diagnostic rules. Push for written scope, and refuse vague “if needed” add-ons without a capped, written process.
Finally, choose the operator who makes the job easy to understand. A true professional will give you customer-friendly customer education, may recommend a maintenance plan when it genuinely fits your property, and will stand behind the work with a clear guarantee and warranty. They’ll also explain the “No clog” clause (if applicable) and their call-back policy so you know exactly what support looks like after the job.
If you want one sentence to guide every decision: the best Sydney drain company isn’t the one with the cheapest ad, it’s the one whose paperwork, evidence, and behaviour consistently prove they’re an ethical contractor.
Discover More About Sydney’s Blocked Drain Problems
Step-by-Step Guide to Clearing a Blocked Drain
Blocked Stormwater Drains: Causes, Solutions, and Preventative Strategies
How to Deal with Hair Clogging Your Drains in Sydney, NSW
Secret Tips to Safely Cleaning a Smelly Drain in Sydney Home
10 Essentials Tips to Preventing Blocked Drains
Guide to Unclogging a Kitchen Sink in Sydney
Using a Plumber’s Snake to Unclog Drains in Sydney
Guide to Unclogging a Bathroom Sink in Sydney
Guide to Unclogging Outdoor Drains For Sydney Homes
How to Unclog a Shower Drain in Sydney
A Complete Guide to Unclogging a Toilet Without a Plunger
Using Bleach to Unblock Your Toilet in Sydney
Guide to Clearing Toilet Paper Blockages Without a Plunger
Don’t Be Fooled by Drain Clearing Quotes in Sydney: 2026 Pricing Guide
Should You Use Chemical Drain Cleaners in Sydney
Effective Ways to Get Rid of Drain Flies for Good – A Homeowner’s Guide
Why Does Your Shower Drain Smell? Causes, Fixes, And Prevention Tips
Tips For Clearing Blocked Roof Drains In Sydney
What To Do If Your Drain Overflows In Sydney
How To Unblock A Floor Drain Quickly
Causes of Burst Pipes and How to Prevent Them
Why You Shouldn’t Ignore a Blocked Drain: Key Risks and Solutions
Why CCTV Drain Inspections Are the Future of Plumbing Solutions
How Construction Debris Causes Drain Blockages
Do Blocked Drains Attract Pests in Sydney?
How to Use a Wet-Dry Vacuum to Clear a Blocked Drain
Guide to Solving Common Rainwater Harvesting Drain Problems
How Sediment Build-Up Causes Drain Blockages
How to Retrieve Toys Stuck in the Tub Drain
Understanding Where Stormwater Drains Go
Guide to Common Causes of Low Water Pressure
How to Prevent Costly Storm Plumbing Emergencies
How to Retrieve Items Lost Down the Drain
How Does UV Pipe Relining Provide a Modern Solution to Pipe Repairs?
Step-by-Step Guide for Unclogging a Toilet in Sydney
16 Dec. 2025
Guide to Clearing Toilet Paper Blockages Without a Plunger
A toilet blocked by excess toilet paper is one of the most common residential plumbing issues, especially in homes with low-flow toilets or older pipework. While a plunger is the usual solution, many toilet paper blockages can be cleared safely without one by using controlled water pressure, lubrication, or mechanical loosening.
This guide explains how toilet paper blockages form, which non-plunger methods actually work, and how to determine whether the blockage is localised or part of a wider drainage issue. Discover more about bidet installation in Sydney.
Why Does Toilet Paper Block a Toilet Drain?
Toilet paper is designed to disintegrate in water, but its breakdown depends on flush volume, pipe gradient, and dwell time inside the trap. When too much paper is flushed at once, it absorbs water rapidly, expands, and compacts against the internal curve of the toilet trap.
Blockages are more likely when toilet paper combines with wipes or hygiene products, when water pressure is low, or when the toilet uses a reduced flush volume. Partial pipe restrictions further increase the likelihood of paper accumulation rather than dispersion.
How Does Hot Water and Dish Soap Clear Toilet Paper Blockages?
Dishwashing liquid reduces surface tension inside the toilet trap, allowing compacted paper to slide rather than grip the pipe wall. Hot water softens the paper fibres and adds controlled hydraulic pressure without damaging porcelain or seals.
This method works best when the blockage consists only of toilet paper and when the water level in the bowl is stable rather than rising. The combination targets friction reduction rather than force, which lowers overflow risk.
Can Baking Soda and Vinegar Break Down Toilet Paper Effectively?
Baking soda and vinegar produce a carbon dioxide reaction that helps loosen compacted organic material. While this reaction does not generate pressure, it can reduce cohesion between paper layers and assist movement when followed by hot water.
This method is best suited for partial blockages or slow drainage rather than fully compacted clogs. It is pipe-safe and appropriate for households avoiding corrosive cleaners.
When Should A Wire Hanger or Toilet Snake Be Used?
Mechanical loosening becomes necessary when paper is tightly compacted or lodged beyond the visible trap. A wire hanger or toilet auger allows targeted contact with the blockage, enabling fragmentation or retrieval.
A toilet snake is preferable due to its curved design and protective coating, which reduces the risk of porcelain damage. Mechanical methods should be applied gently to avoid pushing the blockage deeper into the drain line.
Do Alternative Methods Like Epsom Salts or Bath Bombs Work?
Epsom salts and bath bombs dissolve and release gas when submerged, which can soften paper blockages and assist movement through the trap. Their effectiveness is inconsistent and limited to mild clogs, but they may provide a temporary solution when standard materials are unavailable.
These methods should always be followed by hot water to support downstream movement.
How Does The Plastic Bottle Method Replicate Plunging?
The plastic bottle method uses water displacement rather than air suction. Forcing hot water into the drain opening creates brief internal pressure that can shift compacted toilet paper.
This method should only be used when the bowl is not near overflow and when controlled pressure can be applied. Excessive force increases the risk of splashing or porcelain stress.
What Safety Limits Should Be Observed During DIY Unclogging?
Boiling water should never be used, as it can crack porcelain and weaken seals. Chemical drain cleaners are ineffective against paper and can damage pipes while increasing health risks.
Only one flush should be attempted per method. Rising water levels indicate compaction rather than clearance and signal the need to stop.
When Does a Toilet Paper Blockage Indicate a Larger Plumbing Issue?
Repeated toilet paper blockages often indicate reduced pipe diameter, insufficient venting, or low flush efficiency rather than user behaviour alone. Water backing up into other fixtures suggests a downstream restriction or partial main drain blockage.
In these cases, continued DIY attempts increase risk without addressing the underlying cause.
Frequently Asked Questions About Clearing Toilet Paper Blockages Without A Plunger
What Household Items Can I Use If I Don’t Have A Plunger To Unclog The Toilet?
Several common household items can be effective when a plunger isn’t available. Hot (not boiling) water combined with dishwashing liquid is one of the most reliable options, as it softens and lubricates toilet paper. Baking soda and vinegar can help loosen compacted paper, while a wire coat hanger, toilet brush, or a plastic bottle filled with water can provide gentle mechanical assistance. These methods work best for toilet paper–only blockages rather than clogs involving foreign objects.
What Safe Chemicals Or Natural Remedies Can I Use To Dissolve The Toilet Paper Clog?
Natural remedies are safer and more appropriate than harsh chemicals for toilet paper blockages. Baking soda and white vinegar can help weaken compacted paper fibres, especially when followed by hot water. Dishwashing liquid also works well by reducing friction inside the toilet trap. Commercial chemical drain cleaners are not recommended for toilets, as they are ineffective on paper and can damage pipes or seals.
Will A Toilet Paper Clog Eventually Dissolve On Its Own, And How Long Might It Take?
In some cases, a toilet paper clog may break down on its own if it is minor and the toilet is left unused. This process can take anywhere from 30 minutes to several hours, depending on the amount of paper, water temperature, and flush volume. However, waiting alone is unreliable for compacted blockages, and controlled intervention is usually safer than repeated flushing.
How Do I Know If The Toilet Is Unclogged Or If I Should Try Another Method?
A toilet is likely unclogged when the water level returns to normal and drains away smoothly without hesitation. If the water level drops slowly or remains high after a single flush attempt, the blockage may still be present. Gurgling sounds or rising water indicate that another method should be tried, but only after allowing the water level to stabilise.
What Precautions Should I Take To Avoid Damaging The Toilet Or Causing An Overflow During The Process?
Always avoid repeated flushing, as this increases the risk of overflow. Never use boiling water, which can crack porcelain or damage internal seals. Apply pressure gently when using mechanical tools, and stop immediately if the water level rises. Adequate ventilation and patience between attempts are essential to prevent damage or mess.
Should I Flush The Toilet Again Right Away When It’s Clogged With Toilet Paper, Or Wait For The Water Level To Drop First?
You should always wait for the water level to drop before attempting another flush. This typically takes 10 to 20 minutes, depending on how restricted the drain is. Flushing too soon can compact the paper further or cause the bowl to overflow, making the situation worse.
What Common Household Items Can I Use To Physically Help Dislodge A Toilet Paper Clog Without A Plunger, And How Can I Do That Safely?
A toilet brush, wire coat hanger, or toilet auger can be used to gently loosen compacted toilet paper. A wire hanger should be straightened and bent into a small hook, then inserted carefully to avoid scratching the porcelain. A toilet brush can be used to apply light downward pressure. These tools should be used slowly and carefully to prevent pushing the blockage deeper into the pipe.
Will Pouring Hot Water Into The Toilet Bowl Help Clear A Toilet Paper Clog, And How Should I Do It Safely?
Hot water can be effective, provided it is not boiling. Water should be hot enough to soften the paper but safe to touch briefly. If the bowl is already full, remove some water first to prevent overflow. Pour the hot water from waist height to create gentle pressure, then wait 10 to 15 minutes before assessing drainage.
If The Clog Doesn’t Clear On The First Try, Is It Okay To Try Again Or Use Another Method?
Yes, it is generally safe to try another method if the first attempt does not work, but only after the water level has stabilised. Limit attempts to two or three methods in total. If the blockage persists or worsens, continuing DIY efforts can increase the risk of overflow or pipe damage.
Is It A Good Idea To Use A Chemical Drain Cleaner Or Boiling Water When No Plunger Is Available?
No, chemical drain cleaners and boiling water are not suitable for toilet paper clogs. Drain cleaners are designed for grease and hair, not paper, and can damage toilet components while posing health risks. Boiling water can crack porcelain and compromise seals. Safer alternatives include hot water, dishwashing liquid, baking soda, vinegar, or mechanical loosening tools.
When Should a Plumber Be Contacted?
Professional assistance is required if blockages persist after multiple methods, if water rises rapidly with flushing, or if toilet clogs occur frequently. A plumber can assess pipe condition, flush performance, and drain alignment to prevent recurrence. Early intervention reduces the risk of overflow damage and pipe failure.
Discover More About Sydney’s Blocked Drain Problems
Step-by-Step Guide to Clearing a Blocked Drain
Blocked Stormwater Drains: Causes, Solutions, and Preventative Strategies
How to Deal with Hair Clogging Your Drains in Sydney, NSW
Secret Tips to Safely Cleaning a Smelly Drain in Sydney Home
10 Essentials Tips to Preventing Blocked Drains
Guide to Unclogging a Kitchen Sink in Sydney
Using a Plumber’s Snake to Unclog Drains in Sydney
Guide to Unclogging a Bathroom Sink in Sydney
Guide to Unclogging Outdoor Drains For Sydney Homes
How to Unclog a Shower Drain in Sydney
A Complete Guide to Unclogging a Toilet Without a Plunger
Using Bleach to Unblock Your Toilet in Sydney
Guide to Clearing Toilet Paper Blockages Without a Plunger
Don’t Be Fooled by Drain Clearing Quotes in Sydney: 2026 Pricing Guide
Should You Use Chemical Drain Cleaners in Sydney
Effective Ways to Get Rid of Drain Flies for Good – A Homeowner’s Guide
Why Does Your Shower Drain Smell? Causes, Fixes, And Prevention Tips
Tips For Clearing Blocked Roof Drains In Sydney
What To Do If Your Drain Overflows In Sydney
How To Unblock A Floor Drain Quickly
Causes of Burst Pipes and How to Prevent Them
Why You Shouldn’t Ignore a Blocked Drain: Key Risks and Solutions
Why CCTV Drain Inspections Are the Future of Plumbing Solutions
How Construction Debris Causes Drain Blockages
Do Blocked Drains Attract Pests in Sydney?
How to Use a Wet-Dry Vacuum to Clear a Blocked Drain
Guide to Solving Common Rainwater Harvesting Drain Problems
How Sediment Build-Up Causes Drain Blockages
How to Retrieve Toys Stuck in the Tub Drain
Understanding Where Stormwater Drains Go
Guide to Common Causes of Low Water Pressure
How to Prevent Costly Storm Plumbing Emergencies
How to Retrieve Items Lost Down the Drain
How Does UV Pipe Relining Provide a Modern Solution to Pipe Repairs?
Step-by-Step Guide for Unclogging a Toilet in Sydney
15 Dec. 2025
Using Bleach to Unblock Your Toilet in Sydney
Using bleach to unblock a toilet is a common idea, but it’s often misunderstood. While bleach is effective for cleaning and sanitising, it is not designed as a drain-unblocking solution. In some limited cases, bleach may assist with minor organic buildup, but relying on it for toilet blockages can lead to plumbing damage or safety risks if used incorrectly. Understanding when bleach can help, when it cannot, and what safer alternatives exist is essential before attempting this method. Hire a toilet plumbing team in Sydney.
Can Bleach Actually Unblock a Toilet?
Bleach is not formulated to break down solid toilet blockages such as excess toilet paper, sanitary items, or foreign objects. Its primary function is disinfection rather than physical blockage removal.
Bleach may assist only when the obstruction is light and caused by organic residue such as soap scum, bacteria, or minor biological buildup. In these cases, bleach can soften material enough to allow water flow to resume, but results are inconsistent and limited.
For mechanical obstructions, bleach will not dissolve or dislodge the blockage.
How Does Bleach Interact With Toilet Blockages?
Bleach works by breaking down bacteria, mould, and organic contaminants. When poured into a toilet bowl, it can reduce biological buildup on pipe surfaces, but it does not create pressure or physical movement inside the drain.
This means bleach does not push, pull, or clear compacted waste. Any perceived success usually occurs when the blockage was already close to clearing on its own.
Is It Safe To Use Bleach for Unblocking Toilets?
Using bleach in a toilet carries risks when used for unblocking rather than cleaning.
From a chemical safety perspective, bleach must never be mixed with other cleaning agents. Combining bleach with ammonia or acidic cleaners produces toxic chlorine gas.
From a plumbing perspective, repeated or concentrated bleach use can corrode pipe materials, especially in older systems or homes with metal piping.
From an environmental perspective, bleach entering wastewater systems contributes to chemical pollution if overused.
Bleach should only be used sparingly and cautiously.
How Should Bleach Be Used Safely If Attempted?
If bleach is used at all, it should be done carefully and only once.
Ensure the bathroom is well ventilated before starting. Pour no more than two to three cups of bleach directly into the toilet bowl. Allow it to sit for ten to fifteen minutes without flushing.
After waiting, add a bucket of warm water, never boiling, poured from waist height to introduce gentle pressure. Attempt a single flush. If water does not drain normally, stop and avoid further bleach use.
What Are Safer Alternatives to Bleach for Unblocking a Toilet?
For most toilet blockages, mechanical or low-risk methods are far more effective than bleach.
Hot water combined with dishwashing liquid helps lubricate pipes and soften organic waste. Baking soda and vinegar create a mild reaction that can assist with minor buildup. A plunger remains the most reliable household tool for toilet blockages, as it creates pressure to dislodge waste. For deeper obstructions, a toilet auger allows physical access to the blockage without damaging the bowl.
These methods address the cause rather than relying on chemical breakdown.
When Should Bleach Never Be Used in a Toilet?
Bleach should not be used if the toilet is fully blocked, overflowing, or backing up into other fixtures. It should also be avoided if other chemicals were recently used, or if there is uncertainty about pipe condition.
In these situations, bleach increases risk without improving outcomes.
FAQs About Unblocking a Toilet Using Bleach
What type of toilet blockage can bleach help with?
Bleach may help with very mild organic buildup caused by bacteria or soap residue, but it will not clear solid or compacted blockages.
Can bleach dissolve toilet paper blockages?
Bleach does not effectively dissolve toilet paper clogs once they are compacted inside the pipe.
How much bleach is safe to pour into a toilet?
No more than two to three cups should be used in a single attempt to avoid pipe corrosion and chemical hazards.
How long should bleach sit in a toilet before flushing?
Bleach should sit for ten to fifteen minutes before any water is added or a flush is attempted.
Is bleach safer than chemical drain cleaners for toilets?
Bleach is less aggressive than some drain cleaners but still carries risks and is not designed for blockage removal.
Can bleach damage toilet pipes over time?
Yes, frequent or concentrated bleach use can corrode pipes, especially older metal plumbing.
Does bleach help with smelly toilet drains?
Bleach can temporarily reduce odours by killing bacteria but does not fix underlying blockages.
What happens if bleach is mixed with other toilet cleaners?
Mixing bleach with ammonia or acidic cleaners can release toxic chlorine gas, which is dangerous to inhale.
Can bleach unblock a toilet overnight?
Leaving bleach overnight does not improve effectiveness and increases the risk of pipe damage.
Is bleach effective for recurring toilet clogs?
No, recurring clogs usually indicate mechanical or drainage issues that bleach cannot resolve.
What is safer than bleach for organic toilet blockages?
Hot water with dishwashing liquid or baking soda and vinegar are safer low-risk options.
Can bleach unblock toilets in older homes?
Older plumbing is more vulnerable to chemical corrosion, making bleach a poor choice.
Should bleach be used in low-flow toilets?
Low-flow toilets rely on proper pressure and water movement, making bleach ineffective for clearing blockages.
Does bleach clear toilet traps?
Bleach does not physically clear the trap and cannot remove lodged objects.
Can bleach cause toilet seals to fail?
Repeated exposure may degrade rubber seals over time.
Is bleach environmentally safe when flushed?
In small amounts, it is diluted, but repeated use contributes to chemical wastewater pollution.
When should bleach never be used in a toilet?
Bleach should never be used during overflows, backups, or after other chemicals were applied.
Can plumbers recommend bleach for toilet clogs?
Most plumbers do not recommend bleach as a clog-removal method.
Why does bleach sometimes appear to work?
It may coincide with a blockage already breaking down, giving a false impression of effectiveness.
What should be tried before bleach?
Plunging hot water with detergent, or a toilet auger, should always be tried first.
When is professional help more cost-effective than DIY?
When clogs repeat or affect multiple fixtures, professional intervention prevents long-term damage.
When Should a Professional Plumber Be Called?
A plumber should be contacted if the blockage remains after one attempt, if water backs up into other drains, or if toilet blockages occur frequently. These signs often indicate deeper drainage or sewer issues that household methods cannot resolve safely. Professional equipment allows accurate diagnosis without chemical damage.
Discover More About Sydney’s Blocked Drain Problems
Step-by-Step Guide to Clearing a Blocked Drain
Blocked Stormwater Drains: Causes, Solutions, and Preventative Strategies
How to Deal with Hair Clogging Your Drains in Sydney, NSW
Secret Tips to Safely Cleaning a Smelly Drain in Sydney Home
10 Essentials Tips to Preventing Blocked Drains
Guide to Unclogging a Kitchen Sink in Sydney
Using a Plumber’s Snake to Unclog Drains in Sydney
Guide to Unclogging a Bathroom Sink in Sydney
Guide to Unclogging Outdoor Drains For Sydney Homes
How to Unclog a Shower Drain in Sydney
A Complete Guide to Unclogging a Toilet Without a Plunger
Using Bleach to Unblock Your Toilet in Sydney
Guide to Clearing Toilet Paper Blockages Without a Plunger
Don’t Be Fooled by Drain Clearing Quotes in Sydney: 2026 Pricing Guide
Should You Use Chemical Drain Cleaners in Sydney
Effective Ways to Get Rid of Drain Flies for Good – A Homeowner’s Guide
Why Does Your Shower Drain Smell? Causes, Fixes, And Prevention Tips
Tips For Clearing Blocked Roof Drains In Sydney
What To Do If Your Drain Overflows In Sydney
How To Unblock A Floor Drain Quickly
Causes of Burst Pipes and How to Prevent Them
Why You Shouldn’t Ignore a Blocked Drain: Key Risks and Solutions
Why CCTV Drain Inspections Are the Future of Plumbing Solutions
How Construction Debris Causes Drain Blockages
Do Blocked Drains Attract Pests in Sydney?
How to Use a Wet-Dry Vacuum to Clear a Blocked Drain
Guide to Solving Common Rainwater Harvesting Drain Problems
How Sediment Build-Up Causes Drain Blockages
How to Retrieve Toys Stuck in the Tub Drain
Understanding Where Stormwater Drains Go
Guide to Common Causes of Low Water Pressure
How to Prevent Costly Storm Plumbing Emergencies
How to Retrieve Items Lost Down the Drain
How Does UV Pipe Relining Provide a Modern Solution to Pipe Repairs?
Step-by-Step Guide for Unclogging a Toilet in Sydney
15 Dec. 2025
How to Unclog a Shower Drain in Sydney
A clogged shower drain is a common bathroom issue that usually develops gradually rather than all at once. Standing water, slow drainage, and unpleasant odours are clear indicators that debris is restricting water flow. In many cases, shower drain blockages in Sydney can be resolved without professional help when addressed early.
This guide explains why shower drains clog, what tools are required, how to remove blockages step by step, how to prevent repeat issues, and when professional assistance becomes necessary.
Why Do Shower Drains Get Clogged?
Shower drains clog due to repeated exposure to organic material and residue. The most common causes include:
- Hair, which tangles and binds inside drain openings and pipe bends
- Soap scum, formed when soap reacts with minerals in water and adheres to pipe walls
- Dirt and skin flakes, which mix with hair and residue to thicken blockages
- Mineral deposits, particularly in hard water areas, which gradually narrow pipes
Identifying the dominant cause helps determine the most effective clearing method.
What Tools Are Needed for Unclogging a Shower Drain?
Before starting, gather the appropriate tools to improve effectiveness and reduce pipe damage risk:
- Plunger for dislodging minor blockages using suction
- Drain snake (auger) for reaching deeper clogs
- Baking soda and vinegar for breaking down soap scum and light organic buildup
- Wire hanger bent into a hook for removing hair
- Bucket and rubber gloves to manage debris safely
Using suitable tools ensures a safer and more efficient process.
How Do You Remove Visible Debris From a Shower Drain?
Begin by inspecting the drain opening for hair or soap residue. Wearing gloves, remove visible debris by hand or with a hooked wire hanger. Clearing surface buildup may restore normal drainage if the blockage is minor.
How Can a Plunger Be Used to Unclog a Shower Drain?
If drainage remains slow, use a plunger. Ensure enough water is present to cover the plunger base. Place the plunger firmly over the drain and pump it up and down to create suction. This pressure can dislodge compacted debris lodged just beyond the drain opening.
How Does Baking Soda and Vinegar Help Clear Shower Drain Clogs?
Baking soda and vinegar are effective for soap scum and light organic buildup. Pour baking soda into the drain, followed by vinegar. Allow the mixture to react inside the pipe, then flush with hot water to remove loosened residue.
This method is best suited for maintenance and mild clogs rather than severe blockages.
How Do You Use a Drain Snake to Clear a Shower Drain?
Insert the drain snake slowly into the drain until resistance is felt. Rotate the handle to break apart or hook the blockage. Withdraw the snake carefully and dispose of the debris. Repeat until resistance is no longer present and water flow improves.
How Can a Wire Hanger Be Used to Remove Hair From a Shower Drain?
If a drain snake is unavailable, straighten a wire hanger and bend one end into a hook. Carefully insert it into the drain to retrieve hair and debris. Flush with hot water afterward to confirm the drain is clear.
How Do You Remove the Drain Cover and Clean the Trap?
If blockages persist, remove the drain cover to access the trap area. Use a torch to inspect the drain and manually remove debris using gloves, a wire hook, or a drain snake. Reattach the drain cover securely before testing water flow.
How Can Future Shower Drain Clogs Be Prevented?
Preventative maintenance reduces the risk of repeat blockages:
- Install a drain cover to catch hair before it enters the pipe
- Clean the drain regularly to remove accumulated debris
- Use baking soda and vinegar periodically to dissolve soap residue
- Flush with hot water after showers to limit buildup
Consistent habits significantly improve drain performance.
When Should a Professional Plumber Be Called for a Shower Drain Clog?
Professional help is recommended when clogs persist despite multiple clearing attempts, when blockages recur frequently, or when the issue appears deeper within the plumbing system. Structural pipe issues or shared drain problems require specialised tools and inspection.
What Is the Best Way to Keep a Shower Drain Flowing Properly Long-Term?
Regular maintenance, early debris removal, and prompt attention to slow drainage prevent most shower drain problems. Addressing issues early reduces the risk of pipe damage, odours, and costly repairs.
FAQs About Unclogging a Shower Drain
What is the most common cause of a blocked shower drain in residential bathrooms?
The most common cause is hair buildup. Hair tangles inside the drain opening and pipe bends, trapping soap scum and dirt, which gradually restricts water flow.
How does soap scum contribute to shower drain blockages over time?
Soap scum forms when soap reacts with minerals in water. This sticky residue coats pipe walls, narrowing the passage and causing hair and debris to adhere more easily.
Why does a shower drain start draining slowly before it becomes fully blocked?
Slow drainage occurs when partial obstructions reduce pipe capacity. Over time, debris continues to accumulate until the drain can no longer move water efficiently.
Can hard water make shower drain clogs worse?
Yes. Hard water leaves mineral deposits inside pipes, which reduce internal diameter and accelerate the buildup of soap scum and debris.
How can you tell if a shower drain clog is near the surface or deeper in the pipe?
Surface clogs usually respond to manual debris removal or plunging. Deep clogs persist despite these methods and often require a drain snake to clear.
What type of shower drain clogs can be cleared without tools?
Minor clogs caused by visible hair or soap residue near the drain opening can often be removed by hand using gloves or a simple hook.
How effective is a plunger for unclogging a shower drain?
A plunger is effective for shallow clogs by creating suction that dislodges compacted debris near the drain entrance, but it is less effective for deep blockages.
When should baking soda and vinegar be used on a shower drain?
This method works best for soap scum and light organic buildup. It is suitable for maintenance or mild clogs rather than severe obstructions.
Can baking soda and vinegar damage shower pipes?
No. When used correctly, baking soda and vinegar are safe for residential plumbing and do not corrode pipes.
How does a drain snake remove hair clogs from a shower drain?
A drain snake reaches into the pipe, hooks onto hair and debris, and pulls it out, restoring water flow without pushing the blockage deeper.
What should you do if a shower drain keeps clogging repeatedly?
Recurring clogs often indicate deeper buildup, pipe design issues, or shared drain problems. Persistent issues should be professionally inspected.
Can removing the drain cover help clear a shower drain blockage?
Yes. Removing the drain cover provides access to the trap area where hair and debris commonly accumulate.
Why do shower drains sometimes smell even when water drains slowly?
Odours occur when organic material decomposes inside stagnant water trapped by partial blockages.
How often should a shower drain be cleaned to prevent clogs?
Light maintenance every few weeks and deeper cleaning every few months helps prevent buildup and slow drainage.
Does flushing a shower drain with hot water help prevent clogs?
Yes. Hot water helps dissolve soap residue and flush away loose debris before it can harden or bind with hair.
Can chemical drain cleaners be used safely on shower drains?
Chemical cleaners can damage pipes and are not recommended for regular use. Mechanical and natural methods are safer long-term.
What happens if a shower drain clog is ignored?
Ignoring clogs can lead to standing water, mould growth, unpleasant odours, and eventual pipe damage.
How do shared bathroom drain lines affect shower drain blockages?
In shared drain systems, debris from other fixtures can contribute to shower drain slowdowns, making clogs harder to isolate.
When should a professional plumber be called for a shower drain issue?
Professional help is needed when clogs persist after multiple attempts, recur frequently, or appear deeper in the plumbing system.
Can tree roots cause shower drain blockages?
Tree roots typically affect main sewer lines rather than shower drains, but deeper plumbing issues can still impact shower drainage.
How do plumbers diagnose stubborn shower drain clogs?
Plumbers use specialised tools such as drain cameras and mechanical augers to locate and remove deep or structural obstructions.
Will regular drain covers completely prevent shower drain clogs?
Drain covers significantly reduce hair entry but do not prevent soap scum or mineral buildup inside pipes.
What is the safest long-term method to keep a shower drain clear?
Consistent debris removal, periodic flushing with hot water, and routine maintenance provide the most reliable prevention.
Can slow shower drainage indicate a larger plumbing issue?
Yes. If multiple fixtures drain slowly, the problem may be in the main drain line rather than the shower itself.
How can homeowners reduce the risk of shower drain clogs long-term?
Using drain covers, cleaning hair regularly, avoiding heavy soap residue, and performing routine maintenance significantly lowers clog risk.
Get Deep Into Sydney’s Blocked Drain Problems
Step-by-Step Guide to Clearing a Blocked Drain
Blocked Stormwater Drains: Causes, Solutions, and Preventative Strategies
How to Deal with Hair Clogging Your Drains in Sydney, NSW
Secret Tips to Safely Cleaning a Smelly Drain in Sydney Home
10 Essentials Tips to Preventing Blocked Drains
Guide to Unclogging a Kitchen Sink in Sydney
Using a Plumber’s Snake to Unclog Drains in Sydney
Guide to Unclogging a Bathroom Sink in Sydney
Guide to Unclogging Outdoor Drains For Sydney Homes
How to Unclog a Shower Drain in Sydney
A Complete Guide to Unclogging a Toilet Without a Plunger
Using Bleach to Unblock Your Toilet in Sydney
Guide to Clearing Toilet Paper Blockages Without a Plunger
Don’t Be Fooled by Drain Clearing Quotes in Sydney: 2026 Pricing Guide
Should You Use Chemical Drain Cleaners in Sydney
Effective Ways to Get Rid of Drain Flies for Good – A Homeowner’s Guide
Why Does Your Shower Drain Smell? Causes, Fixes, And Prevention Tips
Tips For Clearing Blocked Roof Drains In Sydney
What To Do If Your Drain Overflows In Sydney
How To Unblock A Floor Drain Quickly
Causes of Burst Pipes and How to Prevent Them
Why You Shouldn’t Ignore a Blocked Drain: Key Risks and Solutions
Why CCTV Drain Inspections Are the Future of Plumbing Solutions
How Construction Debris Causes Drain Blockages
Do Blocked Drains Attract Pests in Sydney?
How to Use a Wet-Dry Vacuum to Clear a Blocked Drain
Guide to Solving Common Rainwater Harvesting Drain Problems
How Sediment Build-Up Causes Drain Blockages
How to Retrieve Toys Stuck in the Tub Drain
Understanding Where Stormwater Drains Go
Guide to Common Causes of Low Water Pressure
How to Prevent Costly Storm Plumbing Emergencies
How to Retrieve Items Lost Down the Drain
How Does UV Pipe Relining Provide a Modern Solution to Pipe Repairs?
Step-by-Step Guide for Unclogging a Toilet in Sydney
15 Dec. 2025
Guide to Unclogging Outdoor Drains For Sydney Homes
Outdoor drains play a critical role in directing rainwater away from homes, driveways, and pathways, particularly during heavy rainfall and storms. When these drains become blocked, water can quickly pool around the property, increasing the risk of foundation damage, soil erosion, and flooding.
Most outdoor drain blockages build gradually, which means early intervention can prevent costly repairs.
This guide explains why outdoor drains block, what tools are required, how to clear them safely, and when professional assistance for blcoked drian is necessary, using practical steps suitable for residential outdoor drainage systems.
Why Do Outdoor Drains Get Clogged?
Outdoor drains are constantly exposed to environmental debris, making them more vulnerable to blockages than internal plumbing systems. The most common causes include:
- Leaves and plant debris that accumulate during seasonal leaf fall and compact inside drain openings
- Dirt and mud washed into drains during heavy rainfall, especially from garden beds and unsealed surfaces
- Tree roots that penetrate small pipe joints or cracks and expand over time
- Litter and debris such as plastic packaging or loose waste that becomes lodged in drain bends
Understanding what caused the blockage helps determine the safest and most effective clearing method.
Tools Needed for Unclogging Outdoor Drains
Clearing outdoor drains safely requires tools designed for debris removal without damaging pipes. Commonly required tools include:
- Drain snake or auger for reaching internal blockages
- Garden hose with a high-pressure nozzle for flushing loosened debris
- Protective gloves to prevent injury from sharp or contaminated materials
- Shovel or trowel for removing surface-level buildup
- Bucket to collect debris removed from the drain
- Wet/dry vacuum for standing water and loose sediment
Using the right tools reduces the risk of pipe damage and improves clearing effectiveness.
How Do You Inspect an Outdoor Drain Before Clearing It?
Before attempting to clear an outdoor drain, inspect the area for visible debris, standing water, or slow drainage. Surface-level blockages often restrict water flow even when pipes are intact. Removing visible material first may restore partial drainage and make deeper clearing easier.
If water remains stagnant or drains slowly after surface debris is removed, the blockage is likely deeper in the system.
What Steps Should You Follow to Unclog an Outdoor Drain?
Inspect and Clear Surface Debris
Remove leaves, mud, and debris from the drain opening using gloved hands or a shovel. Clearing the surface improves visibility and prevents pushing debris further into the system.
Use a Drain Snake to Clear Internal Blockages
Insert the drain snake slowly into the drain until resistance is felt. Rotate the snake to break up or hook debris, then withdraw it carefully. Repeat until resistance is no longer present and water movement improves.
Flush the Drain with Water
After snaking, flush the drain using a garden hose. Start with moderate pressure and gradually increase flow. Proper flushing removes loosened debris and confirms whether the blockage has cleared.
Remove Standing Water with a Wet/Dry Vacuum
If water is pooling inside the drain, use a wet/dry vacuum to remove it. This allows better access for snaking and flushing and helps identify remaining debris.
Check for Tree Root Intrusion
Recurring blockages or resistance during snaking may indicate tree roots inside the pipe. Root intrusion often requires specialised cutting tools or professional intervention to prevent pipe damage.
How can you Prevent Future Clogs in your Outdoor Drain
Preventative maintenance reduces the likelihood of repeated blockages and improves drainage performance:
- Install drain covers to stop leaves and large debris entering the system
- Keep surrounding areas clear of soil, mulch, and garden waste
- Trim nearby trees and shrubs to limit root growth toward drainage pipes
- Use gutter guards to reduce debris entering the stormwater system
- Flush outdoor drains periodically to remove early sediment buildup
Regular maintenance is particularly important before and during rainy seasons.
When to Call a Professional
Professional assistance is recommended when outdoor drains remain blocked despite clearing attempts, when tree roots are suspected, or when water backs up toward structures. Licensed plumbers use tools such as CCTV cameras and hydro-jetting equipment to identify and resolve deeper or structural issues safely.
What causes outdoor drains to block more frequently than indoor drains?
Outdoor drains are exposed to leaves, soil, mud, garden waste, and litter. Unlike indoor drains, they are not filtered and must handle stormwater runoff, which carries debris directly into the system during rainfall.
How can you tell if an outdoor drain is blocked or just slow-draining?
A blocked outdoor drain usually causes standing water, overflow, or pooling after rain, while a slow drain still empties but takes much longer than normal. Repeated slow drainage often indicates a developing blockage.
Why do outdoor drains often block after heavy rainstorms?
Heavy rainfall washes large amounts of debris, soil, and organic matter into drains at once. If the pipe capacity is already reduced, this sudden load causes blockages or overflow.
What are the early warning signs of a blocked outdoor drain?
Early signs include water pooling around grates, slow runoff after rain, gurgling sounds, unpleasant odours, or water flowing back toward paths and foundations.
Can leaves alone completely block an outdoor drain?
Yes. Wet leaves compact tightly inside pipes, especially when mixed with dirt and mud. Over time, this creates a dense blockage that restricts water flow.
How does mud and soil buildup affect outdoor drain performance?
Mud and soil settle at the bottom of pipes, reducing internal diameter. Even a thin sediment layer significantly slows drainage and traps additional debris.
Why are tree roots a serious problem for outdoor drainage systems?
Tree roots enter through joints or cracks and expand inside pipes. They trap debris, restrict flow, and can eventually crack or collapse the pipe if left untreated.
Can a homeowner safely remove tree roots from an outdoor drain?
Minor roots may be cut temporarily, but full root removal usually requires specialised tools. DIY removal rarely prevents regrowth and can damage pipes.
What tools are most effective for unclogging outdoor drains at home?
Drain snakes, garden hoses with pressure nozzles, protective gloves, and wet/dry vacuums are the most effective tools for clearing common outdoor drain blockages.
How deep can a drain snake reach in an outdoor drain?
Most residential drain snakes can reach between 5 and 15 metres, which is sufficient for clearing blockages near pits, bends, and initial pipe runs.
Can flushing an outdoor drain with water make a blockage worse?
Yes. If debris is compacted, high water pressure can push the blockage further down the pipe, making removal more difficult. Flushing should only be done after mechanical clearing.
When is a wet/dry vacuum useful for clearing outdoor drains?
Wet/dry vacuums are ideal for removing standing water, loose sediment, and small debris before using a drain snake or flushing the system.
Why does an outdoor drain keep blocking even after being cleared?
Recurring blockages often indicate tree root intrusion, pipe damage, poor pipe gradient, or sediment buildup deeper in the system.
How often should outdoor drains be cleaned to prevent blockages?
Outdoor drains should be inspected seasonally and cleaned before and during periods of heavy rainfall, especially in autumn when leaf fall is highest.
Can installing a drain cover prevent outdoor drain blockages completely?
Drain covers reduce large debris entry but do not stop sediment, roots, or fine material. They are a preventative measure, not a complete solution.
How do gutter guards help protect outdoor drains?
Gutter guards reduce the amount of debris entering downpipes, lowering the debris load flowing into outdoor and stormwater drains.
Should outdoor drains be flushed even if they are not blocked?
Yes. Periodic flushing removes early sediment buildup and helps maintain unrestricted water flow.
What happens if a blocked outdoor drain is ignored?
Ignoring blockages can lead to flooding, soil erosion, foundation damage, mould growth, and costly structural repairs.
Can blocked outdoor drains cause water to enter the home?
Yes. When drains overflow, water can be forced toward foundations, garages, and subfloor areas, increasing the risk of internal water damage.
How can landscaping increase the risk of outdoor drain blockages?
Poor grading, heavy mulch use, and planting trees close to drains increase debris runoff and root intrusion into drainage pipes.
When should a professional plumber be called for an outdoor drain blockage?
Professional help is required when blockages recur, water backs up toward the house, tree roots are suspected, or DIY methods fail.
How do plumbers diagnose outdoor drain blockages accurately?
Plumbers use CCTV drain cameras to inspect pipe condition, identify blockages, locate root intrusion, and assess structural damage.
Can hydro-jetting damage outdoor drainage pipes?
When performed correctly, hydro-jetting is safe. Pressure is adjusted based on pipe material and condition to avoid damage.
Is pipe relining an option for recurring outdoor drain blockages?
Yes. Pipe relining seals cracks and joints, preventing root intrusion and restoring full flow without excavation.
Do outdoor drain blockages affect stormwater compliance?
Yes. Blocked stormwater drains can cause runoff pollution and may breach local drainage regulations if overflow enters neighbouring properties or waterways.
Why do outdoor drains smell when blocked?
Trapped organic material decomposes in stagnant water, producing foul odours that escape through drain openings.
Can outdoor drains block even if the surface grate looks clear?
Yes. Many blockages form deeper in the pipe where debris compacts beyond visible reach.
What is the best long-term strategy for keeping outdoor drains clear?
A combination of regular inspection, debris control, vegetation management, seasonal flushing, and professional assessment when needed provides the most reliable protection.
Outdoor drain blockages develop over time due to environmental exposure and debris accumulation. Early inspection, correct tools, and routine maintenance can resolve most minor issues. However, persistent blockages, root intrusion, and pipe damage require professional assessment to prevent property damage.
Maintaining clear outdoor drains ensures effective water flow, protects foundations, and reduces the risk of flooding during heavy rainfall.
Get Deep Into Sydney’s Blocked Drain Problems
Step-by-Step Guide to Clearing a Blocked Drain
Blocked Stormwater Drains: Causes, Solutions, and Preventative Strategies
How to Deal with Hair Clogging Your Drains in Sydney, NSW
Secret Tips to Safely Cleaning a Smelly Drain in Sydney Home
10 Essentials Tips to Preventing Blocked Drains
Guide to Unclogging a Kitchen Sink in Sydney
Using a Plumber’s Snake to Unclog Drains in Sydney
Guide to Unclogging a Bathroom Sink in Sydney
Guide to Unclogging Outdoor Drains For Sydney Homes
How to Unclog a Shower Drain in Sydney
A Complete Guide to Unclogging a Toilet Without a Plunger
Using Bleach to Unblock Your Toilet in Sydney
Guide to Clearing Toilet Paper Blockages Without a Plunger
Don’t Be Fooled by Drain Clearing Quotes in Sydney: 2026 Pricing Guide
Should You Use Chemical Drain Cleaners in Sydney
Effective Ways to Get Rid of Drain Flies for Good – A Homeowner’s Guide
Why Does Your Shower Drain Smell? Causes, Fixes, And Prevention Tips
Tips For Clearing Blocked Roof Drains In Sydney
What To Do If Your Drain Overflows In Sydney
How To Unblock A Floor Drain Quickly
Causes of Burst Pipes and How to Prevent Them
Why You Shouldn’t Ignore a Blocked Drain: Key Risks and Solutions
Why CCTV Drain Inspections Are the Future of Plumbing Solutions
How Construction Debris Causes Drain Blockages
Do Blocked Drains Attract Pests in Sydney?
How to Use a Wet-Dry Vacuum to Clear a Blocked Drain
Guide to Solving Common Rainwater Harvesting Drain Problems
How Sediment Build-Up Causes Drain Blockages
How to Retrieve Toys Stuck in the Tub Drain
Understanding Where Stormwater Drains Go
Guide to Common Causes of Low Water Pressure
How to Prevent Costly Storm Plumbing Emergencies
How to Retrieve Items Lost Down the Drain
How Does UV Pipe Relining Provide a Modern Solution to Pipe Repairs?
Step-by-Step Guide for Unclogging a Toilet in Sydney
01 Dec. 2025
How Does UV Pipe Relining Provide a Modern Solution to Pipe Repairs?
UV pipe relining is a trenchless repair method that restores damaged pipes without excavation. Instead of digging up the ground, a resin-impregnated liner is inserted into the existing pipe and hardened using ultraviolet (UV) light. This creates a new, seamless internal pipe that eliminates leaks, cracks, and structural weaknesses. UV relining is rapidly becoming one of Australia’s preferred repair technologies due to its speed, durability, and minimal disruption.
What Is UV Pipe Relining and Why Is It Used in Sydney?
UV pipe relining is a non-invasive technique that repairs pipes internally rather than replacing them. Instead of removing the old pipe, a flexible liner soaked in specialised UV-reactive resin is pulled or pushed into place. Once inflated, the liner fully conforms to the existing pipe’s shape. UV light then cures the resin, forming a new pipe inside the old one. This method is ideal for underground sewer or stormwater pipes where traditional excavation would damage landscaping, driveways, or structural foundations.
How Does the UV Pipe Relining Process Work?
Why Is an Initial CCTV Pipe Inspection Required?
A CCTV inspection identifies the nature of the damage, cracks, root intrusion, corrosion, or structural deformation. It also determines whether the existing pipe still has enough structural integrity for relining. Accurate measurements ensure the liner fits the entire repair length and that no hidden obstructions will prevent installation.
Recommended Company for UV Pipe Relining
Quintessential Plumbing Sydney – Trusted Sydney plumbers offering advanced pipe relining services, including no-dig trenchless pipe rehabilitation for sewer, stormwater and drain lines. They deploy CCTV inspection and modern relining methods to restore pipes efficiently with minimal disruption.
Quintessential Plumbing’s relining work comes with long-term peace of mind, backed by a 25-year guarantee on relined sections and free annual camera inspections.
Why Must the Pipe Be Fully Cleaned Before Relining?
Relining requires a smooth, clean surface for the resin to bond properly. High-pressure jetting or mechanical cutting removes roots, grease, scale, and debris. Without cleaning, the liner may not cure evenly, leading to folds, weak points, or incomplete adhesion that compromise the new pipe.
How Is the Resin-Coated Liner Installed Inside the Pipe?
The liner, soaked in UV-curable resin, is inserted using either air pressure or water inversion. Its flexibility allows it to bend through junctions and curves. Once positioned, the liner is inflated to press tightly against the internal pipe walls, filling cracks and spanning gaps.
Why Is UV Light Used to Cure the Resin?
A UV light train is pulled through the inflated liner. The UV wavelength triggers rapid polymerisation, hardening the resin uniformly. Unlike steam or hot-water curing, UV curing provides consistent strength, faster hardening times, and better control over the curing process—even in long pipe runs.
Why Is a Final CCTV Inspection Completed?
After curing, another CCTV inspection checks whether the liner has cured evenly, maintains the correct diameter, and is free of wrinkles or imperfections. This ensures the new pipe offers complete structural restoration and full flow capacity.
What Are the Advantages of UV Pipe Relining?
Why Is UV Pipe Relining Less Disruptive Than Digging?
Traditional pipe replacement requires excavation, which damages gardens, driveways, concrete slabs, and landscaping. UV relining is carried out through existing access points or small openings, preserving your property while avoiding noise and excavation waste.
Why Is UV Pipe Relining Faster Than Other Relining Methods?
UV curing accelerates hardening, often completing repairs in a single day. Heat-cured and steam-cured methods require longer curing times and more equipment. UV relining provides immediate pipe strength and quick return-to-service.
Why Is a UV-Relined Pipe Long-Lasting?
UV-cured liners create a durable, seamless internal pipe resistant to corrosion, root intrusion, cracking, and joint separation. These liners are engineered to last up to 50 years, offering long-term reliability with minimal maintenance.
Why Is UV Pipe Relining More Cost-Effective Than Replacement?
Relining avoids excavation labour costs, landscaping repairs, concrete reinstatement, and lengthy work times. The trenchless process significantly reduces the overall repair cost while extending pipe service life.
Why Is UV Relining an Environmentally Friendly Option?
The process uses fewer materials, reduces waste, and eliminates the need to dispose of old pipe sections. Less machinery and excavation mean lower carbon emissions and minimal impact on the surrounding soil and vegetation.
Where Is UV Pipe Relining Most Commonly Used?
Why Is UV Relining Ideal for Sewer and Stormwater Pipes?
Sewer and stormwater drains often run under driveways, garden beds, retaining walls, or concrete pathways. UV relining allows complete repair without disrupting these areas. It also blocks future root intrusion, a major cause of drain damage.
Why Do Commercial and Industrial Sites Prefer UV Relining?
Businesses cannot afford operational downtime. UV relining restores damaged pipes quickly and without the noise or mess associated with excavation. It is suitable for large-diameter pipes and high-usage drainage networks.
Why Is UV Relining Effective for Residential Homes?
Homeowners benefit from a trenchless solution that doesn’t require digging up lawns or breaking concrete. UV relining resolves common issues such as tree root damage, cracked pipes, and recurring blockages.
Is UV Pipe Relining Always the Right Solution?
Why Might UV Relining Not Be Suitable for Collapsed Pipes?
If a pipe has completely collapsed or is crushed, a liner cannot maintain its shape because there is no structural pathway to follow. In such cases, excavation and replacement may be required.
Why Does Pipe Accessibility Affect Relining Eligibility?
Access is required to feed the liner and UV curing equipment into the pipe. Pipes without inspection openings or accessible entry points may need modifications before relining.
Why Does Pipe Material Matter for Relining?
UV relining works effectively with PVC, clay, cast iron, concrete, and earthenware pipes. However, pipes with severe deformation or incompatible materials may require alternative repair methods.
When Should You Contact a Professional for UV Pipe Relining?
If you notice repeated blockages, slow drainage, sewer odours, or water leaking underground, a CCTV inspection from a qualified plumber is essential. Professionals can determine whether UV pipe relining is appropriate and provide a tailored solution based on the condition of your drainage system.
FAQ for Understanding UV Pipe Relining
Why Does Uv Pipe Relining Work Better for Cracked Pipes Than for Fully Collapsed Pipes?
UV relining depends on the original pipe maintaining enough structural space for the liner to inflate and cure. Collapsed pipes leave no internal channel for the liner to follow, making excavation necessary.
How Does Resin Thickness or Viscosity Affect the Strength of a Uv-Relined Pipe?
Thicker resin layers and higher-viscosity formulas create a denser cured pipe wall, improving durability, resistance to root intrusion, and structural load capacity.
Why Does a Cctv Inspection Determine Whether Uv Relining Is Suitable?
CCTV cameras identify internal defects such as deformation, bellied sections, collapsed areas, offset joints, and root penetration. These findings indicate whether the pipe has adequate shape to hold a liner.
Why Does Uv Curing Provide a Stronger Result Than Heat-Cured or Steam-Cured Relining?
UV radiation cures the resin evenly along the entire pipe length, ensuring uniform hardness and eliminating soft spots that sometimes occur in heat or steam methods.
Why Is Uv Pipe Relining Recommended for Sewer Pipes Affected by Tree Roots?
UV-relined pipes have no joints or seams, eliminating the entry points roots normally exploit. The cured liner also resists future intrusion due to its solid, non-porous barrier.
Why Does Uv Pipe Relining Work for Long Pipe Runs Better Than Other Methods?
UV curing trains can travel long distances, sometimes 50 metres or more, curing the liner continuously, making it ideal for extended sewer or stormwater lines.
Why Is Uv Pipe Relining More Efficient for Commercial Buildings With Large-Diameter Pipes?
Commercial pipes often have significant flow demand and complex layouts. UV relining cures high-strength liners quickly, reducing downtime and maintaining building operations.
How Does Pipe Diameter Influence the Feasibility of Uv Relining?
Larger pipes require thicker liners and stronger inflation pressure, but UV curing still ensures uniform hardening. Very small-diameter pipes may limit access for the curing equipment.
Why Does Pipe Material Affect Uv Relining Success?
UV relining bonds well to PVC, concrete, clay, cast iron, and earthenware because these materials allow good adhesion. Severely corroded metal pipes may require additional preparation for proper bonding.
Why Do Buried Stormwater Drains Benefit From Uv Relining Instead of Replacement?
Stormwater lines often sit under driveways, landscaping, or retaining walls. UV relining repairs the pipe internally without disturbing the surface structures.
Why Do Homeowners Choose Uv Relining Over Traditional Excavation?
UV relining avoids digging large trenches, preserves gardens and paving, reduces noise, lowers labour costs, and prevents property damage typically caused by excavation.
How Does Uv Pipe Relining Reduce the Risk of Recurring Blockages?
The cured liner creates a smooth internal surface with improved flow characteristics, eliminating rough joints, cracks, and corrosion points where debris normally builds up.
Why Does Uv Relining Last up to 50 Years?
The cured resin forms a rigid composite pipe inside the existing structure. Its seamless, corrosion-resistant design withstands soil pressure, roots, chemical exposure, and wastewater over decades.
How Does the Access Point Location Affect Uv Relining Installation?
UV equipment requires an entry point such as a maintenance hole, inspection opening, or access pit. Pipes without access points may need minor excavation to insert the liner.
Why Is Uv Relining More Environmentally Friendly Than Pipe Replacement?
It eliminates excavation waste, reduces machinery use, prevents disposal of old pipes, and lowers carbon emissions associated with digging and transporting materials.
Why Does Soil Movement Not Affect Uv-Relined Pipes as Much as Old Pipes?
The relined pipe has greater flexibility and structural strength, allowing it to withstand minor ground shifts that would normally crack older clay or concrete pipes.
Why Is Uv Relining Effective Even in Pipes With Multiple Bends or Offsets?
The flexible liner conforms to the pipe’s shape when inflated. Once cured, it forms a seamless internal pipe that maintains flow around bends and offsets.
Why Do Plumbers Often Choose Uv Relining for Blocked or Slow-Draining Sewer Systems?
If blockages are caused by cracks, joints, or root intrusion, relining not only clears the immediate issue but also eliminates the structural defects that cause recurring blockages.
Why Does Uv Relining Minimise Disruption for Industrial Sites With Continuous Wastewater Flow?
UV curing is rapid and predictable, allowing pipes to return to service quickly. This reduces downtime in factories, warehouses, and processing plants.
Why Should You Consider Uv Relining if Your Driveway Sits Above the Damaged Pipe?
Excavating under a driveway requires cutting and replacing concrete, which is costly and time-consuming. UV relining repairs the pipe without disturbing the driveway surface.
What Are the Benefits and Applications of Uv Pipe Relining, Specifically for Small-Diameter Piping, in Industrial Settings?
| Category | Aspect | Details (Small-Diameter Industrial Context) |
|---|---|---|
| Technical Performance | Structural Strength | UV-cured liners form a fully structural “pipe-within-a-pipe,” restoring or exceeding original pipe strength. Fibreglass reinforcement provides high load-bearing capacity suitable for small-diameter industrial lines. |
| Durability & Lifespan | Designed service life commonly exceeds 50 years, with some systems rated up to 70–100 years depending on resin and operating conditions. Suitable for long-term asset management in industrial facilities. | |
| Seamless Construction | Jointless liner eliminates weak points, preventing leaks, joint failures, and internal infiltration commonly found in older small-diameter pipes. | |
| Chemical Resistance | UV liners resist acids, alkalis, solvents, industrial wastewater, and aggressive effluents. Suitable for chemically harsh industrial environments. | |
| Corrosion Protection | Creates a non-corrosive internal barrier, stopping further deterioration of metallic or concrete pipes. | |
| Flow Efficiency | Smooth internal surface reduces friction losses. Despite minimal diameter reduction, hydraulic capacity is typically maintained or improved compared to degraded pipes. | |
| Temperature & Pressure Tolerance | UV liners can be engineered for elevated temperatures and moderate pressure conditions typical in industrial drainage, effluent, and process support lines. | |
| Operational Advantages | Installation Speed | UV curing allows rapid hardening—often within minutes—enabling same-day return to service for small-diameter pipes. |
| Minimal Downtime | Fast installation and curing minimise production shutdowns, making it suitable for continuous or high-output industrial operations. | |
| Trenchless Execution | No excavation required; work is completed through existing access points, avoiding disruption to factory floors, equipment, or buried services. | |
| Reduced Site Disruption | Smaller crews, limited equipment footprint, low noise, and minimal interference with surrounding operations. | |
| Cost Efficiency | Lower labour, restoration, and indirect downtime costs compared to invasive repairs. Long lifespan reduces future maintenance expenditure. | |
| Safety Improvements | Eliminates trench hazards, reduces confined-space entry, and limits worker exposure to uncured resins and fumes due to controlled UV curing. | |
| Environmental Benefits | Less waste generation, no contaminated soil removal, no water or steam usage for curing, and reduced carbon footprint. | |
| Industrial Applications | Process Drainage Lines | Used for rehabilitating small-diameter drains carrying industrial wastewater or process by-products without stopping production. |
| Chemical & Petrochemical Facilities | Suitable for corrosive effluent pipelines, utility drains, and support lines where chemical resistance is essential. | |
| Food & Beverage Plants | Ideal for under-slab drains and waste lines where hygiene, cleanliness, and zero production downtime are critical. | |
| Pharmaceutical Facilities | Supports sterile environments by avoiding excavation and limiting airborne contaminants during pipe rehabilitation. | |
| Power Generation & Utilities | Applied to cooling water drains, condensate lines, stormwater systems, and service conduits requiring rapid repair windows. | |
| Manufacturing Plants | Used for stormwater, sewer, and utility piping beneath production areas where excavation would disrupt operations. | |
| Industrial Campuses & Warehouses | Effective for rehabilitating aging underground infrastructure across large sites with minimal surface impact. |
UV pipe relining is a fast, durable, and minimally invasive way to restore damaged pipes. With long-term performance, reduced repair costs, and no excavation required, it offers a modern alternative to traditional pipe replacement. Investing in this technology protects your property and ensures your plumbing system operates reliably for years.
Get Deep Into Sydney’s Blocked Drain Problems
Step-by-Step Guide to Clearing a Blocked Drain
Blocked Stormwater Drains: Causes, Solutions, and Preventative Strategies
How to Deal with Hair Clogging Your Drains in Sydney, NSW
Secret Tips to Safely Cleaning a Smelly Drain in Sydney Home
10 Essentials Tips to Preventing Blocked Drains
Guide to Unclogging a Kitchen Sink in Sydney
Using a Plumber’s Snake to Unclog Drains in Sydney
Guide to Unclogging a Bathroom Sink in Sydney
Guide to Unclogging Outdoor Drains For Sydney Homes
How to Unclog a Shower Drain in Sydney
A Complete Guide to Unclogging a Toilet Without a Plunger
Using Bleach to Unblock Your Toilet in Sydney
Guide to Clearing Toilet Paper Blockages Without a Plunger
Don’t Be Fooled by Drain Clearing Quotes in Sydney: 2026 Pricing Guide
Should You Use Chemical Drain Cleaners in Sydney
Effective Ways to Get Rid of Drain Flies for Good – A Homeowner’s Guide
Why Does Your Shower Drain Smell? Causes, Fixes, And Prevention Tips
Tips For Clearing Blocked Roof Drains In Sydney
What To Do If Your Drain Overflows In Sydney
How To Unblock A Floor Drain Quickly
Causes of Burst Pipes and How to Prevent Them
Why You Shouldn’t Ignore a Blocked Drain: Key Risks and Solutions
Why CCTV Drain Inspections Are the Future of Plumbing Solutions
How Construction Debris Causes Drain Blockages
Do Blocked Drains Attract Pests in Sydney?
How to Use a Wet-Dry Vacuum to Clear a Blocked Drain
Guide to Solving Common Rainwater Harvesting Drain Problems
How Sediment Build-Up Causes Drain Blockages
How to Retrieve Toys Stuck in the Tub Drain
Understanding Where Stormwater Drains Go
Guide to Common Causes of Low Water Pressure
How to Prevent Costly Storm Plumbing Emergencies
How to Retrieve Items Lost Down the Drain
How Does UV Pipe Relining Provide a Modern Solution to Pipe Repairs?
Step-by-Step Guide for Unclogging a Toilet in Sydney
22 Nov. 2025
Guide to Solving Common Rainwater Harvesting Drain Problems
How Can You Solve Common Rainwater Harvesting Drain Problems?
A rainwater harvesting system works best when its drains, pipes, and tank inlets allow water to move freely from the collection surface into the storage tank. When debris builds up or components are incorrectly sized, the system becomes inefficient, overflows, or causes water damage around your property. Understanding why these drainage problems occur and how to fix them ensures your system remains reliable, clean, and functional.
Why Do Rainwater Harvesting Systems Experience Drain Problems?
Rainwater systems collect water from roofs, patios, and other catchment surfaces. As water flows toward the tank, it carries leaves, dust, twigs, sediment, and organic matter. If the drainage components—such as gutters, downpipes, screens, and diversion devices are not maintained or properly designed, debris accumulates and restricts flow. Poor installation, undersized pipes, and incorrect slopes also create water bottlenecks that lead to blocked drains and system damage.
What Are the Most Common Drain Problems in Rainwater Harvesting Systems?
Why Do Gutters, Downpipes, and Inlet Screens Get Clogged?
Gutters and downpipes naturally collect organic debris. When leaves, sludge, or roof granules accumulate, water cannot move toward the tank efficiently. The inlet screen, meant to keep debris out of the tank, often blocks first. Once blocked, water backs up, overflows, and spills around the property instead of entering the tank.
How Can You Fix Clogged Drains in a Rainwater System?
Installing gutter guards reduces the amount of large debris entering the system. Regular gutter and downpipe cleaning prevents long-term blockages, especially after storms or during autumn when leaf fall increases. A first-flush diverter redirects debris-heavy initial rainfall away from the tank, improving water quality and reducing blockages.
Why Do Rainwater Tanks Overflow During Heavy Rain?
A tank overflows when its drainage or overflow outlet cannot handle the incoming water volume. This occurs when overflow pipes are too small, incorrectly angled, or blocked with debris. Overflowing tanks may also indicate insufficient storage capacity for the catchment area.
How Can You Stop a Rainwater Storage Tank From Overflowing?
Ensuring the tank has a properly installed overflow outlet that directs excess water toward a safe drainage point, such as stormwater systems or a soakaway pit, prevents pooling around the property. If overflow happens frequently, upgrading to a larger tank or adding secondary tanks increases capacity. Regular inspection of overflow pipes ensures water can escape freely.
Why Does Poor Drainage Design Cause System Inefficiencies?
Incorrect pipe sizing, insufficient slope, poorly placed diverters, and awkward pipe runs limit water movement. If downpipes are too narrow for the roof area, they cannot cope with large volumes of rainwater. Poor design also increases pressure within the system during intense rainfall, causing leaks, overflow, or pipe detachment.
How Can You Improve a Poorly Designed Rainwater Drainage System?
Ensuring pipes are properly sized for the catchment area is crucial. Larger roof areas require larger downpipes and drainage pipes. A specialist plumber can design a layout with correct slope, flow rate, and alignment to prevent water bottlenecks. Professional design ensures system efficiency and reduces maintenance issues.
Why Does Sludge Build Up Inside Rainwater Tanks?
Dust, pollen, fine sediment, and roof debris that bypass the inlet filters settle at the bottom of the tank. Over time, this sediment forms a dense sludge layer. Thick sludge reduces tank storage capacity, affects water clarity, and can clog pumps, filters, or outlet pipes.
How Do You Remove Sludge Buildup From a Rainwater Tank?
Regular tank cleaning, generally every two years, is essential. Areas with heavy rainfall or lots of surrounding vegetation may require more frequent cleaning. Installing a sediment trap upstream prevents finer particles from entering the tank, reducing long-term sludge accumulation.
Why Do Rainwater Systems Risk Cross-Contamination With Greywater?
If rainwater systems share lines with greywater or wastewater pipes, backflow can push contaminated water into the tank. Cross-contamination leads to odours, poor water quality, and potential blockages inside the tank or supply lines.
How Can You Prevent Cross-Contamination in a Rainwater Harvesting System?
Installing backflow prevention devices stops wastewater from entering the tank. Ideally, rainwater and greywater systems should remain completely separate, with their own pipes, pumps, and drainage pathways. Keeping systems independent ensures harvested water stays clean and safe.
Why Do Mosquitoes and Insects Enter Rainwater Tanks and Drains?
Mosquitoes are attracted to standing water around tank inlets, blocked drains, and unscreened outlets. Any inaccessible, stagnant water creates breeding environments. Overflows that pool around the tank also encourage insect infestation.
How Can You Prevent Mosquito Infestation in Rainwater Systems?
Fine mesh screens on all tanks inlets, vents, and overflow points prevent insects from entering. Regular clearing of drains ensures that water flows continuously, eliminating stagnant areas. Keeping the system sealed and free of blockages reduces insect activity significantly.
How Can You Maintain Long-Term Drain Health in a Rainwater Harvesting System?
Why Are Routine Inspections Essential for Preventing Drain Problems?
Regular inspections identify early signs of debris buildup, leaks, corrosion, or damaged fittings. Checking gutters, downpipes, diverters, mesh screens, and tank connections ensures the entire system continues operating efficiently through all seasons.
Why Should You Install a Filtration System for Better Water Quality?
Filtration systems, such as mesh filters, first-flush diverters, and sediment traps, remove debris before water enters the tank. This reduces clogging in drains and slows down sludge formation inside the tank.
Why Should You Monitor Tank Water Levels During Heavy Rain?
Consistent overflow during storms may signal a drainage issue or insufficient tank capacity. Monitoring tank levels helps determine whether the system needs pipe adjustments or a tank upgrade.
Why Is Seasonal Maintenance Important for Rainwater Drain Systems?
Autumn leaves, summer storms, and winter temperature changes alter how water flows through the system. Increasing gutter cleaning during peak leaf fall and insulating pipes during winter prevents cracking and freezing.
When Should You Call a Professional for Rainwater Harvesting Drain Problems?
If blockages recur, if overflow issues persist, or if contamination is suspected, professional help is required. A rainwater harvesting specialist can inspect the entire system, repair damage, correct poor design, and ensure your drainage operates efficiently year-round.
FAQ for Solving Common Rainwater Harvesting Drain Problems
Why do my rainwater system’s downpipes overflow during heavy rain, even when they look clear?
Downpipes often overflow when the pipe diameter is too small for the roof catchment area. During heavy rainfall, water volume exceeds the pipe’s maximum flow rate, causing spillover even if there is no visible blockage.
Why does my rainwater tank overflow every storm despite having an overflow pipe?
If the overflow pipe is undersized, incorrectly sloped, or partially blocked by debris or insects, it cannot carry water away at the same rate it enters. This mismatch forces water out around the tank instead of through the overflow outlet.
Why does sludge accumulate so quickly at the bottom of my rainwater tank?
Heavy dust, pollen, and roof particles pass through inlet screens and settle in the tank. Areas with strong winds, iron roofing, or frequent storms experience accelerated sludge build-up due to finer sediment entering the system.
Why do my gutters block repeatedly, even after installing gutter guards?
Fine debris, dust, pine needles, and roof grit can still pass through gutter guard openings. If the guard design isn’t suitable for your surrounding vegetation, debris gradually builds and restricts flow beneath the guard.
Why does my rainwater system let dirty water into the tank during the first few minutes of rainfall?
The first rainfall wash of the roof carries most of the pollutants, including bird droppings, dust, and organic debris. Without a functioning first-flush diverter, this contaminated water flows straight into the tank.
Why does water pool around the base of my rainwater tank when it rains?
Pooling occurs when the overflow pipe discharges too close to the tank or when the surrounding ground lacks proper drainage. Poor site preparation or soil saturation prevents water from dispersing efficiently.
Why does foul odour come from my rainwater tank’s inlet or overflow?
Odours may arise from sludge decomposition, cross-contamination with greywater, or organic debris trapped at entry points. Poor aeration, stagnant water in pipes, or blocked diverters can also create smells.
Why does my rainwater pump keep sucking up debris or dirty water?
If sediment traps or mesh filters are missing or clogged, fine particles enter the pump’s suction line. Tank sludge stirring during heavy inflow can also cause dirty water to reach pump outlets.
Why does my rainwater tank attract mosquitoes even though it is covered?
Mosquitoes enter through tiny gaps around inlet screens, overflow outlets, or venting points. Any hole larger than 1 mm allows mosquito access. Blocked drains create stagnant water nearby, increasing breeding conditions.
Why does my overflow pipe become blocked with insects?
Insects nest inside dark, moist overflow pipes. Without fine mesh screens, spiders, mosquitoes, and small insects create debris clusters that restrict outlet water movement.
Why are my underground rainwater pipes clogging even when the gutters are clean?
Fine debris washed from the roof bypasses gutter guards and accumulates inside underground pipes. Pipes with insufficient fall or sagging sections trap sediment, eventually forming blockages.
Why does my rainwater tank fill too slowly, even during heavy rain?
Slow filling occurs when the gutter slope is incorrect, downpipes are partially obstructed, inlet filters are clogged, or first-flush diverters remain stuck in the diversion phase instead of allowing water into the tank.
Why is my rainwater harvesting system getting contaminated with greywater?
Cross-connections between rainwater and greywater systems, intentional or accidental, allow wastewater to backflow into the tank. Without backflow prevention devices, pressure fluctuations can push contaminated water into rainwater lines.
Why does water backflow into my gutters when the tank is full?
When tanks lack a proper overflow line or the overflow is blocked, water cannot escape fast enough. It moves backward into gutters, creating spillover at gutter edges and downpipe junctions.
Why do my gutters overflow at only one end of the roof?
Uneven gutter slope forces water toward a single end instead of distributing flow across multiple downpipes. A sagging section or poorly graded gutter angle causes localised overflow.
Why is my first-flush diverter not preventing debris from entering the tank?
Diverters fail when the collection chamber is full of sludge, the ball mechanism is stuck, or the sealing washer is worn. This allows debris-heavy first flush water to bypass the chamber and enter the tank.
Why does my rainwater taste earthy or dirty after rainfall?
This flavour typically comes from organic matter or sediment entering the tank. Sludge build-up, dirty gutters, failing inlet screens, or decomposing leaves inside the first-flush chamber contribute to poor water quality.
Why does algae grow inside my rainwater tank or inlet pipes?
Sunlight exposure through clear pipework or translucent tank walls encourages algae. Incorrectly sealed inspection ports and open vents also allow light into the system, enabling algae formation.
Why do buried drainage pipes collapse or become misaligned?
Older PVC or clay pipes may shift due to soil movement, erosion, tree root pressure, or improper bedding. When alignment changes, water flow slows and debris builds rapidly.
Why should I call a professional if my rainwater system experiences repeated blockages?
Recurring issues often indicate design flaws, undersized pipes, poor fall, incorrect diverter placement, or inadequate overflow capacity. Only a specialist can diagnose structural causes and redesign the system for long-term performance.
A well-maintained rainwater harvesting system saves water, protects your home, and delivers clean, sustainable water. By understanding common drainage problems and implementing preventative solutions, you will keep your system running smoothly and avoid costly repairs.
Discover More About Sydney’s Blocked Drain Problems
Step-by-Step Guide to Clearing a Blocked Drain
Blocked Stormwater Drains: Causes, Solutions, and Preventative Strategies
How to Deal with Hair Clogging Your Drains in Sydney, NSW
Secret Tips to Safely Cleaning a Smelly Drain in Sydney Home
10 Essentials Tips to Preventing Blocked Drains
Guide to Unclogging a Kitchen Sink in Sydney
Using a Plumber’s Snake to Unclog Drains in Sydney
Guide to Unclogging a Bathroom Sink in Sydney
Guide to Unclogging Outdoor Drains For Sydney Homes
How to Unclog a Shower Drain in Sydney
A Complete Guide to Unclogging a Toilet Without a Plunger
Using Bleach to Unblock Your Toilet in Sydney
Guide to Clearing Toilet Paper Blockages Without a Plunger
Don’t Be Fooled by Drain Clearing Quotes in Sydney: 2026 Pricing Guide
Should You Use Chemical Drain Cleaners in Sydney
Effective Ways to Get Rid of Drain Flies for Good – A Homeowner’s Guide
Why Does Your Shower Drain Smell? Causes, Fixes, And Prevention Tips
Tips For Clearing Blocked Roof Drains In Sydney
What To Do If Your Drain Overflows In Sydney
How To Unblock A Floor Drain Quickly
Causes of Burst Pipes and How to Prevent Them
Why You Shouldn’t Ignore a Blocked Drain: Key Risks and Solutions
Why CCTV Drain Inspections Are the Future of Plumbing Solutions
How Construction Debris Causes Drain Blockages
Do Blocked Drains Attract Pests in Sydney?
How to Use a Wet-Dry Vacuum to Clear a Blocked Drain
Guide to Solving Common Rainwater Harvesting Drain Problems
How Sediment Build-Up Causes Drain Blockages
How to Retrieve Toys Stuck in the Tub Drain
Understanding Where Stormwater Drains Go
Guide to Common Causes of Low Water Pressure
How to Prevent Costly Storm Plumbing Emergencies
How to Retrieve Items Lost Down the Drain
How Does UV Pipe Relining Provide a Modern Solution to Pipe Repairs?
Step-by-Step Guide for Unclogging a Toilet in Sydney
21 Nov. 2025
What Things Should You Never Flush Down the Toilet?
Flushing the wrong items can clog your toilet, damage your sewer pipes, and harm wastewater systems. Toilets are designed to handle only human waste and toilet paper. Anything else, no matter how small or “flushable” it claims to be, can cause blockages, plumbing repairs, and environmental harm. Understanding why certain materials don’t belong in the toilet helps protect your plumbing and prevent costly emergencies.
Why Should Non-Flushable Items Never Enter the Toilet System?
Toilets use a siphon and gravity to move waste through narrow trapways and pipes. Items that don’t dissolve, break apart, or travel easily become lodged inside these bends. Materials that absorb water, expand, harden, snag, or tangle create blockages that water pressure cannot push through. Sewer systems also cannot break down many household items, leading to fatbergs, pump failures, and environmental contamination.
Why Are Flushable Wipes Unsafe to Flush?
Flushable wipes do not break down quickly enough to pass through plumbing systems. Their synthetic fibres remain intact, catching on pipe edges and forming large, dense clumps. These clumps combine with grease and toilet paper, leading to severe blockages in both household and council sewer lines. Read more about Sydney Bidet Plumbing Solutions.
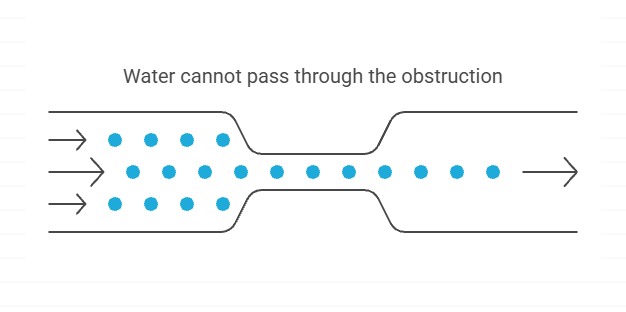
Why Should Paper Towels and Tissues Never Be Flushed?
Paper towels and tissues are designed to stay strong when wet. Their fibres resist disintegration and can expand in water. When flushed, they clump together inside the trapway or waste pipe, causing blockages far more stubborn than toilet paper.
Why Are Sanitary Pads, Tampons, and Cotton Products Dangerous for Toilets?
Sanitary products are made to absorb moisture and expand. When flushed, they swell inside the pipes, creating solid obstructions that water cannot push through. Cotton buds and cotton balls also bind together, trapping hair and debris as they move down the line.
Why Must Nappies, Wet Wipes, and Incontinence Pads Never Go Into the Toilet?
Nappies and absorbent hygiene pads are built to hold large volumes of fluid. Once flushed, they expand rapidly, blocking the trap within seconds. Even partial flushing of such items creates hidden clogs that worsen over time.
Why Should Dental Floss Never Be Flushed?
Dental floss acts like a net inside the pipes. It wraps around bends, snags on imperfections, and tangles with hair and wipes. This creates long, stringy blockages that fill the pipe and worsen with each flush.
Why Are Grease, Oils, and Fat Unsafe for the Toilet?
Grease and oils stick to pipe walls and cool down into a thick, hard residue. When combined with wipes or other debris, they form fatbergs, large, rock-like sewer obstructions that can shut down entire wastewater systems.
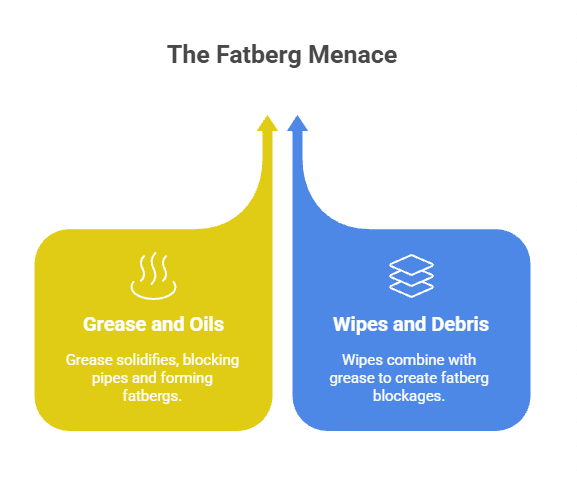
Why Should Medications Never Be Flushed?
Medications do not break down safely in wastewater systems. They contaminate waterways, harm aquatic life, and pass into the environment unchanged. Toilets cannot filter chemicals, so flushing pills introduces pharmaceuticals directly into natural ecosystems.
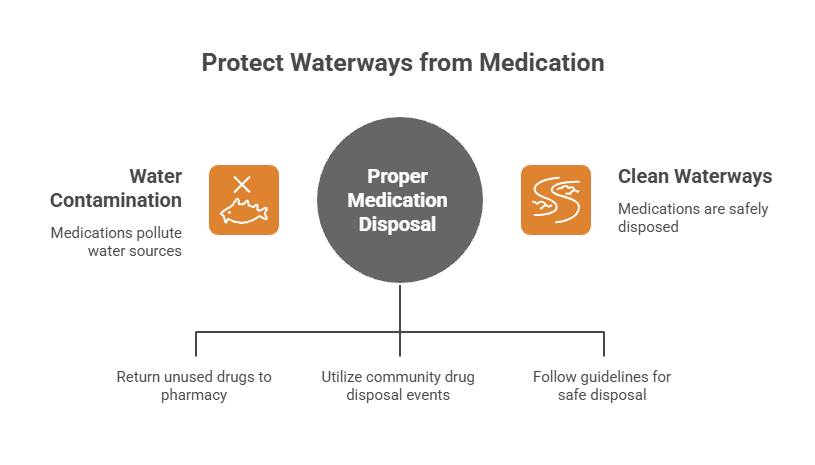
Why Should Cat Litter and Pet Waste Never Enter the Toilet?
Most cat litter clumps when wet. Once flushed, it hardens inside the pipes and becomes nearly impossible to remove. Pet waste, especially from cats, also contains parasites like Toxoplasma gondii that wastewater plants cannot fully remove.
Why Are Condoms, Rubber Products, and Latex Items Bad for Toilets?
Rubber and latex remain intact in water and can stretch to wedge themselves into pipe bends. These materials never dissolve and frequently cause blockages deep in the sewer network.
Why Should You Avoid Flushing Hair Down the Toilet?
Hair forms dense knots inside the trapway. It tangles with toilet paper, wipes, and grease, creating heavy blockages that plungers struggle to dislodge. Hair also traps sediment and debris as it travels through the sewer line.
Why Are Q-Tips, Ear Cleaners, and Small Plastics Unsafe to Flush?
Small plastic items never break down. Their rigid shape allows them to lodge in pipe bends, creating a physical obstruction. Once stuck, they collect additional debris and eventually block the entire pipe.
Why Should Food Scraps and Coffee Grounds Never Enter the Toilet?
Food scraps absorb water and expand, while coffee grounds settle into dense clumps. Toilets are not designed to push food down the sewer line; these materials create sludge-like blockages that obstruct water flow.
When Should You Suspect That Something Flushed Is Causing a Plumbing Problem?
Signs include slow flushing, rising water in the bowl, gurgling noises from drains, sewage odours, or water backing up into the shower. These symptoms often indicate a foreign object caught inside the trap or sewer line.
What Should You Do If a Non-Flushable Item Accidentally Goes Down the Toilet?
Avoid flushing again. Additional water may force the item deeper into the pipes. Use a plunger or toilet auger immediately. If resistance is strong or water begins backing up, a plumber should inspect the system using CCTV camera equipment.
What Should You Dispose of in the Bin Instead of the Toilet?
Any item that doesn’t dissolve instantly in water, wipes, cotton, floss, sanitary products, nappies, rubber items, litter, paper towels, food waste, plastics, and chemicals should always go in the rubbish bin. Only human waste and toilet paper should enter the toilet.
How Can You Prevent Toilet Blockages Caused by Improper Disposal?
Place a small bin next to the toilet, use only dissolving toilet paper, educate family members about non-flushables, and avoid in-cistern cleaning tablets that degrade rubber seals. These simple habits, along with proper bathroom installation in Sydney, protect your plumbing long-term.
FAQ for Things You Should Never Flush Down the Toilet
Why do flushable wipes stay intact in pipes instead of breaking down like toilet paper?
Flushable wipes contain synthetic fibres that resist dissolving. Unlike toilet paper, they remain strong in water and travel through pipes as solid sheets, creating major blockages when they catch on rough surfaces.
Why do paper towels block toilets even when flushed in small amounts?
Paper towels absorb water and expand rather than disintegrate. Their reinforced fibres are engineered for durability, making them behave like sponges that lodge stubbornly inside trapways.
Why do sanitary pads and tampons cause severe pipe blockages when flushed?
Sanitary products are designed to expand and absorb liquids rapidly. When flushed, they swell inside the pipe and form a tight, immovable obstruction that water cannot push through.
Why do cotton buds and cotton balls collect debris inside sewer lines?
Cotton fibres tangle easily, trapping hair, soap scum, and paper fragments. As these materials bind together, they create a dense clog that grows larger with every flush.
Why does dental floss create long stringy blockages in toilets?
Floss acts like rope inside pipes. It wraps around bends and joints, trapping wipes and other non-flushable items, forming net-like masses that block the sewer line.
Why do nappies and incontinence pads cause instant toilet blockages?
Nappies contain gel absorbents that expand dramatically when wet. These materials swell to many times their size, instantly sealing the pipe and preventing water from passing.
Why does flushing grease and fat damage waste pipes?
Grease cools and solidifies inside pipes, forming a sticky coating. This coating attracts wipes, food scraps, and hair, eventually building into a solid fatberg that blocks the sewer main.
Why do medications contaminate waterways when flushed?
Wastewater plants cannot filter pharmaceutical chemicals. When flushed, medications travel through treatment systems unchanged, entering rivers and oceans and harming aquatic ecosystems.
Why does cat litter harden inside toilet pipes even when it looks flushable?
Clumping cat litter contains bentonite clay, which becomes rock solid when wet. Once flushed, it settles inside pipes and creates blockages that plungers and augers cannot break apart easily.
Why is flushing pet waste unsafe for home plumbing and sewer systems?
Pet waste often contains parasites, bacteria, and organic matter that cling to pipe walls. Some pathogens, especially from cats, survive wastewater treatment and pose health risks.
Why are condoms and latex items common causes of hidden toilet blockages?
Latex and rubber don’t disintegrate in water. They stretch and lodge inside pipe bends, creating flexible barriers that trap other debris and lead to major sewer obstructions.
Why does hair accumulate into solid clumps inside toilet drains?
Hair knots together and binds with oils, wipes, and paper, forming a strong mass that wedges itself into the trapway. These clumps grow larger over time and block the line fully.
Why do Q-tips and small plastics clog toilets even though they’re tiny?
Their rigid shape allows them to wedge inside pipe joints. Once stuck, they collect additional debris, especially wipes and hair, until the blockage becomes severe.
Why do food scraps and coffee grounds settle inside toilet pipes?
Food particles absorb water and expand, while coffee grounds clump into sludge. Toilets lack the water pressure needed to push food through, causing a gradual build-up deep in the system.
Why does flushing chemicals or cleaning products harm your plumbing system?
Harsh chemicals can erode rubber seals, corrode metal components, and disrupt septic tank bacteria. This leads to running toilets, leaks, and premature system failure.
Why should I suspect a non-flushable item if my toilet suddenly blocks?
A sudden blockage, especially after guests or children use the toilet, often indicates a foreign object lodged in the trap. Toilets rarely block instantly from toilet paper alone.
Why does water rise and then drain slowly when non-flushables are clogging the trap?
Non-flushable items act like plugs. Water struggles to bypass the obstruction, rising up the bowl before slowly trickling past the blockage, which is a classic symptom of wipes or cotton products.
Why does my toilet block repeatedly, even after clearing it?
Repeated blockages often point to wipes or foreign items caught deep in the pipe. Even small remnants trap new debris, causing ongoing issues until the pipe is properly cleared.
Why does flushing cause gurgling noises in nearby drains when non-flushables are involved?
Gurgling occurs when trapped air moves past partial blockages. Items like wipes and floss create airflow restrictions, causing bubbling or gurgling sounds through other fixtures.
Why should I call a plumber if a non-flushable item accidentally goes down the toilet?
Non-flushables often wedge in areas plungers can’t reach. A plumber can use CCTV inspection and specialised tools to locate and safely remove the obstruction before it causes a major overflow.
Discover More About Toilet Plumbing Issues:
What Things Should You Never Flush Down the Toilet?
What Causes a Running Toilet and How Can You Fix It?
How Can You Unblock a Badly Blocked Toilet?
What Should You Do When Your Toilet Won’t Flush?
Toilet Leaking at the Base? Troubleshooting Guide
Unclogging a Toilet Without a Plunger: A Complete Guide
Guide to Unclogging a Bathroom Sink
Slow-Filling Toilet? Here’s Why and How to Fix It
Guide to Testing a Toilet Flush Valve for Sydney Homes
21 Nov. 2025
What Causes a Running Toilet and How Can You Fix It?
What Is a Running Toilet, What Causes It, and How Do You Stop It?
A running toilet is a toilet that continues to let water flow after the flush cycle has finished. Instead of shutting off once the cistern refills, water keeps moving into the bowl or overflow tube, causing the toilet to run constantly or intermittently. A toilet that keeps running can waste hundreds of litres of water each day and usually indicates that one or more internal components are no longer sealing, regulating, or shutting off correctly. Understanding what a running toilet is and why it happens makes it easier to identify the fault and apply the correct fix before water bills and wear increase. If you are in need of a bidet plumbing expert in Sydney, contact us now!
What Is a Running Toilet?
A running toilet occurs when water continues flowing from the cistern into the bowl after flushing, instead of stopping at the correct water level. This can happen continuously or at random intervals throughout the day. In most cases, a running toilet is caused by a problem with the flapper, fill valve, float, or flush valve assembly. Because the system never fully seals or shuts off, the toilet keeps refilling and releasing water, even when it hasn’t been used.
What Does It Mean When a Toilet Keeps Running?
When a toilet keeps running, it means the internal shut-off mechanism has failed to stop water flow at the right point. Water may be leaking slowly into the bowl, spilling into the overflow tube, or cycling on and off as the cistern level drops. While the toilet may still flush normally, continuous or repeated running signals an internal fault that will not resolve on its own and typically worsens over time.
Why Do Toilets Run Instead of Stopping Normally?
Toilets are designed to refill once and then stop. When a toilet runs instead, it usually means a seal is worn, a valve is misadjusted, or a moving part is no longer responding correctly. Mineral buildup, ageing rubber components, incorrect float height, or manufacturing defects in newer toilets can all interfere with proper shut-off. Even a small internal leak is enough to trigger repeated refilling.
Why Does My Toilet Keep Running After Flushing?
When a toilet keeps running after flushing, it means the system cannot fully shut off once the cistern refills. After the flush cycle ends, water should stop entering the tank and remain at a fixed level. If water continues flowing, one of the internal components—most commonly the flapper, fill valve, or float—is failing to seal or regulate the water correctly. This causes water to keep draining into the bowl or overflow tube, forcing the fill valve to stay open.
Why Is My Toilet Still Running Several Minutes After a Flush?
A toilet that runs for several minutes after flushing usually has a slow internal leak rather than a complete failure. The flapper may be sealing poorly, allowing water to escape gradually into the bowl. As the cistern level drops, the fill valve reactivates to compensate, creating a long or repeated refill cycle. This type of running often sounds quiet but continues for extended periods.
Why Does Water Keep Flowing Into the Bowl After Flushing?
If water keeps flowing into the toilet bowl after flushing, it indicates that water is bypassing the flush valve instead of stopping inside the cistern. This commonly happens when the flapper does not sit flat against the valve seat or when the valve seat itself is worn or damaged. Even a small gap allows water to leak continuously into the bowl, keeping the toilet running even though the tank appears full.
Why Does My Toilet Continue to Run After the Tank Has Filled?
A toilet that continues to run after the tank has filled often points to a fill valve or float problem. If the float is set too high, water rises above the normal shut-off level and spills into the overflow tube. If the fill valve is worn or clogged, it may not close completely even when the float reaches the correct height. In both cases, water continues flowing instead of stopping cleanly.
Why Does the Toilet Run Every Time I Flush It?
If the toilet runs every time it is flushed, the issue is consistent rather than intermittent. This usually means a key component has deteriorated enough that it fails on every cycle. Common causes include a hardened flapper, misadjusted float, stretched chain, or ageing fill valve. Because the fault repeats with each flush, the toilet will continue wasting water until the component is repaired or replaced.
Why Does My Toilet Run Only After Heavy or Repeated Flushing?
A toilet that runs only after multiple or heavy flushes often has a borderline failure. The system may cope under light use but fail when larger volumes of water pass through. This can happen when the flapper seals unevenly, the float reacts slowly, or the fill valve struggles to shut off under higher demand. Over time, this type of issue typically progresses into constant running.
Why Does My Toilet Keep Running Even Though the Flush Seems Normal?
A normal flush does not mean the system is working correctly. A toilet can flush properly while still leaking internally. If the toilet keeps running after flushing but otherwise seems fine, water is usually escaping slowly through a seal or valve that no longer closes fully. These hidden leaks are often only noticed by the sound of running water or higher water bills.
Why Does the Fill Valve Keep Running?
If the fill valve keeps running, it means the valve is no longer shutting off when the correct water level is reached. This can happen when internal seals wear out, sediment builds up inside the valve, or the valve mechanism becomes misaligned. A faulty fill valve allows water to keep entering the cistern even though it appears full, causing constant or intermittent running. Hissing or spraying sounds inside the tank are common signs of a fill valve issue.
Why Does My Toilet Fill Valve Keep Running Off and On?
When the toilet fill valve runs on and off, it usually indicates a slow internal leak elsewhere in the system. Water escapes gradually from the cistern into the bowl, lowering the water level just enough to trigger the fill valve repeatedly. This cycle, often called “ghost flushing,” is most commonly caused by a leaking flapper or worn flush valve seat rather than the fill valve itself.
Why Does the Float Cause the Toilet to Keep Running?
The float controls when the fill valve shuts off. If the float is set too high, sticks, or moves sluggishly, the valve does not close at the right time. Water may rise above the normal level and spill into the overflow tube, causing continuous running. Floats can also bind against the cistern wall or become waterlogged, preventing accurate shut-off.
Why Is Water Running Into the Toilet Bowl?
When water runs continuously into the toilet bowl, it means water is bypassing the flush valve instead of staying inside the cistern. This is usually caused by a flapper that no longer seals properly against the flush valve opening. Even a small gap allows water to leak steadily into the bowl, forcing the fill valve to keep refilling the tank. Over time, this silent leak can waste a significant amount of water.
Why Is the Toilet Tank Not Filling Properly but Water Is Still Running?
If the toilet tank isn’t filling correctly but water is still running, the problem is often related to a misadjusted float, blocked fill valve inlet, or partially closed supply valve. In some cases, water flows straight into the overflow tube instead of filling the cistern. This creates the sound of running water while the tank level remains low or unstable.
Why Does the Flush Valve Cause a Toilet to Keep Running?
The flush valve opening and its sealing surface must be smooth for the flapper to seal correctly. If the flush valve seat is cracked, warped, or coated with mineral buildup, water leaks past the flapper even if it’s new. This constant leakage causes the toilet to keep running as the fill valve repeatedly replaces lost water. Flush valve damage often requires more than a simple flapper replacement.
Why Does the Chain Make the Toilet Keep Running?
The lift chain connects the flush handle to the flapper. If the chain is too tight, it prevents the flapper from settling fully into place. If it’s too loose, the flapper may not align correctly when closing. In both cases, water leaks into the bowl and causes ongoing running. Correct chain length allows the flapper to lift freely and seal completely after each flush.
How Can You Tell Which Component Is Causing the Running?
To identify the faulty component, remove the cistern lid and observe what happens after flushing. If water trickles into the bowl, the flapper or valve seat is leaking. If water flows into the overflow tube, the float height or fill valve is the issue. If the fill valve continues running even when the float is manually lowered, the valve itself has failed. Watching how water moves inside the cistern quickly reveals the source of the problem.
Why Does My Toilet Keep Running Off and On?
When a toilet runs off and on, it usually means water is slowly leaking out of the cistern rather than flowing continuously. As the water level drops, the fill valve activates to refill the tank, then shuts off again once the level is restored. This cycle repeats throughout the day, even when the toilet hasn’t been used. The most common cause is a flapper or flush valve seat that no longer seals fully.
Why Does the Toilet Run Randomly During the Day?
A toilet that runs randomly is often experiencing a slow internal leak that goes unnoticed until the cistern level drops enough to trigger refilling. Temperature changes, water pressure fluctuations, or slight movement of internal parts can make the issue seem inconsistent. While the running may stop on its own temporarily, the underlying fault remains and usually worsens over time.
What Makes a Toilet Run Occasionally Instead of Constantly?
A toilet that runs occasionally rather than all the time typically has a partially failing component. The flapper may seal under some conditions but leak under others, or the fill valve may shut off inconsistently. Small leaks inside the cistern can take hours to lower the water level enough to activate the fill valve, making the running seem unpredictable.
Why Does My Toilet Suddenly Start Running?
If a toilet suddenly starts running, the issue is often caused by a part reaching the end of its usable life. Rubber components such as flappers and valve seals can deteriorate quickly once they begin to harden or crack. Sediment buildup inside the fill valve can also cause sudden failure, preventing the valve from sealing properly.
Why Does My Toilet Run Mostly at Night or When Not in Use?
A toilet that runs mostly at night or when not in use is typically leaking slowly and quietly. During quieter hours, the sound of refilling becomes more noticeable. Lower overnight water pressure or cooler temperatures can also affect older valves, making intermittent leaks easier to detect during these times.
Why Does the Toilet Randomly Stop Running on Its Own?
If the toilet stops running without any adjustment, it may be because internal parts temporarily shift into a better sealing position. The float may settle correctly, the flapper may reseat more evenly, or water pressure changes may allow the valve to close fully. These temporary fixes mask the problem but do not resolve it permanently.
Why Does Removing the Cistern Lid Sometimes Stop the Running?
Removing or replacing the cistern lid can slightly move the float or chain, allowing the system to shut off correctly for a short time. This creates the impression that the problem has been fixed, but the underlying misalignment or wear remains. Once the lid is replaced and the toilet is used again, the running often returns.
Why Does a New Toilet Sometimes Run Randomly?
A new toilet that runs randomly is often affected by incorrect setup rather than wear. Misadjusted float height, improper chain length, or manufacturing residue inside the fill valve can all cause inconsistent shut-off. These issues are usually resolved by recalibrating the internal components rather than replacing them.
Why Does a Toilet Keep Running After the Flush Cycle Ends?
A toilet keeps running when the internal components cannot shut off the water flow. This usually happens because the fill valve isn’t closing properly, the flapper isn’t sealing the flush valve opening, or the float mechanism is set incorrectly. When these parts fail to synchronise, water continuously escapes into the bowl or overflow tube, forcing the fill valve to cycle endlessly.
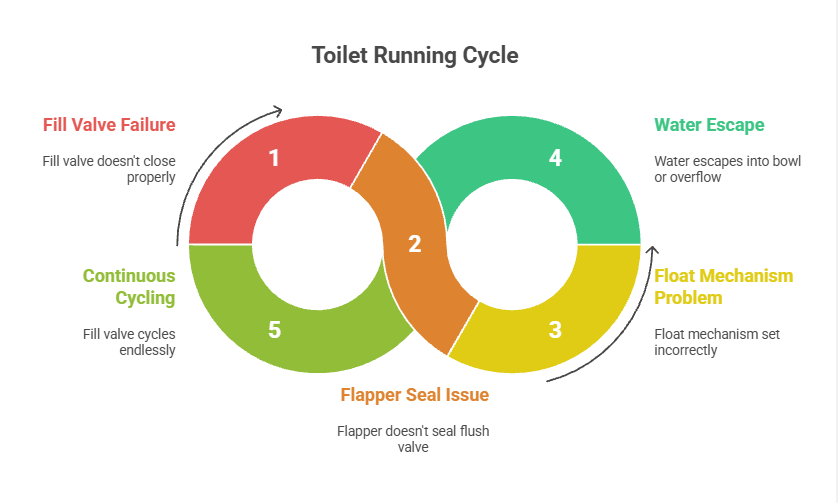
Why Does a Faulty Flapper Seal Cause a Toilet to Run?
The flapper creates a watertight seal at the bottom of the cistern. If the flapper becomes brittle, warped, mineral-coated, or misaligned, water leaks past it into the toilet bowl. Even a small gap between the flapper and the valve seat allows water to drain slowly, keeping the fill valve open to compensate. A worn flapper is one of the most common causes of a running toilet.
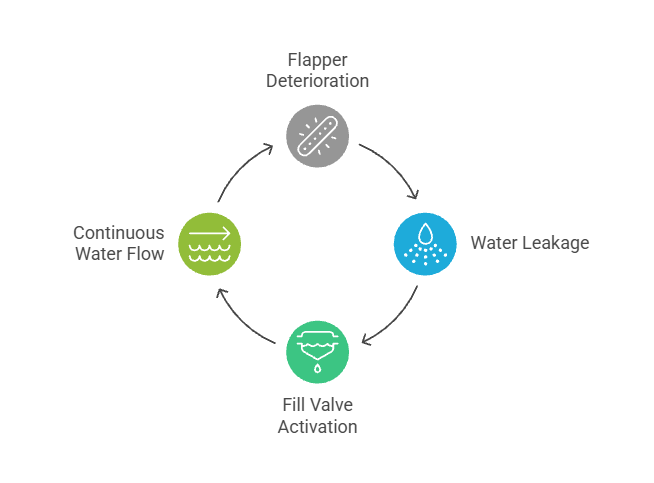
Why Does an Incorrect Float Height Lead to a Constantly Running Toilet?
The float controls when the fill valve shuts off. If the float is set too high, the water level rises past the overflow tube, causing water to spill continuously into the bowl. Because the tank can never reach its shut-off point, the fill valve stays open. If the float is sticking or bent, the valve may also fail to close on time.
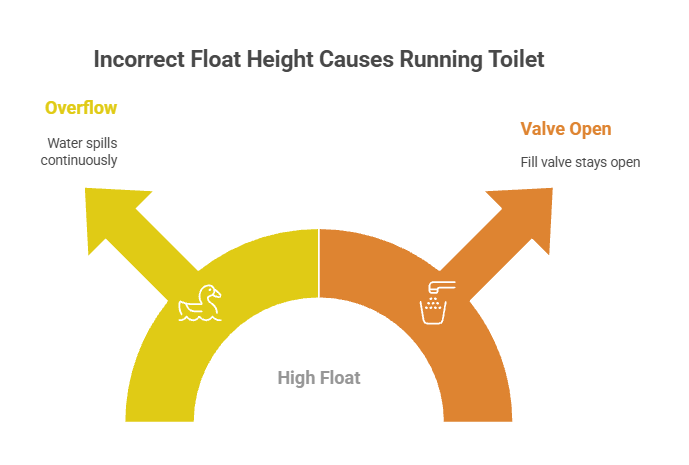
Why Does a Worn or Dirty Fill Valve Make the Toilet Run?
The fill valve regulates how much water enters the cistern. Over time, sediment, debris, and wear inside the valve prevent it from shutting off fully. When this happens, water continues feeding into the tank even though the correct level has been reached. A faulty fill valve often creates hissing, trickling, or spraying sounds inside the cistern.
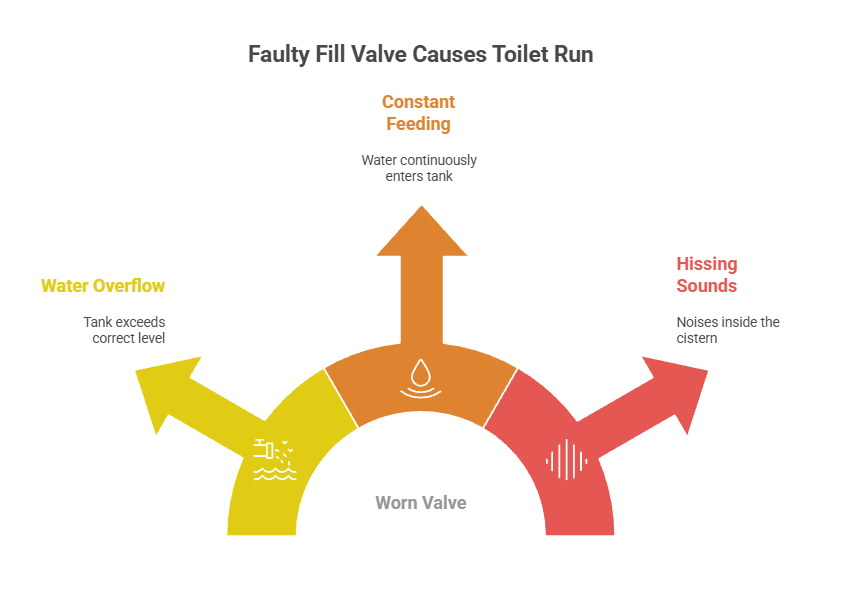
Why Does a Leaking Flush Valve Seat Keep the Toilet Running?
The flush valve seat is where the flapper rests. If the seat is cracked, worn, or covered with mineral buildup, the flapper cannot seal properly. Even if the flapper is new, a damaged valve seat allows water to escape, forcing the fill valve to refill the tank repeatedly.
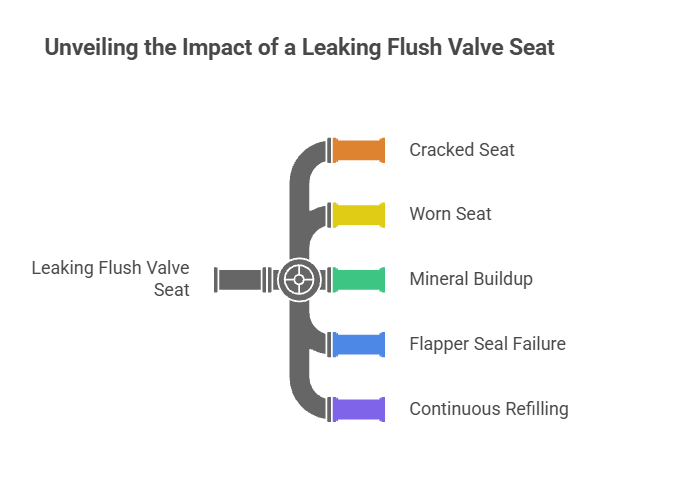
Why Does a Stuck or Overly Tight Chain Prevent a Toilet From Stopping?
The lift chain connects the flush handle to the flapper. If the chain is too tight, it prevents the flapper from sealing fully. If it’s too loose, the flapper may not drop into the correct position after flushing. In both cases, water continues leaking into the bowl, causing constant running.
Why Does Water Flow Into the Overflow Tube Non-Stop?
If water pours into the overflow tube constantly, the water level is too high or the fill valve is malfunctioning. The overflow tube prevents flooding by diverting excess water into the bowl, but continuous flow indicates that the system never reaches the shut-off point.
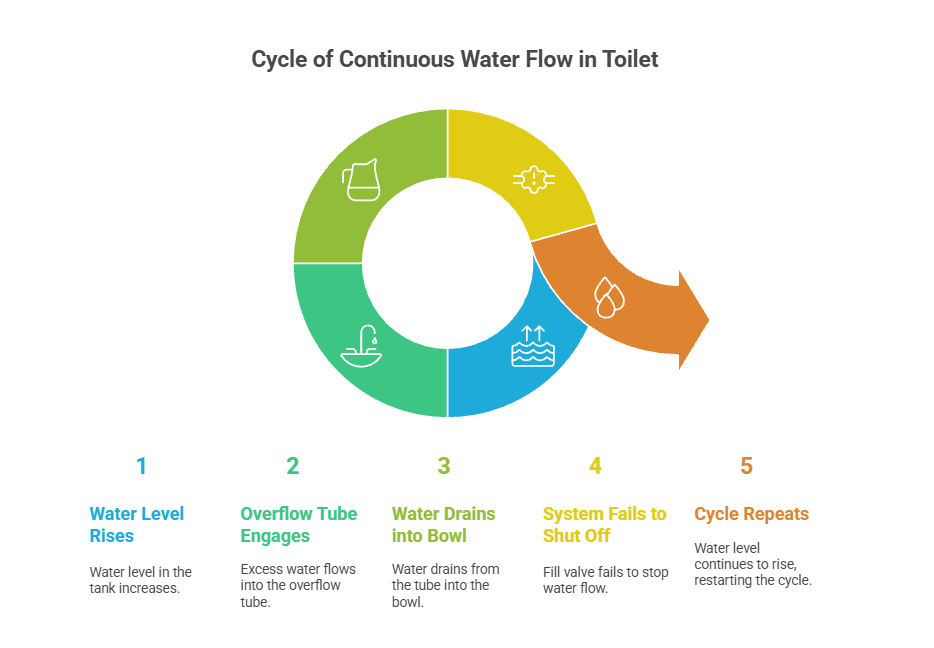
How Can You Diagnose What’s Making Your Toilet Run?
To diagnose the problem, remove the cistern lid and observe the water movement. If water trickles into the bowl even when the toilet isn’t being flushed, the flapper seal is likely compromised. If the water level rises to the top of the overflow tube, the float or fill valve is misadjusted. If the fill valve doesn’t shut off even when the float is lowered manually, the valve is faulty. Watching how each component behaves during and after a flush helps pinpoint the exact failure.
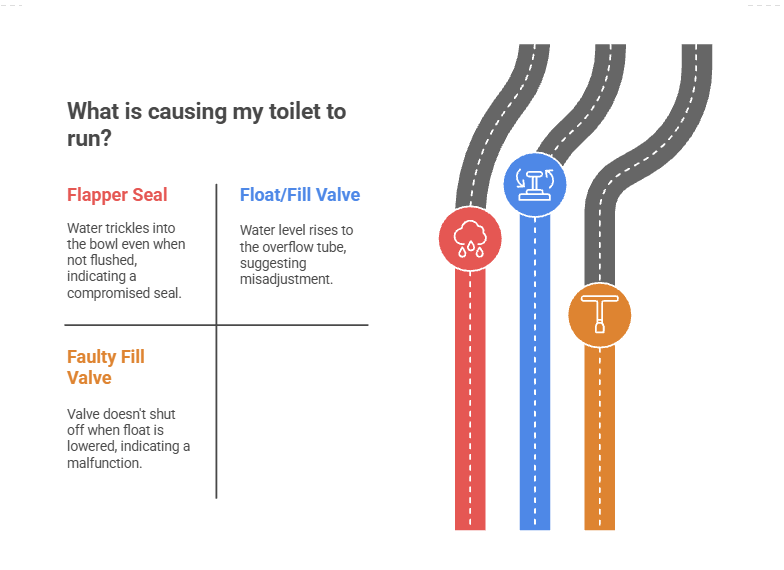
How Can You Fix a Running Toilet Caused by a Faulty Flapper?
Replacing a flapper is one of the simplest repairs. Removing the old flapper, cleaning the valve seat, and attaching a new flapper usually restores a proper seal. Ensuring the chain has the correct amount of slack allows the flapper to rise fully during the flush and seal properly afterwards.
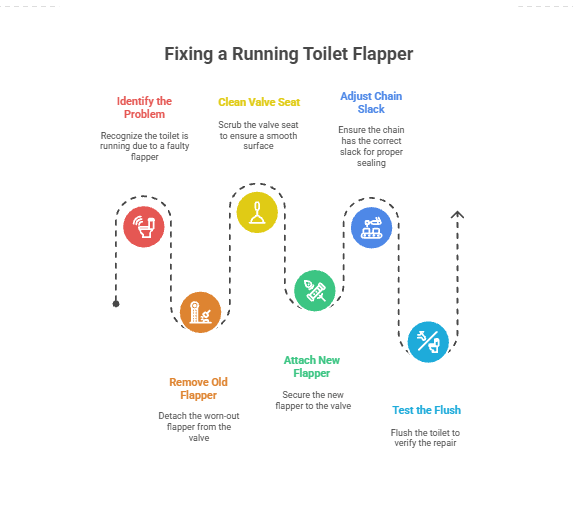
How Can You Fix a Running Toilet Caused by a High Float Level?
Adjusting the float height ensures the tank stops filling at the correct water level. On older systems with a metal float arm, gently bending the arm downward lowers the water line. On modern systems, sliding the float cup down the fill valve shaft achieves the same result. Correct float height prevents water from spilling into the overflow tube.
How Can You Fix a Running Toilet Caused by a Faulty Fill Valve?
Cleaning the fill valve can sometimes restore proper operation, especially if the issue was caused by sediment. However, worn or cracked valves must be replaced. Installing a new fill valve restores correct water regulation and eliminates continuous running.
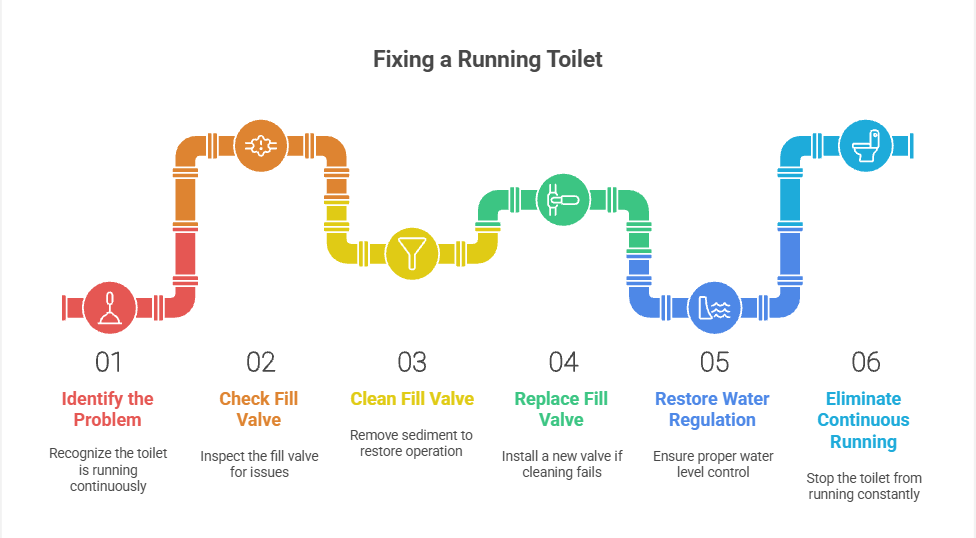
When Should You Replace the Entire Flush Valve Assembly?
If the flush valve seat is cracked or severely worn, replacing the flapper alone won’t stop the leak. Installing a complete flush valve assembly requires disconnecting the cistern from the toilet, removing the old valve, and fitting a new one. This provides a long-term seal and prevents repeated running.
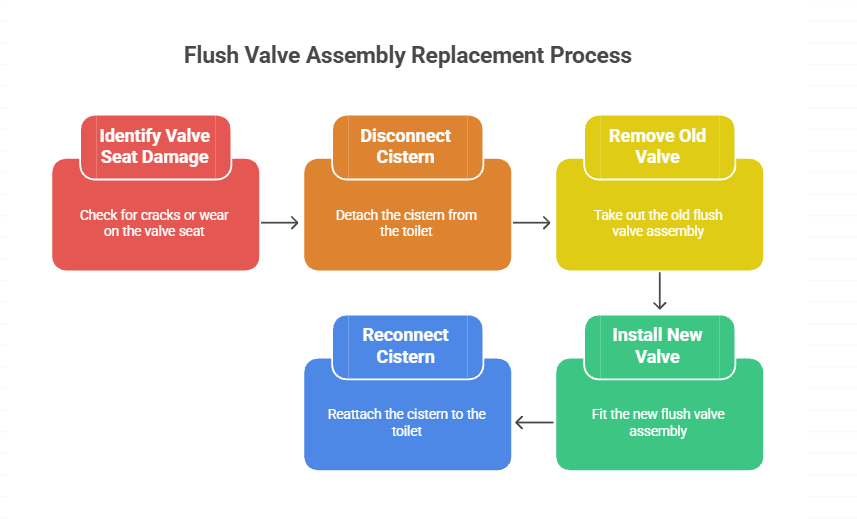
How to Stop a Running Toilet
Stopping a running toilet requires identifying which internal component is failing and correcting it properly. While the symptoms may sound similar, the fix depends on whether the issue comes from the flapper, fill valve, float, chain, or flush valve seat. Addressing the correct part prevents repeated running and unnecessary replacements.
Step 1: Check the Flapper Seal
If water is leaking into the bowl, the flapper is often the cause. Inspect it for warping, cracks, mineral buildup, or stiffness. Clean the valve seat beneath it and replace the flapper if it no longer seals flat. Ensure the flapper closes fully after each flush.
Step 2: Adjust or Inspect the Chain
The lift chain should have slight slack when the flapper is closed. If it’s too tight, the flapper stays partially open. If it’s too loose, the flapper may not seat correctly. Adjusting the chain length allows the flapper to lift fully and seal properly once the flush finishes.
Step 3: Adjust the Float Height
If water is flowing into the overflow tube, the float is set too high or moving incorrectly. Lowering the float stops excess water from spilling into the overflow and allows the fill valve to shut off at the correct level. Make sure the float moves freely and isn’t rubbing against the cistern wall.
Step 4: Inspect the Fill Valve
A fill valve that won’t shut off completely will cause constant or intermittent running. Sediment buildup or internal wear prevents proper sealing. Cleaning the valve may help temporarily, but worn valves usually need replacement to restore reliable shut-off.
Step 5: Examine the Flush Valve Seat
If the flapper has been replaced but the toilet still runs, the flush valve seat may be damaged or rough. Mineral deposits, cracks, or corrosion prevent a watertight seal. In these cases, replacing the entire flush valve assembly provides a long-term fix.
Step 6: Test After Each Adjustment
After making one adjustment or replacement, flush the toilet and observe how the system behaves. Water should stop flowing once the cistern refills, with no trickling into the bowl or overflow tube. Testing step by step prevents unnecessary part changes.
How Much Does It Cost to Fix a Running Toilet?
The cost to fix a running toilet depends on which component needs repair and whether professional help is required. Minor fixes such as replacing a flapper or adjusting the float are relatively inexpensive. More complex issues involving the fill valve, flush valve assembly, or internal damage cost more due to labour and parts.
Delaying repairs often increases costs, as continuous running accelerates wear on other components and raises water bills significantly over time.
Is It Bad If My Toilet Keeps Running?
Yes, a toilet that keeps running should always be addressed. Even a slow internal leak can waste hundreds of litres of water each day. Beyond higher water bills, constant running puts extra strain on valves, seals, and fittings, increasing the likelihood of further failures.
In some cases, long-term running can lead to mineral buildup, noise issues, and damage to internal components that would otherwise last much longer.
What Happens If You Ignore a Running Toilet?
Ignoring a running toilet allows a small mechanical fault to become a larger system failure. Rubber components continue to degrade, valves wear unevenly, and water loss accumulates quietly. Over time, this can result in:
- Significantly higher water usage
- Increased wear on the fill valve and flush mechanism
- Repeated failures even after part replacements
- The need for more extensive internal repairs
Early intervention prevents escalation and keeps repairs simple.
When Is It Time to Call a Plumber for a Running Toilet?
Professional assistance for toilet replacement in Sydney is needed if the toilet continues running after replacing the flapper, adjusting the float, and installing a new fill valve. Persistent leaks, damaged internal parts, cracked cisterns, or corroded flush valve seats often require expert repair. Our certified plumber at Quintessential Plumbing can also identify hidden issues such as supply line pressure problems or structural tank damage.
FAQ: Causes of a Running Toilet and How to Fix It
Why does my toilet make a constant hissing noise even when it hasn’t been flushed?
A continuous hiss indicates the fill valve is struggling to shut off. Sediment buildup or internal wear prevents the valve diaphragm from sealing properly, allowing water to flow constantly into the cistern.
Why does water keep trickling into the toilet bowl long after the flush?
If water trickles into the bowl, the flapper is not sealing the flush valve opening. The flapper may be warped, coated in mineral deposits, or misaligned, preventing a watertight seal.
Why does my toilet run intermittently throughout the day?
Random refilling, also known as “ghost flushing,” happens when water leaks slowly from the cistern into the bowl. As the water level drops, the fill valve reactivates. This is usually caused by a deteriorating flapper or a cracked flush valve seat.
Why does adjusting the float height fix some running toilets?
The float determines when the fill valve shuts off. If the float is set too high, the water rises to the overflow tube and spills continuously into the bowl. Lowering the float stops excess water from entering the overflow tube.
Why does my toilet still run after replacing the flapper?
If the toilet continues running after a new flapper is installed, the valve seat may be damaged or covered in residue. A rough or cracked seat prevents the flapper from sealing properly.
Why does my toilet run only at night or early morning?
Lower water pressure or temperature changes can affect older fill valves, causing them to leak intermittently. Small leaks inside the cistern become more noticeable during quiet hours.
Why is my toilet running even though the water level looks normal in the cistern?
A running sound with a normal water level often suggests the fill valve is leaking internally, releasing a thin stream of water that isn’t visible unless inspected closely.
Why does the toilet run when the chain is too tight or too loose?
If the chain is too tight, the flapper stays partially open. If it’s too loose, the flapper may not settle back into place. Both conditions allow water to escape continuously into the bowl.
Why does sediment in the water supply cause a running toilet?
Sediment from old pipes or tank water can clog the fill valve’s internal mechanisms, preventing it from closing fully. This leads to constant water flow and a noisy cistern.
Why does replacing the fill valve fix many running toilet issues?
The fill valve controls water entry into the cistern. When worn, cracked, or clogged, it fails to shut off. Installing a new valve restores proper shut-off action and eliminates constant filling.
Why does my toilet run after every flush for several minutes?
A slow stop indicates the flapper takes too long to settle or the water level is set too high. Misadjusted floats or slow-falling flappers prolong the refill cycle unnecessarily.
Why does water enter the overflow tube if the toilet fills too high?
When the water level exceeds the top of the overflow tube, excess water dumps directly into the bowl instead of stopping at the set level. This means the float height or fill valve shut-off is incorrect.
Why does my toilet make bubbling noises during a running cycle?
Bubbling sounds often point to air being drawn through the overflow tube due to turbulence caused by continuous water movement. This also suggests a high water level or internal valve leak.
Why does the toilet continue running after cleaning the cistern?
If the cistern was cleaned using in-tank tablets or strong cleaners, the chemicals may degrade rubber seals, including the flapper. Damaged seals cause leaks that lead to constant running.
Why does the toilet randomly stop running when the lid is removed?
Touching or shifting the lid can temporarily move the float or chain into a better position, masking the problem. Once the lid is replaced, the misalignment often returns.
Why does the toilet run after replacing the float?
If the replacement float is not calibrated correctly or is obstructed by the cistern wall, it may not rise freely. This stops the shut-off mechanism from engaging.
Why does my toilet run, but the bowl water level looks low?
Cistern leaks often go unnoticed in the bowl because the leak is small but constant. Low bowl water can be unrelated and caused by siphon jet blockages or evaporative loss.
Why does my toilet keep running even after turning the supply valve down?
Reducing water flow doesn’t fix the underlying issue. The fill valve or flapper still leaks, so the toilet continues to run slowly despite the lower pressure.
Why do old toilets run more frequently than newer models?
Age-related wear on flappers, valves, gaskets, and seals makes older toilets more prone to leakage. Newer toilets use improved materials designed to resist mineral buildup and degradation.
Why should a plumber inspect a toilet that keeps running despite multiple part replacements?
Persistent running indicates structural issues such as a warped flush valve seat, cracked cistern, deteriorated overflow tube, or hidden supply line problems that require professional tools and expertise.