The flush button on the toilet got somehow smashed and you just need to go back now to that old bucket of water style. But do not be miserable. Replacing a faulty flushing method will not be that hard. It will be taught in this post about how you can fix the toilet flush button by using few simple steps.
Here is the list of a tool that you will need to fix the key button toilet flush issues. Also, the moment you unlock a toilet cistern, discover whether you are dealing with the flex mount dual flush valve or the top press dual flush valve!
In spite of whether the toilet has the water-saving or the standard flushing mechanism, changing a faulty button will work in the same manner. On that note, the task will differ though from that manner you approach and fixed the toilet that will not flush at all. From there, follow those steps:
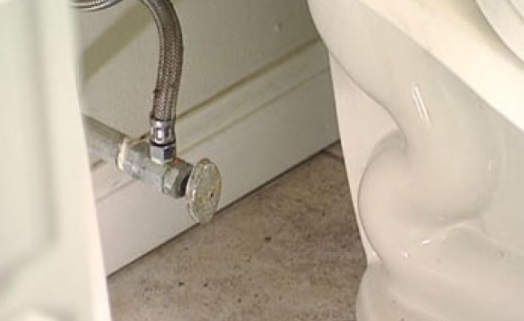
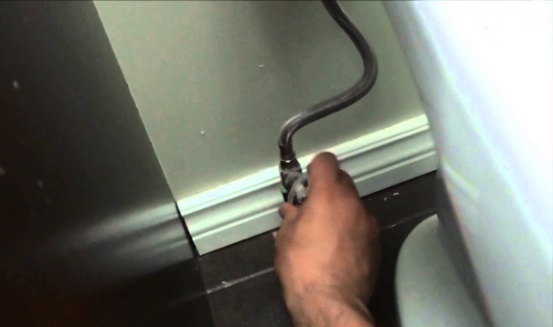
1. Switch off your water supply
When the toilet had an isolation valve, then, can switch off the water with no need to stop the supply into the other parts of the house. Where there is no such thing as a valve close to your toilet, you have to switch off your water at the stopcock beneath the kitchen sink. Search for the plate with the sign “water” or a “W”.
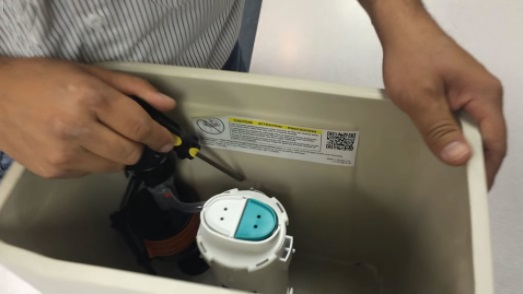
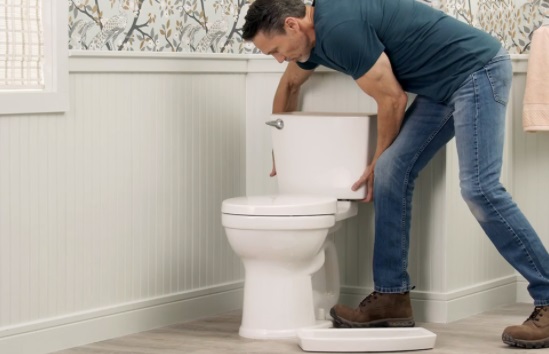
2. Open your cistern
Remove your cistern lid cautiously and disconnect its refill tube. Place a lid somewhere safe then take out its old button. You must be able to make this easily through undoing its back nut which holds a press button in place. Cleat a rim of a hole so it will be prepared when you needed to fit a new button.
3. Drain your water
Level down a system to empty a cistern out of your water. That will allow you to take out the entire cistern. There are so many ways to complete this and this will all rely on the kind of mechanism you have got. Do not worry if there will be small water left inside and you may deal with it afterwards.
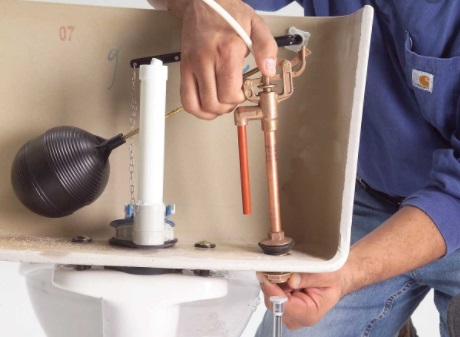
4. Detach your cistern
You can’t do the push button replacement job without taking out the toilet tank, initially. Get the screwdriver and take out the two screws which holds the tank connected to a wall. Locate the 2 wing nuts beneath the cistern and then undo them, so you’ll lift it away coming from a toilet bowl. Put each nuts and bolts into a side. Remove a pipe that feeds a tank with water. Empty any left over water from a tank and then close your toilet lid down. Slowly place your cistern over the top after you have placed the towel on a lid. Wipe the water from its place where a cistern goes.
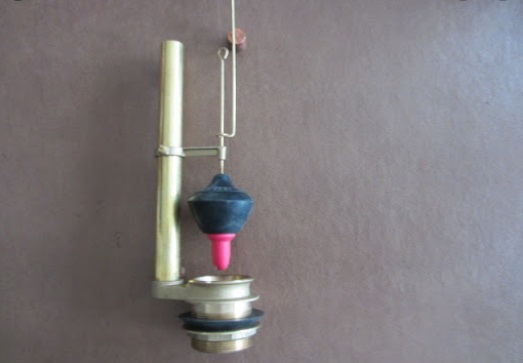
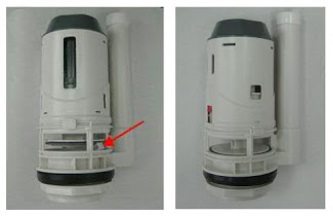
5. Take out an old flush valve
Below your cistern, you will see the rubber doughnut-formed gasket. Remove it gently and utilize the grips so it can undo a back nut which will hold a flushing mechanism in its place. Remove a metal clamp and place it to a side, just for that. Check if a doughnut washer will be in the best state. You may re-use this again, even when the new system will come with the washer. In the end, take out your old flush valve coming from inside your tank. You will need to have it a little of the wiggle so it slides more simply through a silicon about a hole.
6. Fit the latest flushing mechanism
It is best to locate here that replacing the other kinds of flushing systems would be a little of a work sometimes. Right then, have the latest mechanism out of a packaging. Remove a doughnut washer and then undo a nut by the hands. Move a new seal upward, so it will sit tight and nice at the lower part of a unit. Pop a valve by the cistern and then secure it in its place. Fit a metal clamp back, then tightened a nut by hand or with your grips. Place back the new and old doughnut gasket it will depend on whether an old one will be reusable.
7. Install your cistern back
Put on the 2 bolts back in the slots in its lower tank part and gradually situate it in a place. Strengthen a wing nut to secure a cistern to your toilet bowl. Grab the screwdriver and then tighten the screws which will hold a tank fixed in its place to a wall. Check whether all things seemed to be steady and nice, as with the last things you’ll need some toilet drips and leaks. Finally, connect the back of the feed of the cold water.
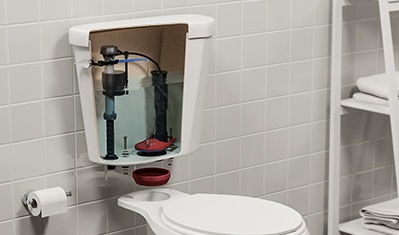
8. Check and then adjust your flush valve
Be sure that you have set your fill valve to the position which allows the float in moving unobstructed down and up. Double-check with an instruction that will come with a unit to create any water-saving floating adjustments. You may try the outcome the moment you connect your toilet to your supply of water again.
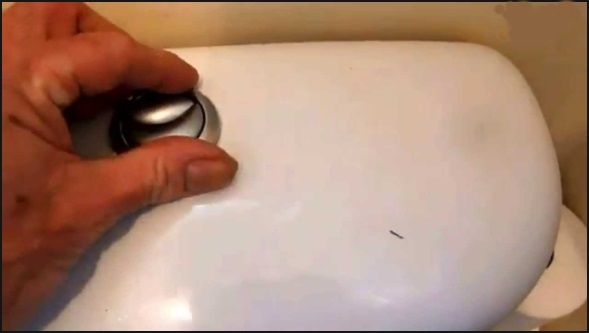
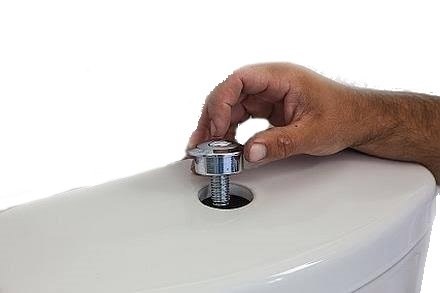
9. Replace your flush button
Fitting your push flush button will be that easy. Just unscrew your back nut, fit in your button and tighten your nut. If the button comes with the shroud, use this when you wish. You can simply discard your shroud if a button fits fine. Attach your button to a system, close your lid and you are done.
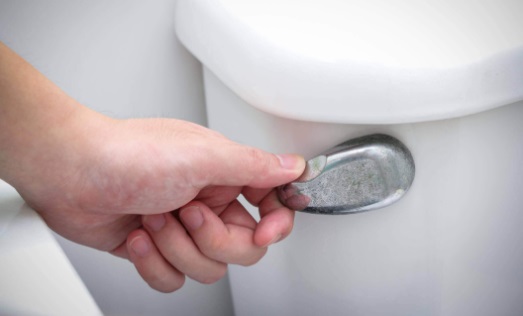
10. Switch on your water supply
Connect your toilet and your supply of water. Flush the toilet for so many times to try when everything functions as it should. You can check for any leaks and drips. Consider taking out the toilet and getting the latest one when the flush issues continue to take place.
As you’re witnessing, to fix the flush button of a toilet will not be that complicated. You’ll need some professional orders at hand and with the perfect tools for the task. Still, take note that our advices are just your guidance, as we can’t be held liable to any damage caused, due to lack of expertise. It is always best to phone in the plumbing expert, who will give you with the total guarantee on their work done.
Related post:
Normally, the initial sign of the plumbing leak in the bathroom will be the water stains over the ceiling of a room straight below. This is typically the sign that a leak had caused costly harm to hidden spaces and you should phone out the plumber when inspecting and repairing bathroom leaks.
Most of the plumbing leaks originated close by the plumbing fixtures like the shower enclosures, sinks, bathtubs, and toilets. Through taking the time in looking out for some revealing signs that the bathroom could have the leak, you should save yourself with a costly future repair bill and a headache.
The tiled floors may leak by the cracked tiles or issues with the grouting. Be sure to locate the reliable bathroom fitters for the expert tiling work and renovations, as problems with this space may cause major damage.
In the bathroom leak, the same also applies to the shower enclosure leaks. You can check all the seals and the areas for the gaps. It is hard to spot most of the leaks as the water disperses gradually.
Typically, the water can gradually leak so it is just difficult to detect it. The simplest means of testing for the leaking drain or the bath plug is by plugging a hole and filling a bathtub with a bit of water. Check back with an hour to witness when the water level had dropped. When it has, it will be the obvious sign of the leak – even though it would also be a seal of a plug stopper, and so you can check this too. It is even cheaper than ripping the bathtub only to locate that there is no damage below.
It’s the best idea to verify a seal around the shower and the showerhead from then on, as it is somewhere where the undetected bathroom leaks may lead to the more major plumbing problem. It will cause major harm when the water is continually leaking and coming in contact with the floor and surrounding wall. The shower leaks will soon become a costly plumbing repair because the extensive renovation work will also be required.
Related posts:
The sink leaks may also take place at pipe joints plus in most cases the pipe themselves. It is always the best idea to check carefully at normal intervals.
The sinks drains will leak in the similar ways as the bath drains, so with similar type of checks must be carried out.
The damaged seals and the deteriorating silicone spaces around the faucets and taps will allow the water to seep by and damage the space below. With basins and sinks, it’s typically usually simpler to take the unrestricted view of closely what is going on beneath a sink, so pouring the excess water around a top of a tap area and then checking the space below is the simplest means to identify the leak here.
The escaped water will simply manifest behind walls and will drip down on the floor space and will cause damage. The moldy tiles are the warning signs that there can be gaps in the grouting or silicon. Usually tiles will fall off or come loose as an outcome.
Most of the leaks that originated from the toilet are the reason by the leak in between the waste pipe and the toilet. It means that each time that the toilet is flushed, the water leaks. Because the toilet is most likely used more often when compared to the shower damage to the floors may escalate quickly to turn into a costly plumbing repair job.
Do you live in Sydney and are experiencing some weird smells or drainage issues in your home?
Blocked toilets are Sydney’s number 1 reason for calling your local plumber. Whether the toilet is blocked by excess toilet paper, something stuck in the pipes, or tree roots, this can cause your toilet to be out of action. A clear sign of a blocked toilet is low water levels or slow draining. If left unattended for an extended period of time it can cause the raw sewer to overflow and you will require an emergency plumber immediately.
Every Sydney resident has experienced a sink blockage, from general scraps falling down the sink, excess coffee grind, or simply a general build-up, this all leads to a sink blockage or slow drains in your kitchen. To prevent sink blockages from building up, call Quintessential Plumbing today to unblock your drains.
As the blocked drain builds up, the waste decomposes and becomes stagnant, causing an unpleasant smell or odor throughout your Sydney home. If you have smelly drains and you’re located in Sydney, call Quintessential Plumbing.
If you experience weird sounds from your pipes, this would indicate a larger blocked drain issue. Consult with the Sydney blocked drain experts – Quintessential Plumbing for a free blocked drain inspection, with all the equipment, our team will be able to diagnose the issue and get it fixed for you.
As your Sydney blocked drain experts, we want to give you some free DIY tips to unblock your drains, so before you call a plumber try these out.
Plunger – A simple tip for a quick unblock of your sink, the plunger will dislodge the food that gets stuck in between your trap and sink and release! You should be able to start using your kitchen sink again! Be aware that plungers are only capable of unblocking minor blocked pipe issues.
Bent coat hanger – Do you have hair or small objects stuck in the bathroom? Using a bent coat hanger to reach the blocked drain may dislodge and allow water flow.
Baking soda & vinegar – Try a home remedy, this will work if you have a minor blockage. Pour hot water down your drain and add a cup of soda, then followed by vinegar. Let it sit for 10 minutes and flush the toilet.
From the Sutherland Shire to Eastern Suburbs, Western Sydney, and the Inner West
Quintessential Plumbing is reliable, on time, and loved by over 1000 happy Sydney owners. Blocked drains or toilets always occur at the worst times, and our team is on call 24/7 to help you through your plumbing emergency.
Related post:
Sydney 24/7 Emergency Plumbers! Check Out What We Have Been Up To This Week!
7 Insider Tips That You Need When You Are Hiring Your Residential Plumber Within A Budget
Yearly there are so many reports of the deaths and injuries that resulted from the poisoning of carbon monoxide within the UK due to unsafe boiler installation. The carbon monoxide is the odorless gas that when breathe stops the oxygen from roving to the body, causing body tissues and cells to fail and to die. As slight as 2 percent of carbon monoxide in air may cause death within 3-minutes, and when you are suffering some symptoms of possible food poisoning without a rise in the body temperature, then, it’s a good opportunity that you’re encountering very low-level poisoning.
The boiler installation is being considered as the biggest danger when assessing an accident possibility that resulted from malfunctioning of your home appliances. That’s why it’s important that you will always be on the guard for the warning signs of the unsafe boiler installation.
When you will see the black stains close by the boiler even on a ceiling then there’s the best chance that there’s the leak on your airway. As the outcome of which smokes that should be take outside are then leaking inside. These smokes contain the deadly sum of carbon monoxide. Not paying attention to certain details can be deadly. You must be informed by professionals that will assess a situation of the unsafe boiler installation.
The back boilers are the conventional old boilers that is used to fit in the fireplace and operate by using gas, they’re no longer permitted to be installed because of how unsafe an installation will be. When you have the gas fireplace or the back boiler be sure that these are being inspected annually to make sure that they’re in safe operating condition, when you have the signs of having poor flame picture, black-sut around the side, or any harm on the fireplace, then it could be classed being immediately dangerous by the gas safe engineer that must be switched off immediately.
The pilot light is the tiny glass flame that stays lit almost all the time which is being used to ignite the gas when in need. The exclusive sensor is being put in place so it can monitor when a pilot is being lit or not. When it is not being lit, then a sensor sends the signal to incise the flow of gas so that it does not spread in the house. When the pilot is being blown out frequently, it is already a sign that your gas is not totally burning. When the pilot light had been altering colors from blue to holding on a yellow tip, then it shows the lacking of oxygen and with excess carbon monoxide.
When you are seeing the heavy amount of condensation wherein the boiler is being installed then, it’s already the sign that the boiler isn’t being properly vented as the water had been one of those by-goods of combustion. When the exhaust gases aren’t leaving the home, then they’ll finally leak into your house. It means that the carbon monoxide is leaking also into your house. Apart from taking the expert to examine the boiler, you must be sure also that you have the totally functioning carbon monoxide alarming in each room of your house.
The carbon monoxide is if not odorless. But, when it is being released in the surroundings right after not being properly burnt, you will encounter that odd faint smell. When this will be the case in the house, you must not be uncertain to get the boiler checked by the experts.
Related post:
The problems with the unsafe boiler installation must not be ignored with under any circumstances. The Quintessential Plumbing covers all plumbing, heating and gas safe services, our team can give service, repair, and also installation of your gas appliances in Sydney and its surrounding fields. Contact our team now and get your quotations using our online contact forms.