

22 Nov. 2025
Guide to Solving Common Rainwater Harvesting Drain Problems
How Can You Solve Common Rainwater Harvesting Drain Problems?
A rainwater harvesting system works best when its drains, pipes, and tank inlets allow water to move freely from the collection surface into the storage tank. When debris builds up or components are incorrectly sized, the system becomes inefficient, overflows, or causes water damage around your property. Understanding why these drainage problems occur and how to fix them ensures your system remains reliable, clean, and functional.
Why Do Rainwater Harvesting Systems Experience Drain Problems?
Rainwater systems collect water from roofs, patios, and other catchment surfaces. As water flows toward the tank, it carries leaves, dust, twigs, sediment, and organic matter. If the drainage components—such as gutters, downpipes, screens, and diversion devices are not maintained or properly designed, debris accumulates and restricts flow. Poor installation, undersized pipes, and incorrect slopes also create water bottlenecks that lead to blocked drains and system damage.
What Are the Most Common Drain Problems in Rainwater Harvesting Systems?
Why Do Gutters, Downpipes, and Inlet Screens Get Clogged?
Gutters and downpipes naturally collect organic debris. When leaves, sludge, or roof granules accumulate, water cannot move toward the tank efficiently. The inlet screen, meant to keep debris out of the tank, often blocks first. Once blocked, water backs up, overflows, and spills around the property instead of entering the tank.
How Can You Fix Clogged Drains in a Rainwater System?
Installing gutter guards reduces the amount of large debris entering the system. Regular gutter and downpipe cleaning prevents long-term blockages, especially after storms or during autumn when leaf fall increases. A first-flush diverter redirects debris-heavy initial rainfall away from the tank, improving water quality and reducing blockages.
Why Do Rainwater Tanks Overflow During Heavy Rain?
A tank overflows when its drainage or overflow outlet cannot handle the incoming water volume. This occurs when overflow pipes are too small, incorrectly angled, or blocked with debris. Overflowing tanks may also indicate insufficient storage capacity for the catchment area.
How Can You Stop a Rainwater Storage Tank From Overflowing?
Ensuring the tank has a properly installed overflow outlet that directs excess water toward a safe drainage point, such as stormwater systems or a soakaway pit, prevents pooling around the property. If overflow happens frequently, upgrading to a larger tank or adding secondary tanks increases capacity. Regular inspection of overflow pipes ensures water can escape freely.
Why Does Poor Drainage Design Cause System Inefficiencies?
Incorrect pipe sizing, insufficient slope, poorly placed diverters, and awkward pipe runs limit water movement. If downpipes are too narrow for the roof area, they cannot cope with large volumes of rainwater. Poor design also increases pressure within the system during intense rainfall, causing leaks, overflow, or pipe detachment.
How Can You Improve a Poorly Designed Rainwater Drainage System?
Ensuring pipes are properly sized for the catchment area is crucial. Larger roof areas require larger downpipes and drainage pipes. A specialist plumber can design a layout with correct slope, flow rate, and alignment to prevent water bottlenecks. Professional design ensures system efficiency and reduces maintenance issues.
Why Does Sludge Build Up Inside Rainwater Tanks?
Dust, pollen, fine sediment, and roof debris that bypass the inlet filters settle at the bottom of the tank. Over time, this sediment forms a dense sludge layer. Thick sludge reduces tank storage capacity, affects water clarity, and can clog pumps, filters, or outlet pipes.
How Do You Remove Sludge Buildup From a Rainwater Tank?
Regular tank cleaning, generally every two years, is essential. Areas with heavy rainfall or lots of surrounding vegetation may require more frequent cleaning. Installing a sediment trap upstream prevents finer particles from entering the tank, reducing long-term sludge accumulation.
Why Do Rainwater Systems Risk Cross-Contamination With Greywater?
If rainwater systems share lines with greywater or wastewater pipes, backflow can push contaminated water into the tank. Cross-contamination leads to odours, poor water quality, and potential blockages inside the tank or supply lines.
How Can You Prevent Cross-Contamination in a Rainwater Harvesting System?
Installing backflow prevention devices stops wastewater from entering the tank. Ideally, rainwater and greywater systems should remain completely separate, with their own pipes, pumps, and drainage pathways. Keeping systems independent ensures harvested water stays clean and safe.
Why Do Mosquitoes and Insects Enter Rainwater Tanks and Drains?
Mosquitoes are attracted to standing water around tank inlets, blocked drains, and unscreened outlets. Any inaccessible, stagnant water creates breeding environments. Overflows that pool around the tank also encourage insect infestation.
How Can You Prevent Mosquito Infestation in Rainwater Systems?
Fine mesh screens on all tanks inlets, vents, and overflow points prevent insects from entering. Regular clearing of drains ensures that water flows continuously, eliminating stagnant areas. Keeping the system sealed and free of blockages reduces insect activity significantly.
How Can You Maintain Long-Term Drain Health in a Rainwater Harvesting System?
Why Are Routine Inspections Essential for Preventing Drain Problems?
Regular inspections identify early signs of debris buildup, leaks, corrosion, or damaged fittings. Checking gutters, downpipes, diverters, mesh screens, and tank connections ensures the entire system continues operating efficiently through all seasons.
Why Should You Install a Filtration System for Better Water Quality?
Filtration systems, such as mesh filters, first-flush diverters, and sediment traps, remove debris before water enters the tank. This reduces clogging in drains and slows down sludge formation inside the tank.
Why Should You Monitor Tank Water Levels During Heavy Rain?
Consistent overflow during storms may signal a drainage issue or insufficient tank capacity. Monitoring tank levels helps determine whether the system needs pipe adjustments or a tank upgrade.
Why Is Seasonal Maintenance Important for Rainwater Drain Systems?
Autumn leaves, summer storms, and winter temperature changes alter how water flows through the system. Increasing gutter cleaning during peak leaf fall and insulating pipes during winter prevents cracking and freezing.
When Should You Call a Professional for Rainwater Harvesting Drain Problems?
If blockages recur, if overflow issues persist, or if contamination is suspected, professional help is required. A rainwater harvesting specialist can inspect the entire system, repair damage, correct poor design, and ensure your drainage operates efficiently year-round.
FAQ for Solving Common Rainwater Harvesting Drain Problems
Why do my rainwater system’s downpipes overflow during heavy rain, even when they look clear?
Downpipes often overflow when the pipe diameter is too small for the roof catchment area. During heavy rainfall, water volume exceeds the pipe’s maximum flow rate, causing spillover even if there is no visible blockage.
Why does my rainwater tank overflow every storm despite having an overflow pipe?
If the overflow pipe is undersized, incorrectly sloped, or partially blocked by debris or insects, it cannot carry water away at the same rate it enters. This mismatch forces water out around the tank instead of through the overflow outlet.
Why does sludge accumulate so quickly at the bottom of my rainwater tank?
Heavy dust, pollen, and roof particles pass through inlet screens and settle in the tank. Areas with strong winds, iron roofing, or frequent storms experience accelerated sludge build-up due to finer sediment entering the system.
Why do my gutters block repeatedly, even after installing gutter guards?
Fine debris, dust, pine needles, and roof grit can still pass through gutter guard openings. If the guard design isn’t suitable for your surrounding vegetation, debris gradually builds and restricts flow beneath the guard.
Why does my rainwater system let dirty water into the tank during the first few minutes of rainfall?
The first rainfall wash of the roof carries most of the pollutants, including bird droppings, dust, and organic debris. Without a functioning first-flush diverter, this contaminated water flows straight into the tank.
Why does water pool around the base of my rainwater tank when it rains?
Pooling occurs when the overflow pipe discharges too close to the tank or when the surrounding ground lacks proper drainage. Poor site preparation or soil saturation prevents water from dispersing efficiently.
Why does foul odour come from my rainwater tank’s inlet or overflow?
Odours may arise from sludge decomposition, cross-contamination with greywater, or organic debris trapped at entry points. Poor aeration, stagnant water in pipes, or blocked diverters can also create smells.
Why does my rainwater pump keep sucking up debris or dirty water?
If sediment traps or mesh filters are missing or clogged, fine particles enter the pump’s suction line. Tank sludge stirring during heavy inflow can also cause dirty water to reach pump outlets.
Why does my rainwater tank attract mosquitoes even though it is covered?
Mosquitoes enter through tiny gaps around inlet screens, overflow outlets, or venting points. Any hole larger than 1 mm allows mosquito access. Blocked drains create stagnant water nearby, increasing breeding conditions.
Why does my overflow pipe become blocked with insects?
Insects nest inside dark, moist overflow pipes. Without fine mesh screens, spiders, mosquitoes, and small insects create debris clusters that restrict outlet water movement.
Why are my underground rainwater pipes clogging even when the gutters are clean?
Fine debris washed from the roof bypasses gutter guards and accumulates inside underground pipes. Pipes with insufficient fall or sagging sections trap sediment, eventually forming blockages.
Why does my rainwater tank fill too slowly, even during heavy rain?
Slow filling occurs when the gutter slope is incorrect, downpipes are partially obstructed, inlet filters are clogged, or first-flush diverters remain stuck in the diversion phase instead of allowing water into the tank.
Why is my rainwater harvesting system getting contaminated with greywater?
Cross-connections between rainwater and greywater systems, intentional or accidental, allow wastewater to backflow into the tank. Without backflow prevention devices, pressure fluctuations can push contaminated water into rainwater lines.
Why does water backflow into my gutters when the tank is full?
When tanks lack a proper overflow line or the overflow is blocked, water cannot escape fast enough. It moves backward into gutters, creating spillover at gutter edges and downpipe junctions.
Why do my gutters overflow at only one end of the roof?
Uneven gutter slope forces water toward a single end instead of distributing flow across multiple downpipes. A sagging section or poorly graded gutter angle causes localised overflow.
Why is my first-flush diverter not preventing debris from entering the tank?
Diverters fail when the collection chamber is full of sludge, the ball mechanism is stuck, or the sealing washer is worn. This allows debris-heavy first flush water to bypass the chamber and enter the tank.
Why does my rainwater taste earthy or dirty after rainfall?
This flavour typically comes from organic matter or sediment entering the tank. Sludge build-up, dirty gutters, failing inlet screens, or decomposing leaves inside the first-flush chamber contribute to poor water quality.
Why does algae grow inside my rainwater tank or inlet pipes?
Sunlight exposure through clear pipework or translucent tank walls encourages algae. Incorrectly sealed inspection ports and open vents also allow light into the system, enabling algae formation.
Why do buried drainage pipes collapse or become misaligned?
Older PVC or clay pipes may shift due to soil movement, erosion, tree root pressure, or improper bedding. When alignment changes, water flow slows and debris builds rapidly.
Why should I call a professional if my rainwater system experiences repeated blockages?
Recurring issues often indicate design flaws, undersized pipes, poor fall, incorrect diverter placement, or inadequate overflow capacity. Only a specialist can diagnose structural causes and redesign the system for long-term performance.
A well-maintained rainwater harvesting system saves water, protects your home, and delivers clean, sustainable water. By understanding common drainage problems and implementing preventative solutions, you will keep your system running smoothly and avoid costly repairs.
Discover More About Sydney’s Blocked Drain Problems
Step-by-Step Guide to Clearing a Blocked Drain
Blocked Stormwater Drains: Causes, Solutions, and Preventative Strategies
How to Deal with Hair Clogging Your Drains in Sydney, NSW
Secret Tips to Safely Cleaning a Smelly Drain in Sydney Home
10 Essentials Tips to Preventing Blocked Drains
Guide to Unclogging a Kitchen Sink in Sydney
Using a Plumber’s Snake to Unclog Drains in Sydney
Guide to Unclogging a Bathroom Sink in Sydney
Guide to Unclogging Outdoor Drains For Sydney Homes
How to Unclog a Shower Drain in Sydney
A Complete Guide to Unclogging a Toilet Without a Plunger
Using Bleach to Unblock Your Toilet in Sydney
Guide to Clearing Toilet Paper Blockages Without a Plunger
Don’t Be Fooled by Drain Clearing Quotes in Sydney: 2026 Pricing Guide
Should You Use Chemical Drain Cleaners in Sydney
Effective Ways to Get Rid of Drain Flies for Good – A Homeowner’s Guide
Why Does Your Shower Drain Smell? Causes, Fixes, And Prevention Tips
Tips For Clearing Blocked Roof Drains In Sydney
What To Do If Your Drain Overflows In Sydney
How To Unblock A Floor Drain Quickly
Causes of Burst Pipes and How to Prevent Them
Why You Shouldn’t Ignore a Blocked Drain: Key Risks and Solutions
Why CCTV Drain Inspections Are the Future of Plumbing Solutions
How Construction Debris Causes Drain Blockages
Do Blocked Drains Attract Pests in Sydney?
How to Use a Wet-Dry Vacuum to Clear a Blocked Drain
Guide to Solving Common Rainwater Harvesting Drain Problems
How Sediment Build-Up Causes Drain Blockages
How to Retrieve Toys Stuck in the Tub Drain
Understanding Where Stormwater Drains Go
Guide to Common Causes of Low Water Pressure
How to Prevent Costly Storm Plumbing Emergencies
How to Retrieve Items Lost Down the Drain
How Does UV Pipe Relining Provide a Modern Solution to Pipe Repairs?
Step-by-Step Guide for Unclogging a Toilet in Sydney
21 Nov. 2025
What Things Should You Never Flush Down the Toilet?
Flushing the wrong items can clog your toilet, damage your sewer pipes, and harm wastewater systems. Toilets are designed to handle only human waste and toilet paper. Anything else, no matter how small or “flushable” it claims to be, can cause blockages, plumbing repairs, and environmental harm. Understanding why certain materials don’t belong in the toilet helps protect your plumbing and prevent costly emergencies.
Why Should Non-Flushable Items Never Enter the Toilet System?
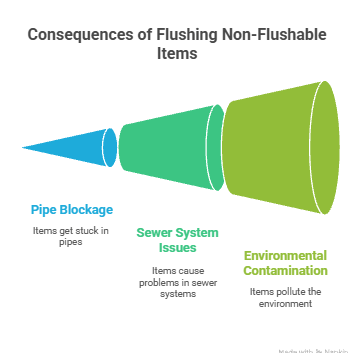
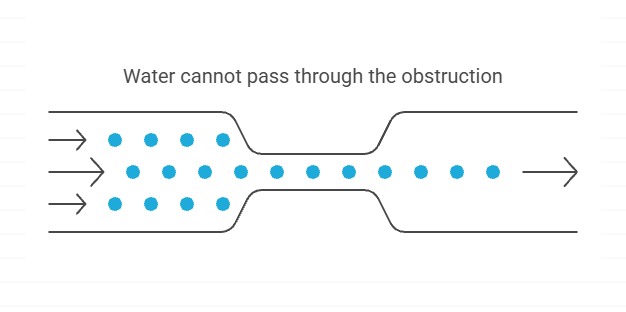
Toilets use a siphon and gravity to move waste through narrow trapways and pipes. Items that don’t dissolve, break apart, or travel easily become lodged inside these bends. Materials that absorb water, expand, harden, snag, or tangle create blockages that water pressure cannot push through. Sewer systems also cannot break down many household items, leading to fatbergs, pump failures, and environmental contamination.
Why Are Flushable Wipes Unsafe to Flush?
Flushable wipes do not break down quickly enough to pass through plumbing systems. Their synthetic fibres remain intact, catching on pipe edges and forming large, dense clumps. These clumps combine with grease and toilet paper, leading to severe blockages in both household and council sewer lines. Read more about Sydney Bidet Plumbing Solutions.
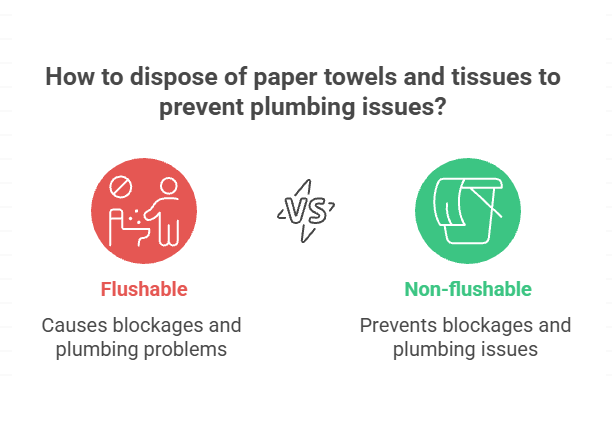
Why Should Paper Towels and Tissues Never Be Flushed?
Paper towels and tissues are designed to stay strong when wet. Their fibres resist disintegration and can expand in water. When flushed, they clump together inside the trapway or waste pipe, causing blockages far more stubborn than toilet paper.
Why Are Sanitary Pads, Tampons, and Cotton Products Dangerous for Toilets?
Sanitary products are made to absorb moisture and expand. When flushed, they swell inside the pipes, creating solid obstructions that water cannot push through. Cotton buds and cotton balls also bind together, trapping hair and debris as they move down the line.
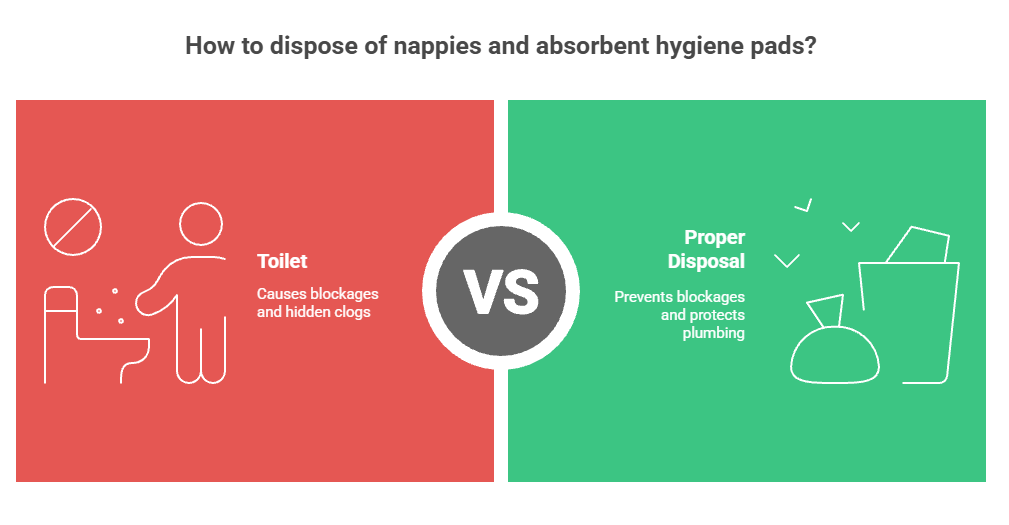
Why Must Nappies, Wet Wipes, and Incontinence Pads Never Go Into the Toilet?
Nappies and absorbent hygiene pads are built to hold large volumes of fluid. Once flushed, they expand rapidly, blocking the trap within seconds. Even partial flushing of such items creates hidden clogs that worsen over time.
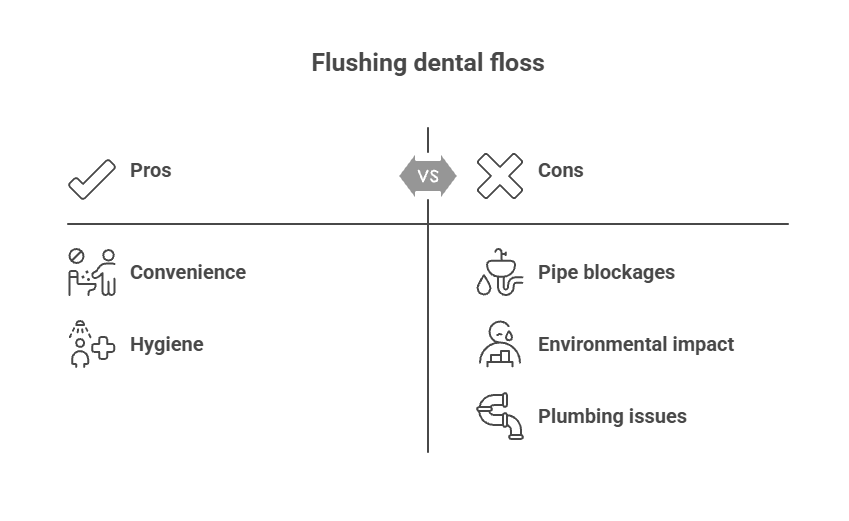
Why Should Dental Floss Never Be Flushed?
Dental floss acts like a net inside the pipes. It wraps around bends, snags on imperfections, and tangles with hair and wipes. This creates long, stringy blockages that fill the pipe and worsen with each flush.
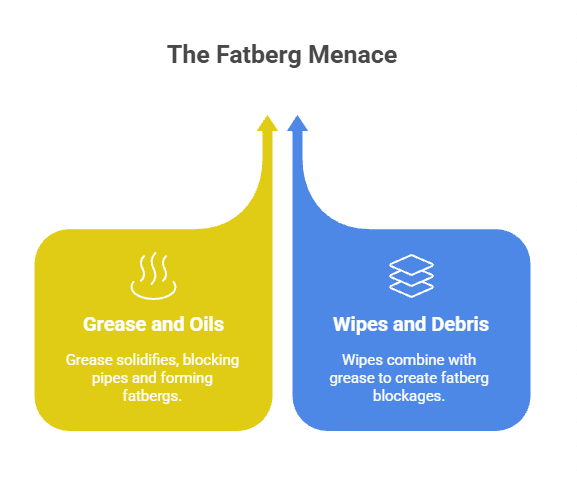
Why Are Grease, Oils, and Fat Unsafe for the Toilet?
Grease and oils stick to pipe walls and cool down into a thick, hard residue. When combined with wipes or other debris, they form fatbergs, large, rock-like sewer obstructions that can shut down entire wastewater systems.
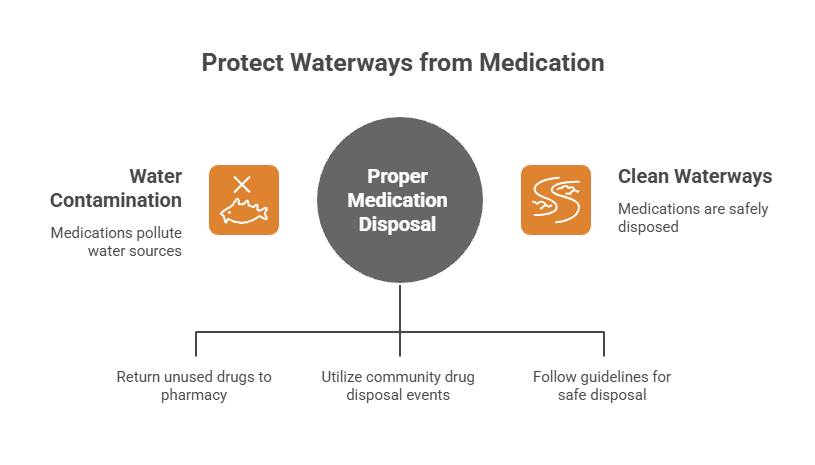
Why Should Medications Never Be Flushed?
Medications do not break down safely in wastewater systems. They contaminate waterways, harm aquatic life, and pass into the environment unchanged. Toilets cannot filter chemicals, so flushing pills introduces pharmaceuticals directly into natural ecosystems.
Why Should Cat Litter and Pet Waste Never Enter the Toilet?
Most cat litter clumps when wet. Once flushed, it hardens inside the pipes and becomes nearly impossible to remove. Pet waste, especially from cats, also contains parasites like Toxoplasma gondii that wastewater plants cannot fully remove.
Why Are Condoms, Rubber Products, and Latex Items Bad for Toilets?
Rubber and latex remain intact in water and can stretch to wedge themselves into pipe bends. These materials never dissolve and frequently cause blockages deep in the sewer network.
Why Should You Avoid Flushing Hair Down the Toilet?
Hair forms dense knots inside the trapway. It tangles with toilet paper, wipes, and grease, creating heavy blockages that plungers struggle to dislodge. Hair also traps sediment and debris as it travels through the sewer line.
Why Are Q-Tips, Ear Cleaners, and Small Plastics Unsafe to Flush?
Small plastic items never break down. Their rigid shape allows them to lodge in pipe bends, creating a physical obstruction. Once stuck, they collect additional debris and eventually block the entire pipe.
Why Should Food Scraps and Coffee Grounds Never Enter the Toilet?
Food scraps absorb water and expand, while coffee grounds settle into dense clumps. Toilets are not designed to push food down the sewer line; these materials create sludge-like blockages that obstruct water flow.
When Should You Suspect That Something Flushed Is Causing a Plumbing Problem?
Signs include slow flushing, rising water in the bowl, gurgling noises from drains, sewage odours, or water backing up into the shower. These symptoms often indicate a foreign object caught inside the trap or sewer line.
What Should You Do If a Non-Flushable Item Accidentally Goes Down the Toilet?
Avoid flushing again. Additional water may force the item deeper into the pipes. Use a plunger or toilet auger immediately. If resistance is strong or water begins backing up, a plumber should inspect the system using CCTV camera equipment.
What Should You Dispose of in the Bin Instead of the Toilet?
Any item that doesn’t dissolve instantly in water, wipes, cotton, floss, sanitary products, nappies, rubber items, litter, paper towels, food waste, plastics, and chemicals should always go in the rubbish bin. Only human waste and toilet paper should enter the toilet.
How Can You Prevent Toilet Blockages Caused by Improper Disposal?
Place a small bin next to the toilet, use only dissolving toilet paper, educate family members about non-flushables, and avoid in-cistern cleaning tablets that degrade rubber seals. These simple habits, along with proper bathroom installation in Sydney, protect your plumbing long-term.
FAQ for Things You Should Never Flush Down the Toilet
Why do flushable wipes stay intact in pipes instead of breaking down like toilet paper?
Flushable wipes contain synthetic fibres that resist dissolving. Unlike toilet paper, they remain strong in water and travel through pipes as solid sheets, creating major blockages when they catch on rough surfaces.
Why do paper towels block toilets even when flushed in small amounts?
Paper towels absorb water and expand rather than disintegrate. Their reinforced fibres are engineered for durability, making them behave like sponges that lodge stubbornly inside trapways.
Why do sanitary pads and tampons cause severe pipe blockages when flushed?
Sanitary products are designed to expand and absorb liquids rapidly. When flushed, they swell inside the pipe and form a tight, immovable obstruction that water cannot push through.
Why do cotton buds and cotton balls collect debris inside sewer lines?
Cotton fibres tangle easily, trapping hair, soap scum, and paper fragments. As these materials bind together, they create a dense clog that grows larger with every flush.
Why does dental floss create long stringy blockages in toilets?
Floss acts like rope inside pipes. It wraps around bends and joints, trapping wipes and other non-flushable items, forming net-like masses that block the sewer line.
Why do nappies and incontinence pads cause instant toilet blockages?
Nappies contain gel absorbents that expand dramatically when wet. These materials swell to many times their size, instantly sealing the pipe and preventing water from passing.
Why does flushing grease and fat damage waste pipes?
Grease cools and solidifies inside pipes, forming a sticky coating. This coating attracts wipes, food scraps, and hair, eventually building into a solid fatberg that blocks the sewer main.
Why do medications contaminate waterways when flushed?
Wastewater plants cannot filter pharmaceutical chemicals. When flushed, medications travel through treatment systems unchanged, entering rivers and oceans and harming aquatic ecosystems.
Why does cat litter harden inside toilet pipes even when it looks flushable?
Clumping cat litter contains bentonite clay, which becomes rock solid when wet. Once flushed, it settles inside pipes and creates blockages that plungers and augers cannot break apart easily.
Why is flushing pet waste unsafe for home plumbing and sewer systems?
Pet waste often contains parasites, bacteria, and organic matter that cling to pipe walls. Some pathogens, especially from cats, survive wastewater treatment and pose health risks.
Why are condoms and latex items common causes of hidden toilet blockages?
Latex and rubber don’t disintegrate in water. They stretch and lodge inside pipe bends, creating flexible barriers that trap other debris and lead to major sewer obstructions.
Why does hair accumulate into solid clumps inside toilet drains?
Hair knots together and binds with oils, wipes, and paper, forming a strong mass that wedges itself into the trapway. These clumps grow larger over time and block the line fully.
Why do Q-tips and small plastics clog toilets even though they’re tiny?
Their rigid shape allows them to wedge inside pipe joints. Once stuck, they collect additional debris, especially wipes and hair, until the blockage becomes severe.
Why do food scraps and coffee grounds settle inside toilet pipes?
Food particles absorb water and expand, while coffee grounds clump into sludge. Toilets lack the water pressure needed to push food through, causing a gradual build-up deep in the system.
Why does flushing chemicals or cleaning products harm your plumbing system?
Harsh chemicals can erode rubber seals, corrode metal components, and disrupt septic tank bacteria. This leads to running toilets, leaks, and premature system failure.
Why should I suspect a non-flushable item if my toilet suddenly blocks?
A sudden blockage, especially after guests or children use the toilet, often indicates a foreign object lodged in the trap. Toilets rarely block instantly from toilet paper alone.
Why does water rise and then drain slowly when non-flushables are clogging the trap?
Non-flushable items act like plugs. Water struggles to bypass the obstruction, rising up the bowl before slowly trickling past the blockage, which is a classic symptom of wipes or cotton products.
Why does my toilet block repeatedly, even after clearing it?
Repeated blockages often point to wipes or foreign items caught deep in the pipe. Even small remnants trap new debris, causing ongoing issues until the pipe is properly cleared.
Why does flushing cause gurgling noises in nearby drains when non-flushables are involved?
Gurgling occurs when trapped air moves past partial blockages. Items like wipes and floss create airflow restrictions, causing bubbling or gurgling sounds through other fixtures.
Why should I call a plumber if a non-flushable item accidentally goes down the toilet?
Non-flushables often wedge in areas plungers can’t reach. A plumber can use CCTV inspection and specialised tools to locate and safely remove the obstruction before it causes a major overflow.
Discover More About Toilet Plumbing Issues:
What Things Should You Never Flush Down the Toilet?
What Causes a Running Toilet and How Can You Fix It?
How Can You Unblock a Badly Blocked Toilet?
What Should You Do When Your Toilet Won’t Flush?
Toilet Leaking at the Base? Troubleshooting Guide
Unclogging a Toilet Without a Plunger: A Complete Guide
Guide to Unclogging a Bathroom Sink
Slow-Filling Toilet? Here’s Why and How to Fix It
Guide to Testing a Toilet Flush Valve for Sydney Homes
21 Nov. 2025
What Causes a Running Toilet and How Can You Fix It?
What Is a Running Toilet, What Causes It, and How Do You Stop It?
A running toilet is a toilet that continues to let water flow after the flush cycle has finished. Instead of shutting off once the cistern refills, water keeps moving into the bowl or overflow tube, causing the toilet to run constantly or intermittently. A toilet that keeps running can waste hundreds of litres of water each day and usually indicates that one or more internal components are no longer sealing, regulating, or shutting off correctly. Understanding what a running toilet is and why it happens makes it easier to identify the fault and apply the correct fix before water bills and wear increase. If you are in need of a bidet plumbing expert in Sydney, contact us now!
What Is a Running Toilet?
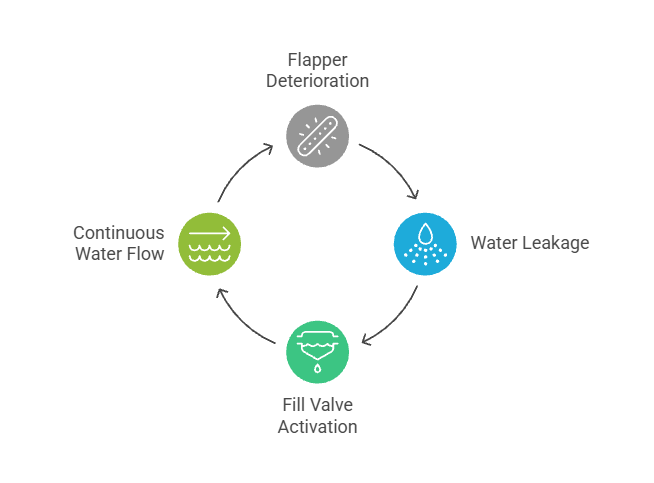
A running toilet occurs when water continues flowing from the cistern into the bowl after flushing, instead of stopping at the correct water level. This can happen continuously or at random intervals throughout the day. In most cases, a running toilet is caused by a problem with the flapper, fill valve, float, or flush valve assembly. Because the system never fully seals or shuts off, the toilet keeps refilling and releasing water, even when it hasn’t been used.
What Does It Mean When a Toilet Keeps Running?
When a toilet keeps running, it means the internal shut-off mechanism has failed to stop water flow at the right point. Water may be leaking slowly into the bowl, spilling into the overflow tube, or cycling on and off as the cistern level drops. While the toilet may still flush normally, continuous or repeated running signals an internal fault that will not resolve on its own and typically worsens over time.
Why Do Toilets Run Instead of Stopping Normally?
Toilets are designed to refill once and then stop. When a toilet runs instead, it usually means a seal is worn, a valve is misadjusted, or a moving part is no longer responding correctly. Mineral buildup, ageing rubber components, incorrect float height, or manufacturing defects in newer toilets can all interfere with proper shut-off. Even a small internal leak is enough to trigger repeated refilling.
Why Does My Toilet Keep Running After Flushing?
When a toilet keeps running after flushing, it means the system cannot fully shut off once the cistern refills. After the flush cycle ends, water should stop entering the tank and remain at a fixed level. If water continues flowing, one of the internal components—most commonly the flapper, fill valve, or float—is failing to seal or regulate the water correctly. This causes water to keep draining into the bowl or overflow tube, forcing the fill valve to stay open.
Why Is My Toilet Still Running Several Minutes After a Flush?
A toilet that runs for several minutes after flushing usually has a slow internal leak rather than a complete failure. The flapper may be sealing poorly, allowing water to escape gradually into the bowl. As the cistern level drops, the fill valve reactivates to compensate, creating a long or repeated refill cycle. This type of running often sounds quiet but continues for extended periods.
Why Does Water Keep Flowing Into the Bowl After Flushing?
If water keeps flowing into the toilet bowl after flushing, it indicates that water is bypassing the flush valve instead of stopping inside the cistern. This commonly happens when the flapper does not sit flat against the valve seat or when the valve seat itself is worn or damaged. Even a small gap allows water to leak continuously into the bowl, keeping the toilet running even though the tank appears full.
Why Does My Toilet Continue to Run After the Tank Has Filled?
A toilet that continues to run after the tank has filled often points to a fill valve or float problem. If the float is set too high, water rises above the normal shut-off level and spills into the overflow tube. If the fill valve is worn or clogged, it may not close completely even when the float reaches the correct height. In both cases, water continues flowing instead of stopping cleanly.
Why Does the Toilet Run Every Time I Flush It?
If the toilet runs every time it is flushed, the issue is consistent rather than intermittent. This usually means a key component has deteriorated enough that it fails on every cycle. Common causes include a hardened flapper, misadjusted float, stretched chain, or ageing fill valve. Because the fault repeats with each flush, the toilet will continue wasting water until the component is repaired or replaced.
Why Does My Toilet Run Only After Heavy or Repeated Flushing?
A toilet that runs only after multiple or heavy flushes often has a borderline failure. The system may cope under light use but fail when larger volumes of water pass through. This can happen when the flapper seals unevenly, the float reacts slowly, or the fill valve struggles to shut off under higher demand. Over time, this type of issue typically progresses into constant running.
Why Does My Toilet Keep Running Even Though the Flush Seems Normal?
A normal flush does not mean the system is working correctly. A toilet can flush properly while still leaking internally. If the toilet keeps running after flushing but otherwise seems fine, water is usually escaping slowly through a seal or valve that no longer closes fully. These hidden leaks are often only noticed by the sound of running water or higher water bills.
Why Does the Fill Valve Keep Running?
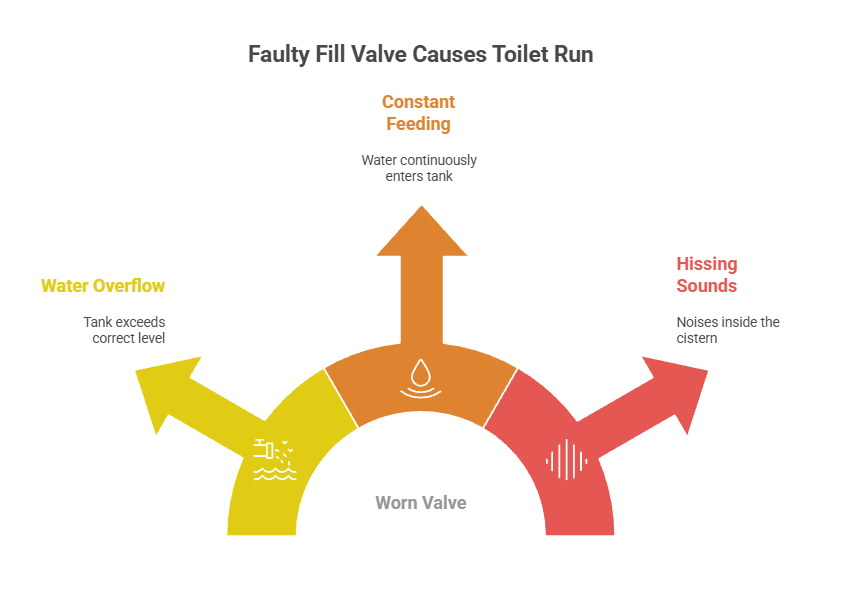
If the fill valve keeps running, it means the valve is no longer shutting off when the correct water level is reached. This can happen when internal seals wear out, sediment builds up inside the valve, or the valve mechanism becomes misaligned. A faulty fill valve allows water to keep entering the cistern even though it appears full, causing constant or intermittent running. Hissing or spraying sounds inside the tank are common signs of a fill valve issue.
Why Does My Toilet Fill Valve Keep Running Off and On?
When the toilet fill valve runs on and off, it usually indicates a slow internal leak elsewhere in the system. Water escapes gradually from the cistern into the bowl, lowering the water level just enough to trigger the fill valve repeatedly. This cycle, often called “ghost flushing,” is most commonly caused by a leaking flapper or worn flush valve seat rather than the fill valve itself.
Why Does the Float Cause the Toilet to Keep Running?
The float controls when the fill valve shuts off. If the float is set too high, sticks, or moves sluggishly, the valve does not close at the right time. Water may rise above the normal level and spill into the overflow tube, causing continuous running. Floats can also bind against the cistern wall or become waterlogged, preventing accurate shut-off.
Why Is Water Running Into the Toilet Bowl?
When water runs continuously into the toilet bowl, it means water is bypassing the flush valve instead of staying inside the cistern. This is usually caused by a flapper that no longer seals properly against the flush valve opening. Even a small gap allows water to leak steadily into the bowl, forcing the fill valve to keep refilling the tank. Over time, this silent leak can waste a significant amount of water.
Why Is the Toilet Tank Not Filling Properly but Water Is Still Running?
If the toilet tank isn’t filling correctly but water is still running, the problem is often related to a misadjusted float, blocked fill valve inlet, or partially closed supply valve. In some cases, water flows straight into the overflow tube instead of filling the cistern. This creates the sound of running water while the tank level remains low or unstable.
Why Does the Flush Valve Cause a Toilet to Keep Running?
The flush valve opening and its sealing surface must be smooth for the flapper to seal correctly. If the flush valve seat is cracked, warped, or coated with mineral buildup, water leaks past the flapper even if it’s new. This constant leakage causes the toilet to keep running as the fill valve repeatedly replaces lost water. Flush valve damage often requires more than a simple flapper replacement.
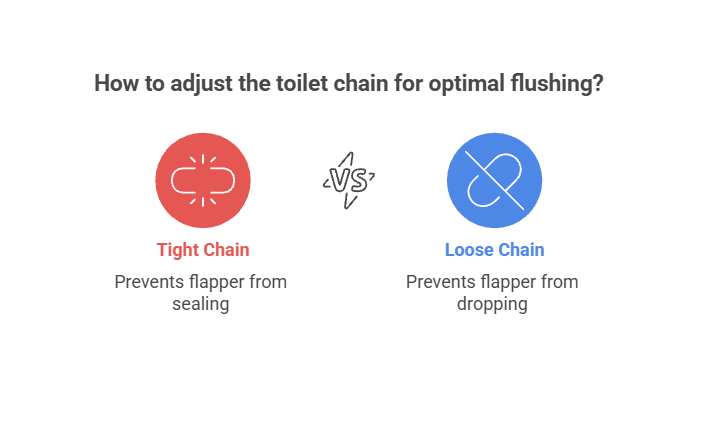
Why Does the Chain Make the Toilet Keep Running?
The lift chain connects the flush handle to the flapper. If the chain is too tight, it prevents the flapper from settling fully into place. If it’s too loose, the flapper may not align correctly when closing. In both cases, water leaks into the bowl and causes ongoing running. Correct chain length allows the flapper to lift freely and seal completely after each flush.
How Can You Tell Which Component Is Causing the Running?
To identify the faulty component, remove the cistern lid and observe what happens after flushing. If water trickles into the bowl, the flapper or valve seat is leaking. If water flows into the overflow tube, the float height or fill valve is the issue. If the fill valve continues running even when the float is manually lowered, the valve itself has failed. Watching how water moves inside the cistern quickly reveals the source of the problem.
Why Does My Toilet Keep Running Off and On?
When a toilet runs off and on, it usually means water is slowly leaking out of the cistern rather than flowing continuously. As the water level drops, the fill valve activates to refill the tank, then shuts off again once the level is restored. This cycle repeats throughout the day, even when the toilet hasn’t been used. The most common cause is a flapper or flush valve seat that no longer seals fully.
Why Does the Toilet Run Randomly During the Day?
A toilet that runs randomly is often experiencing a slow internal leak that goes unnoticed until the cistern level drops enough to trigger refilling. Temperature changes, water pressure fluctuations, or slight movement of internal parts can make the issue seem inconsistent. While the running may stop on its own temporarily, the underlying fault remains and usually worsens over time.
What Makes a Toilet Run Occasionally Instead of Constantly?
A toilet that runs occasionally rather than all the time typically has a partially failing component. The flapper may seal under some conditions but leak under others, or the fill valve may shut off inconsistently. Small leaks inside the cistern can take hours to lower the water level enough to activate the fill valve, making the running seem unpredictable.
Why Does My Toilet Suddenly Start Running?
If a toilet suddenly starts running, the issue is often caused by a part reaching the end of its usable life. Rubber components such as flappers and valve seals can deteriorate quickly once they begin to harden or crack. Sediment buildup inside the fill valve can also cause sudden failure, preventing the valve from sealing properly.
Why Does My Toilet Run Mostly at Night or When Not in Use?
A toilet that runs mostly at night or when not in use is typically leaking slowly and quietly. During quieter hours, the sound of refilling becomes more noticeable. Lower overnight water pressure or cooler temperatures can also affect older valves, making intermittent leaks easier to detect during these times.
Why Does the Toilet Randomly Stop Running on Its Own?
If the toilet stops running without any adjustment, it may be because internal parts temporarily shift into a better sealing position. The float may settle correctly, the flapper may reseat more evenly, or water pressure changes may allow the valve to close fully. These temporary fixes mask the problem but do not resolve it permanently.
Why Does Removing the Cistern Lid Sometimes Stop the Running?
Removing or replacing the cistern lid can slightly move the float or chain, allowing the system to shut off correctly for a short time. This creates the impression that the problem has been fixed, but the underlying misalignment or wear remains. Once the lid is replaced and the toilet is used again, the running often returns.
Why Does a New Toilet Sometimes Run Randomly?
A new toilet that runs randomly is often affected by incorrect setup rather than wear. Misadjusted float height, improper chain length, or manufacturing residue inside the fill valve can all cause inconsistent shut-off. These issues are usually resolved by recalibrating the internal components rather than replacing them.
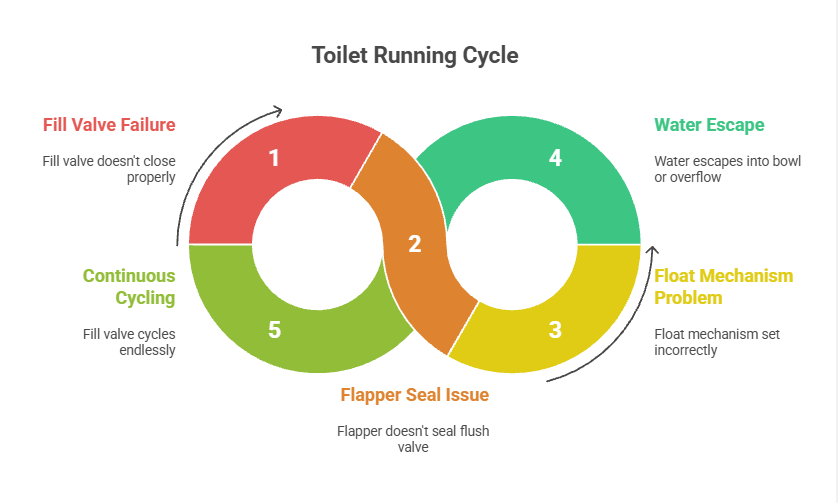
Why Does a Toilet Keep Running After the Flush Cycle Ends?
A toilet keeps running when the internal components cannot shut off the water flow. This usually happens because the fill valve isn’t closing properly, the flapper isn’t sealing the flush valve opening, or the float mechanism is set incorrectly. When these parts fail to synchronise, water continuously escapes into the bowl or overflow tube, forcing the fill valve to cycle endlessly.
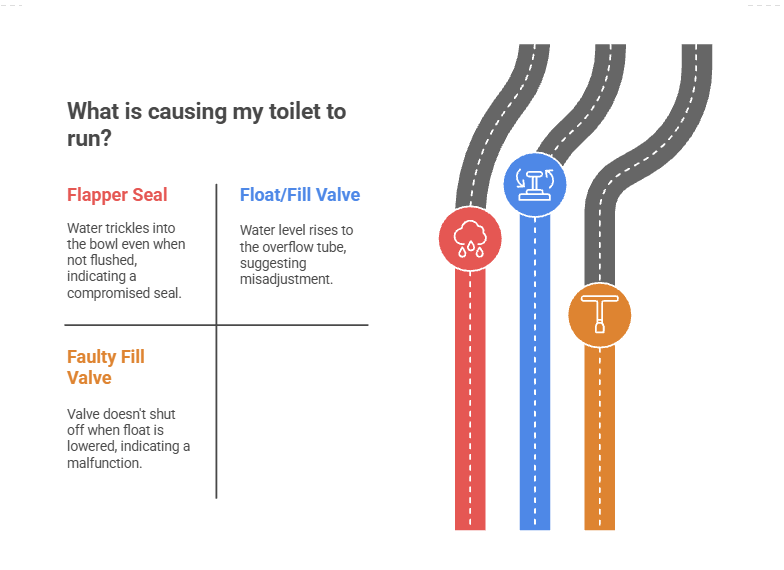
Why Does a Faulty Flapper Seal Cause a Toilet to Run?
The flapper creates a watertight seal at the bottom of the cistern. If the flapper becomes brittle, warped, mineral-coated, or misaligned, water leaks past it into the toilet bowl. Even a small gap between the flapper and the valve seat allows water to drain slowly, keeping the fill valve open to compensate. A worn flapper is one of the most common causes of a running toilet.
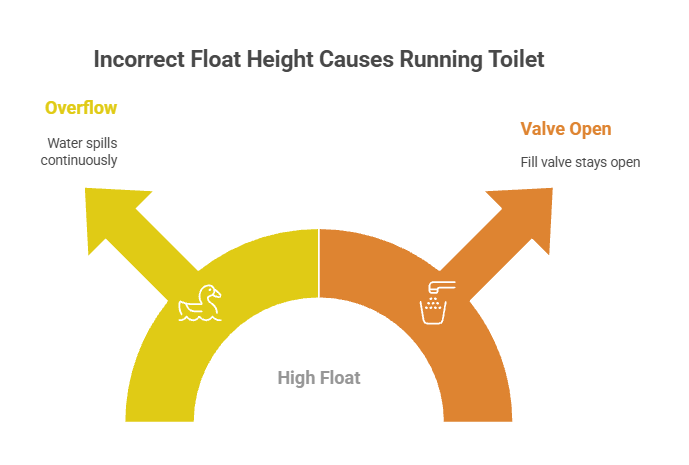
Why Does an Incorrect Float Height Lead to a Constantly Running Toilet?
The float controls when the fill valve shuts off. If the float is set too high, the water level rises past the overflow tube, causing water to spill continuously into the bowl. Because the tank can never reach its shut-off point, the fill valve stays open. If the float is sticking or bent, the valve may also fail to close on time.
Why Does a Worn or Dirty Fill Valve Make the Toilet Run?
The fill valve regulates how much water enters the cistern. Over time, sediment, debris, and wear inside the valve prevent it from shutting off fully. When this happens, water continues feeding into the tank even though the correct level has been reached. A faulty fill valve often creates hissing, trickling, or spraying sounds inside the cistern.
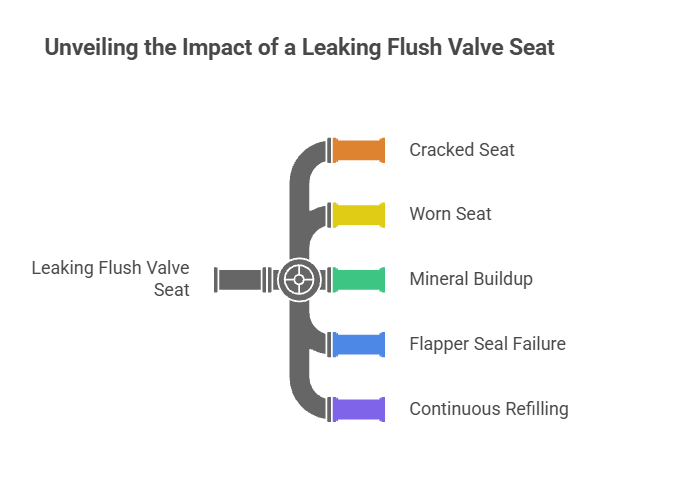
Why Does a Leaking Flush Valve Seat Keep the Toilet Running?
The flush valve seat is where the flapper rests. If the seat is cracked, worn, or covered with mineral buildup, the flapper cannot seal properly. Even if the flapper is new, a damaged valve seat allows water to escape, forcing the fill valve to refill the tank repeatedly.
Why Does a Stuck or Overly Tight Chain Prevent a Toilet From Stopping?
The lift chain connects the flush handle to the flapper. If the chain is too tight, it prevents the flapper from sealing fully. If it’s too loose, the flapper may not drop into the correct position after flushing. In both cases, water continues leaking into the bowl, causing constant running.
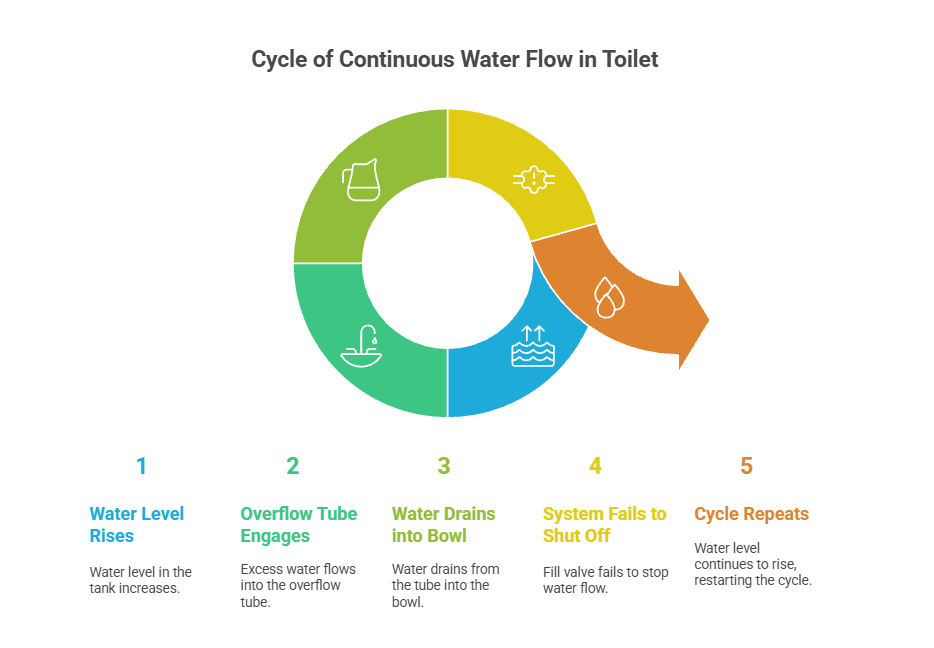
Why Does Water Flow Into the Overflow Tube Non-Stop?
If water pours into the overflow tube constantly, the water level is too high or the fill valve is malfunctioning. The overflow tube prevents flooding by diverting excess water into the bowl, but continuous flow indicates that the system never reaches the shut-off point.
How Can You Diagnose What’s Making Your Toilet Run?
To diagnose the problem, remove the cistern lid and observe the water movement. If water trickles into the bowl even when the toilet isn’t being flushed, the flapper seal is likely compromised. If the water level rises to the top of the overflow tube, the float or fill valve is misadjusted. If the fill valve doesn’t shut off even when the float is lowered manually, the valve is faulty. Watching how each component behaves during and after a flush helps pinpoint the exact failure.
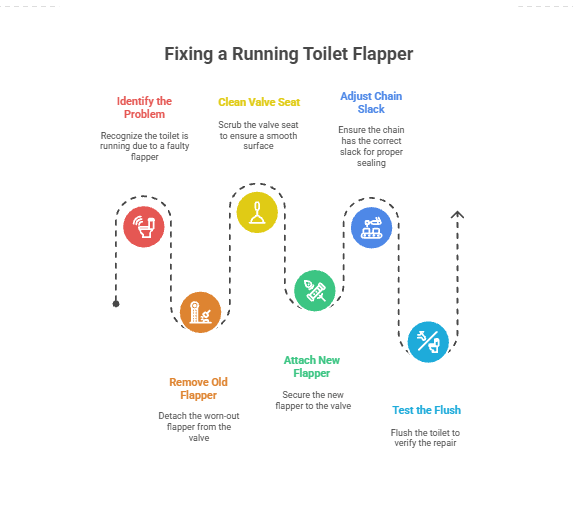
How Can You Fix a Running Toilet Caused by a Faulty Flapper?
Replacing a flapper is one of the simplest repairs. Removing the old flapper, cleaning the valve seat, and attaching a new flapper usually restores a proper seal. Ensuring the chain has the correct amount of slack allows the flapper to rise fully during the flush and seal properly afterwards.
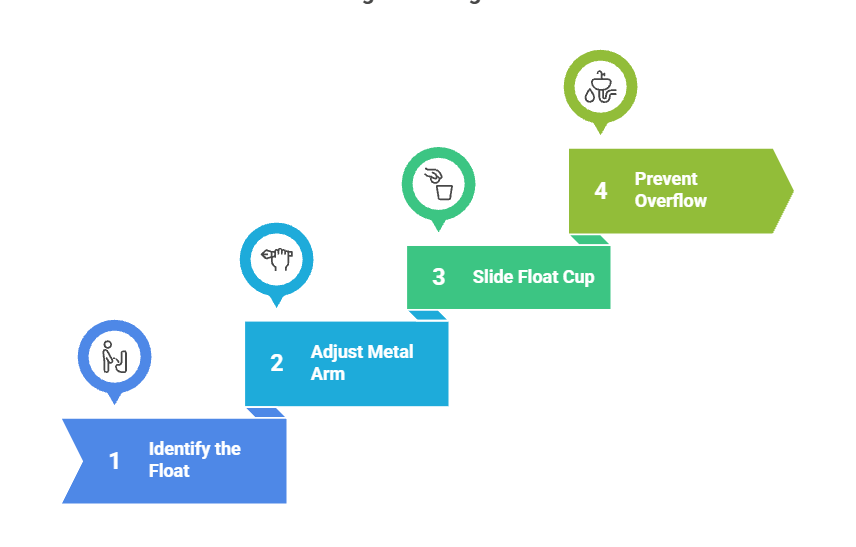
How Can You Fix a Running Toilet Caused by a High Float Level?
Adjusting the float height ensures the tank stops filling at the correct water level. On older systems with a metal float arm, gently bending the arm downward lowers the water line. On modern systems, sliding the float cup down the fill valve shaft achieves the same result. Correct float height prevents water from spilling into the overflow tube.
How Can You Fix a Running Toilet Caused by a Faulty Fill Valve?
Cleaning the fill valve can sometimes restore proper operation, especially if the issue was caused by sediment. However, worn or cracked valves must be replaced. Installing a new fill valve restores correct water regulation and eliminates continuous running.
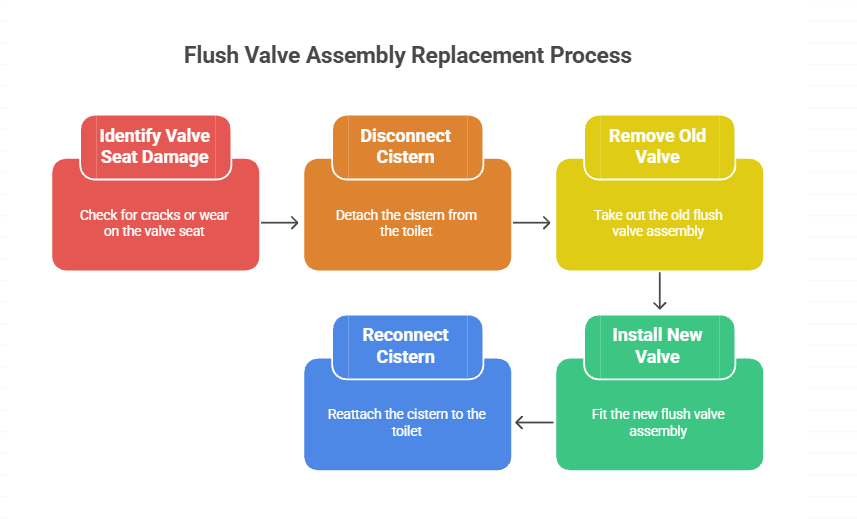
When Should You Replace the Entire Flush Valve Assembly?
If the flush valve seat is cracked or severely worn, replacing the flapper alone won’t stop the leak. Installing a complete flush valve assembly requires disconnecting the cistern from the toilet, removing the old valve, and fitting a new one. This provides a long-term seal and prevents repeated running.
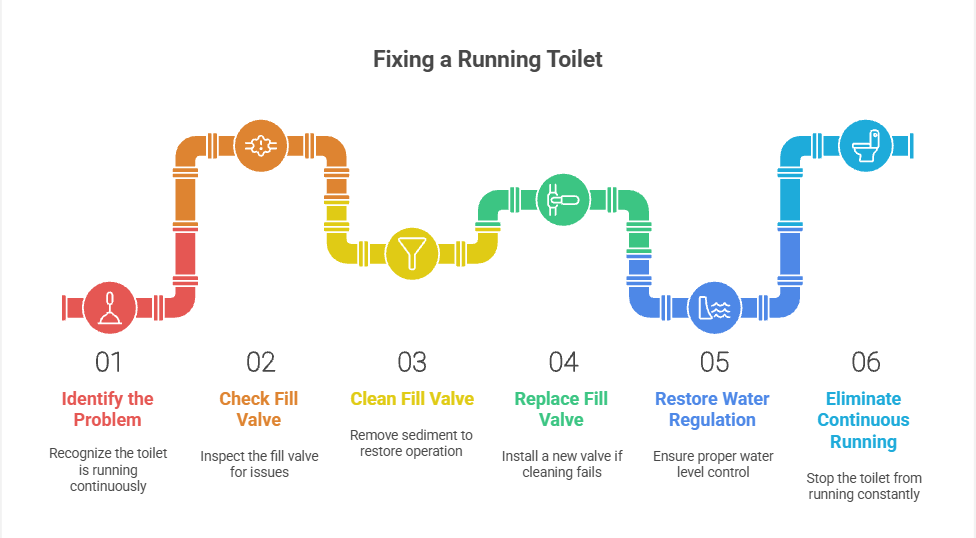
How to Stop a Running Toilet
Stopping a running toilet requires identifying which internal component is failing and correcting it properly. While the symptoms may sound similar, the fix depends on whether the issue comes from the flapper, fill valve, float, chain, or flush valve seat. Addressing the correct part prevents repeated running and unnecessary replacements.
Step 1: Check the Flapper Seal
If water is leaking into the bowl, the flapper is often the cause. Inspect it for warping, cracks, mineral buildup, or stiffness. Clean the valve seat beneath it and replace the flapper if it no longer seals flat. Ensure the flapper closes fully after each flush.
Step 2: Adjust or Inspect the Chain
The lift chain should have slight slack when the flapper is closed. If it’s too tight, the flapper stays partially open. If it’s too loose, the flapper may not seat correctly. Adjusting the chain length allows the flapper to lift fully and seal properly once the flush finishes.
Step 3: Adjust the Float Height
If water is flowing into the overflow tube, the float is set too high or moving incorrectly. Lowering the float stops excess water from spilling into the overflow and allows the fill valve to shut off at the correct level. Make sure the float moves freely and isn’t rubbing against the cistern wall.
Step 4: Inspect the Fill Valve
A fill valve that won’t shut off completely will cause constant or intermittent running. Sediment buildup or internal wear prevents proper sealing. Cleaning the valve may help temporarily, but worn valves usually need replacement to restore reliable shut-off.
Step 5: Examine the Flush Valve Seat
If the flapper has been replaced but the toilet still runs, the flush valve seat may be damaged or rough. Mineral deposits, cracks, or corrosion prevent a watertight seal. In these cases, replacing the entire flush valve assembly provides a long-term fix.
Step 6: Test After Each Adjustment
After making one adjustment or replacement, flush the toilet and observe how the system behaves. Water should stop flowing once the cistern refills, with no trickling into the bowl or overflow tube. Testing step by step prevents unnecessary part changes.
How Much Does It Cost to Fix a Running Toilet?
The cost to fix a running toilet depends on which component needs repair and whether professional help is required. Minor fixes such as replacing a flapper or adjusting the float are relatively inexpensive. More complex issues involving the fill valve, flush valve assembly, or internal damage cost more due to labour and parts.
Delaying repairs often increases costs, as continuous running accelerates wear on other components and raises water bills significantly over time.
Is It Bad If My Toilet Keeps Running?
Yes, a toilet that keeps running should always be addressed. Even a slow internal leak can waste hundreds of litres of water each day. Beyond higher water bills, constant running puts extra strain on valves, seals, and fittings, increasing the likelihood of further failures.
In some cases, long-term running can lead to mineral buildup, noise issues, and damage to internal components that would otherwise last much longer.
What Happens If You Ignore a Running Toilet?
Ignoring a running toilet allows a small mechanical fault to become a larger system failure. Rubber components continue to degrade, valves wear unevenly, and water loss accumulates quietly. Over time, this can result in:
- Significantly higher water usage
- Increased wear on the fill valve and flush mechanism
- Repeated failures even after part replacements
- The need for more extensive internal repairs
Early intervention prevents escalation and keeps repairs simple.
When Is It Time to Call a Plumber for a Running Toilet?
Professional assistance for toilet replacement in Sydney is needed if the toilet continues running after replacing the flapper, adjusting the float, and installing a new fill valve. Persistent leaks, damaged internal parts, cracked cisterns, or corroded flush valve seats often require expert repair. Our certified plumber at Quintessential Plumbing can also identify hidden issues such as supply line pressure problems or structural tank damage.
FAQ: Causes of a Running Toilet and How to Fix It
Why does my toilet make a constant hissing noise even when it hasn’t been flushed?
A continuous hiss indicates the fill valve is struggling to shut off. Sediment buildup or internal wear prevents the valve diaphragm from sealing properly, allowing water to flow constantly into the cistern.
Why does water keep trickling into the toilet bowl long after the flush?
If water trickles into the bowl, the flapper is not sealing the flush valve opening. The flapper may be warped, coated in mineral deposits, or misaligned, preventing a watertight seal.
Why does my toilet run intermittently throughout the day?
Random refilling, also known as “ghost flushing,” happens when water leaks slowly from the cistern into the bowl. As the water level drops, the fill valve reactivates. This is usually caused by a deteriorating flapper or a cracked flush valve seat.
Why does adjusting the float height fix some running toilets?
The float determines when the fill valve shuts off. If the float is set too high, the water rises to the overflow tube and spills continuously into the bowl. Lowering the float stops excess water from entering the overflow tube.
Why does my toilet still run after replacing the flapper?
If the toilet continues running after a new flapper is installed, the valve seat may be damaged or covered in residue. A rough or cracked seat prevents the flapper from sealing properly.
Why does my toilet run only at night or early morning?
Lower water pressure or temperature changes can affect older fill valves, causing them to leak intermittently. Small leaks inside the cistern become more noticeable during quiet hours.
Why is my toilet running even though the water level looks normal in the cistern?
A running sound with a normal water level often suggests the fill valve is leaking internally, releasing a thin stream of water that isn’t visible unless inspected closely.
Why does the toilet run when the chain is too tight or too loose?
If the chain is too tight, the flapper stays partially open. If it’s too loose, the flapper may not settle back into place. Both conditions allow water to escape continuously into the bowl.
Why does sediment in the water supply cause a running toilet?
Sediment from old pipes or tank water can clog the fill valve’s internal mechanisms, preventing it from closing fully. This leads to constant water flow and a noisy cistern.
Why does replacing the fill valve fix many running toilet issues?
The fill valve controls water entry into the cistern. When worn, cracked, or clogged, it fails to shut off. Installing a new valve restores proper shut-off action and eliminates constant filling.
Why does my toilet run after every flush for several minutes?
A slow stop indicates the flapper takes too long to settle or the water level is set too high. Misadjusted floats or slow-falling flappers prolong the refill cycle unnecessarily.
Why does water enter the overflow tube if the toilet fills too high?
When the water level exceeds the top of the overflow tube, excess water dumps directly into the bowl instead of stopping at the set level. This means the float height or fill valve shut-off is incorrect.
Why does my toilet make bubbling noises during a running cycle?
Bubbling sounds often point to air being drawn through the overflow tube due to turbulence caused by continuous water movement. This also suggests a high water level or internal valve leak.
Why does the toilet continue running after cleaning the cistern?
If the cistern was cleaned using in-tank tablets or strong cleaners, the chemicals may degrade rubber seals, including the flapper. Damaged seals cause leaks that lead to constant running.
Why does the toilet randomly stop running when the lid is removed?
Touching or shifting the lid can temporarily move the float or chain into a better position, masking the problem. Once the lid is replaced, the misalignment often returns.
Why does the toilet run after replacing the float?
If the replacement float is not calibrated correctly or is obstructed by the cistern wall, it may not rise freely. This stops the shut-off mechanism from engaging.
Why does my toilet run, but the bowl water level looks low?
Cistern leaks often go unnoticed in the bowl because the leak is small but constant. Low bowl water can be unrelated and caused by siphon jet blockages or evaporative loss.
Why does my toilet keep running even after turning the supply valve down?
Reducing water flow doesn’t fix the underlying issue. The fill valve or flapper still leaks, so the toilet continues to run slowly despite the lower pressure.
Why do old toilets run more frequently than newer models?
Age-related wear on flappers, valves, gaskets, and seals makes older toilets more prone to leakage. Newer toilets use improved materials designed to resist mineral buildup and degradation.
Why should a plumber inspect a toilet that keeps running despite multiple part replacements?
Persistent running indicates structural issues such as a warped flush valve seat, cracked cistern, deteriorated overflow tube, or hidden supply line problems that require professional tools and expertise.
Discover More About Toilet Plumbing Issues:
What Things Should You Never Flush Down the Toilet?
What Causes a Running Toilet and How Can You Fix It?
How Can You Unblock a Badly Blocked Toilet?
What Should You Do When Your Toilet Won’t Flush?
Toilet Leaking at the Base? Troubleshooting Guide
Unclogging a Toilet Without a Plunger: A Complete Guide
Guide to Unclogging a Bathroom Sink
Slow-Filling Toilet? Here’s Why and How to Fix It
Guide to Testing a Toilet Flush Valve for Sydney Homes
21 Nov. 2025
How Can You Unblock a Badly Blocked Toilet?
A severely blocked toilet can feel overwhelming, especially when the water level rises close to overflowing. A deep obstruction in the trap or sewer line stops water from draining and prevents flushing entirely. Understanding what’s causing the blockage and which techniques work best allows you to clear the blockage safely and avoid damaging the toilet. This guide explains why severe blockages occur and the steps to restore proper flow. Find out more about Sydney’s Best Bidet Installation Plumbing Expert.
Why Do Toilets Become Badly Blocked?
A toilet becomes severely blocked when something restricts the trapway or the waste pipe beyond the bowl. Excessive toilet paper, wipes, sanitary items, or foreign objects can form a dense obstruction. Older drains with narrower diameters or rough internal surfaces are more prone to catching debris. Low-flow toilets, slow siphon action, and poor venting also contribute to major blockages by preventing waste from moving effectively through the trap.
Why Does Water Rise Instead of Flushing When the Toilet Is Badly Blocked?
When the trap is obstructed, water cannot pass through the bend and into the drain. The bowl fills instead, rising dangerously high. Because the siphon cannot form, the flush simply pushes more water into the bowl rather than pulling water down the drain. This rise-and-stall behaviour is a key indicator of a severe blockage.
How Can You Stop a Badly Blocked Toilet From Overflowing?
Before attempting to clear the blockage, preventing overflow is essential. Turning off the water supply tap behind the toilet stops the cistern from refilling. If the toilet has already been flushed, waiting for the water level to slowly drop often gives enough room to begin clearing the obstruction safely.
Why Is a Heavy-Duty Plunger Effective for Bad Blockages?
A flange or accordion-style plunger creates a stronger seal and more pressure than a standard cup plunger. When pressed firmly into the bowl’s outlet, it generates a force that pushes and pulls water against the obstruction. This hydraulic action dislodges compacted material and encourages it to move through the trap. Several forceful plunges may be needed before the water starts draining.
Why Might a Toilet Auger Be Necessary for Deep or Stubborn Blockages?
A toilet auger reaches deeper into the trap and the waste line beyond the bend. Its flexible shaft and angled tip can break apart solid blockages or hook onto foreign objects. When the auger meets resistance, turning the handle helps either pull the obstruction out or push it through into the wider pipe, where water pressure can carry it away. This is more effective than plunging alone for wipes, toys, or hardened debris.
How Can Hot Water and Dishwashing Liquid Help Loosen a Severe Clog?
Hot water softens dense toilet paper and organic matter. Dishwashing liquid coats the trapway and reduces friction. Pouring hot, but not boiling, water into the bowl gradually heats the blockage, making it more pliable. The soapy mixture lubricates the trap and helps a tightly packed obstruction slide through more easily. This method also prepares the blockage for plunging by reducing its resistance.
Why Does the Baking Soda and Vinegar Reaction Work on Some Bad Blockages?
Baking soda and vinegar create a foaming reaction that can help break down organic waste and paper buildup. While this method may not remove very large or solid objects, it loosens compressible material inside the trap. Allowing the mixture to sit for thirty to sixty minutes softens the obstruction, making plunging or augering more effective.
How Can Removing Excess Water Help You Clear a Severe Blockage?
If the bowl is full, using a small container or wet/dry vacuum to lower the water level makes room for plunging or adding hot water safely. Lowering the water level also helps you gauge whether the obstruction has shifted after each attempt by monitoring water movement more clearly.
Why Should You Avoid Chemical Drain Cleaners in a Badly Blocked Toilet?
Chemical drain cleaners can cause strong reactions and generate heat that may damage the porcelain or the toilet’s internal seals. They are often ineffective against solid blockages such as wipes or foreign objects. Chemical cleaners also create hazardous splashes if used before plunging or augering.
When Should You Suspect the Blockage Is in the Main Sewer Line?
If other fixtures, such as the shower, bath, or sink, also drain slowly or gurgle, the blockage may be in the main sewer rather than inside the toilet. This often requires professional intervention because the obstruction is deeper in the drainage system and cannot be reached with household tools.
How Can You Tell When It’s Time to Call a Plumber for a Badly Blocked Toilet?
A professional toilet fitting service in Sydney is needed when plunging, augering, hot water techniques, and chemical-free treatments fail. If the blockage sits beyond the toilet’s trap, specialised equipment such as motorised augers or high-pressure jetting may be required. Odours, recurring blockages, or water backing up into other fixtures also indicate a problem deeper in the line.
What Should You Do to Prevent Future Severe Toilet Blockages?
Preventing major blockages begins with keeping non-flushable items, such as wipes, cotton buds, and sanitary products, out of the toilet. Using moderate amounts of toilet paper, maintaining good water pressure, and addressing early signs of slow flushing help prevent build-up. Households with older plumbing benefit from periodic drain inspections to catch problems before they worsen.
FAQ for How to Unblock a Badly Blocked Toilet
Why does my toilet water rise dangerously high before slowly draining?
A water rise without draining indicates a partial blockage in the trapway or immediately beyond it. The water tries to push through the obstruction, but because the flow is restricted, it slowly seeps past the blockage instead of flushing smoothly.
Why does plunging make the toilet water splash but not clear the blockage?
If air leaks around the plunger seal or the blockage is too deep for suction pressure to reach, plunging becomes ineffective. A poor seal or a blockage beyond the trap bend limits how much hydraulic pressure can be applied.
Why does the toilet refill normally, but won’t flush anything down?
A refill from the cistern means the water supply is fine, but the trapway or sewer line is blocked. Water entering the bowl can’t escape through the restriction, so flushing creates backflow instead of siphon action.
Why does my toilet get badly blocked even when I don’t flush wipes or foreign objects?
Excessive toilet paper, paper towels, low-flow toilet designs, poor venting, and narrow or older pipes can all cause blockages without foreign objects. Over time, organic waste can also compress into a dense obstruction.
Why do low-flow toilets block more severely than older high-flow toilets?
Low-flow toilets use less water per flush, reducing their ability to push waste through the trap. Dense waste or thick paper can remain lodged where a larger flush volume from older toilets would have cleared it.
How can I tell if the blockage is in the toilet trap or deeper in the sewer line?
If only the toilet is affected, the blockage is likely in the trapway. If multiple fixtures gurgle or drain slowly, such as the shower or sink, the blockage is probably deeper in the sewer line.
Why does my plunger create bubbles but no movement in the water?
Bubbles without movement show that the plunger isn’t creating a full seal over the trap opening. Without a tight seal, the plunger pushes air rather than transferring pressure to the blockage.
Why is a toilet auger more effective for severe clogs?
A toilet auger physically reaches the obstruction, unlike a plunger, which only applies force. The auger’s coil and hooked tip can break apart wipes, toilet paper masses, toys, and compacted debris lodged deep in the trap.
Why does adding hot water sometimes clear a severe blockage?
Hot water softens thick paper clumps and breaks down organic matter. When combined with dishwashing liquid, it lubricates the trapway, reducing friction and helping lodged material slide through the pipe.
Why should boiling water never be used to unblock a toilet?
Boiling water can crack porcelain due to sudden temperature changes and can warp plastic components inside the toilet. Hot, but not boiling, water is safe and just as effective.
Why does the water level drop slowly hours after a flush attempt?
A slow drop usually means water is gradually seeping past a compacted clog. This indicates the obstruction is tight but not completely solid, which often responds well to plunging or augering.
How do I know if a foreign object is causing the severe blockage?
If the blockage appeared suddenly, especially right after young children used the toilet, a foreign object is likely stuck. Toys, toothbrushes, and small containers often lodge in the trap where plunging alone cannot remove them.
Why do baking soda and vinegar help only with certain types of blockages?
The foaming reaction softens organic matter and dissolves soap scum, but cannot break apart wipes, plastic items, or compacted foreign objects. Chemical reactions work best for paper-based or organic blockages.
Why does my toilet make a gurgling sound before refusing to flush?
Gurgling indicates trapped air inside the drain line, often caused by a partial blockage or venting problem. As the obstruction worsens, the toilet eventually stops flushing altogether.
Why should I remove excess water before attempting to unblock a severe clog?
Lowering the water level gives space for plunging, prevents overflow, and allows hot water or cleaners to be added safely. It also makes it easier to observe changes in water movement during clearing attempts.
Why are chemical drain cleaners unsafe for toilet blockages?
Chemical cleaners generate heat and can damage toilet seals, warp plastic components, and crack porcelain. They also create hazardous splashes when plunging, making them unsafe for toilets.
Why does my toilet block repeatedly, even after successful plunging?
Recurring blockages indicate a deeper issue: rough pipe interiors, partial sewer obstruction, insufficient flush power, or wipes caught beyond the trap. A professional drain inspection may be needed.
Why does flushing cause water to back up into my shower or bath?
This means the blockage is in the main sewer line rather than the toilet. Wastewater cannot move further down the system, so it reverses into the lower drains in the bathroom.
Why should I call a plumber if my toilet is still blocked after augering?
If augering fails, the blockage is likely beyond the toilet’s reach, sitting deeper in the sewer line. Professional plumbers use CCTV drain cameras and jetting equipment to remove stubborn or extensive blockages.
Why does my toilet block more often in wet weather?
Heavy rain can overwhelm external drainage systems, causing slow sewer flow or temporary backpressure. This reduces the ability of waste to move efficiently through the line, making blockages more likely.
Discover More About Toilet Plumbing Issues:
What Things Should You Never Flush Down the Toilet?
What Causes a Running Toilet and How Can You Fix It?
How Can You Unblock a Badly Blocked Toilet?
What Should You Do When Your Toilet Won’t Flush?
Toilet Leaking at the Base? Troubleshooting Guide
Unclogging a Toilet Without a Plunger: A Complete Guide
Guide to Unclogging a Bathroom Sink
Slow-Filling Toilet? Here’s Why and How to Fix It
Guide to Testing a Toilet Flush Valve for Sydney Homes
21 Nov. 2025
What Should You Do When Your Toilet Won’t Flush?
A toilet that suddenly refuses to flush can be caused by anything from a simple mechanical issue in the cistern to a deeper blockage in the trap or drain line. Understanding what’s stopping the flushing mechanism helps you fix the problem quickly and avoid unnecessary damage or overflow. This guide explains why toilets fail to flush and the steps you can take to restore normal operation.
Why Does a Toilet Fail to Flush Even When the Handle Moves?
If the handle moves but nothing happens, the internal components that connect the handle to the flush valve may be disconnected. The lift chain may have snapped, come loose, or stretched. A broken handle arm can also prevent the flush valve from lifting. Without this lift action, water cannot be released from the cistern into the bowl, making the flush ineffective. Read more about bidet plumbing in Sydney.
Why Does a Toilet Not Flush When the Water Level in the Tank Is Too Low?
A proper flush requires enough water in the cistern to generate force. When the water level is too low, the flush loses power and may not clear the bowl. Low tank levels happen due to incorrect float settings, a partially closed shut-off valve, or a faulty fill valve that doesn’t refill the cistern properly.
What Happens When the Flapper or Flush Valve Isn’t Lifting Correctly?
The flapper or flush valve must lift fully to let water rush from the cistern into the bowl. A worn, warped, or misaligned flapper can prevent the lift needed for a full flush. Mineral buildup or debris around the valve seat can also limit movement, reducing the water flow and weakening the flush.
Why Does a Clog in the Toilet Trap Stop the Toilet From Flushing?
The trapway, the curved section inside the toilet base, helps create siphon action. When waste, wipes, or toilet paper accumulate inside the trap, it becomes blocked. A clogged trap restricts water movement, preventing the siphon from forming. As a result, water rises but cannot be pulled through the drain.
Why Does a Blocked Drain Line Prevent the Toilet From Flushing?
If multiple fixtures drain slowly or gurgle, the blockage may be deeper in the drain line rather than inside the toilet itself. Tree roots, collapsed pipes, accumulated wipes, or heavy blockages in the main sewer line can prevent flushing altogether because there’s nowhere for the wastewater to go.
Why Does the Toilet Bowl Water Level Affect Flushing Power?
A proper flush depends on the bowl water level. Too little water reduces siphon strength. Too much water can prevent siphon formation or cause overflow instead of flushing. Problems such as a blocked siphon jet, clogged rim holes, or a partial trap obstruction can alter bowl water levels and weaken the flush.
How Can You Diagnose Why Your Toilet Won’t Flush?
Checking the cistern first is the simplest way to diagnose the issue. Remove the lid and lift the handle, if the chain doesn’t move, it needs adjusting or reconnecting. Look at the water level and confirm it’s reaching the marked fill line. Inspect the flapper for wear or misalignment. If the cistern components look normal, the issue is likely a clog in the trap or drain. Performing a gentle test flush will show whether water can leave the bowl or is being obstructed.
How Can You Fix a Toilet That Won’t Flush Due to a Loose Chain or Handle?
If the lift chain has too much slack, it won’t raise the flapper high enough. Adjusting it to a proper tension allows the flapper to lift completely. If the handle arm is corroded or broken, replacing it restores proper movement. These are fast fixes that often restore full flushing power.
How Can You Resolve Flushing Problems Caused by a Faulty Fill Valve?
A fill valve that no longer refills the cistern correctly must be cleaned or replaced. Sediment, age-related wear, or internal damage can slow the refill process or stop it entirely. Installing a new valve restores normal tank water levels and ensures enough pressure for a full flush.
What Should You Do If the Toilet Won’t Flush Because of a Bowl or Trap Clog?
Using a plunger is the first step, creating suction and pressure to dislodge the obstruction. If plunging fails, a toilet auger can reach deeper into the trap to break apart the blockage. If both methods fail, the clog likely sits further down the drain line and needs professional clearing.
When Should You Call a Plumber for a Toilet That Refuses to Flush?
Professional help is needed when multiple drains are affected, water backs up into the shower or bath, the toilet overflows repeatedly, or the cistern mechanisms are intact but the flush still fails. These signs often point to a deeper sewer issue, a collapsed pipe, or a stubborn obstruction requiring specialised equipment.
What Should You Know About Preventing Future Flushing Problems?
Toilet performance improves when non-flushable items are kept out of the bowl. Regular cleaning of rim holes, siphon jets, and cistern components prevents mineral buildup. Ensuring the water level stays consistent in the tank and addressing early signs of weak flushing helps prevent complete failure later.
FAQ: What to Do When Your Toilet Won’t Flush
Why does the flush handle feel loose and not trigger a flush?
A loose handle usually means the lift chain has disconnected or the handle arm has worn out. Without tension pulling the flapper, the cistern can’t release water into the bowl, resulting in a dead flush.
Why won’t my toilet flush even though the tank is full of water?
If the tank is full but the toilet doesn’t flush, the flapper may not be lifting high enough to release water. Issues like chain slack, a warped flapper, or mineral buildup around the valve seat can prevent proper water flow.
Why does the toilet produce a weak flush instead of a full one?
A weak flush often means insufficient water pressure, blocked rim holes, a clogged siphon jet, or a partially obstructed trap. Any restriction in water flow reduces the siphon effect needed for a strong flush.
Why does my toilet fill up but won’t drain when I flush?
A blockage in the trap or drain line prevents water from travelling past the S-bend. Instead of being pulled through the drain, the water rises in the bowl because the siphon action can’t form.
Why do low-flow toilets clog more easily and fail to flush properly?
Low-flow toilets use less water per flush. When there isn’t enough water volume or pressure, waste may not travel fully through the trapway. Dense waste or thicker toilet paper makes the problem worse.
Why does the water level drop inside the bowl before flushing?
A low bowl water level can indicate a crack in the trap, evaporation from rarely used toilets, or partial siphoning caused by a nearby drain issue. Low bowl levels reduce flushing strength substantially.
Why does my toilet gurgle when I try to flush it?
Gurgling suggests a blockage in the vent or drain line. Air becomes trapped in the plumbing system and escapes through the toilet during flushing, weakening the ability to form a proper siphon.
Why does flushing work sometimes and fail at other times?
Intermittent flushing often points to inconsistent tank water levels, float malfunctions, or partial drain blockages that shift position. Mineral deposits in rim holes can also cause unpredictable flush strength.
Why doesn’t my toilet flush fully after heavy use?
A lightly blocked trap or drain line may allow small flushes to pass but fail when more water or waste is introduced. This indicates a blockage forming deeper in the system.
Why is my toilet slow to refill after a failed flush?
A slow refill often indicates a faulty fill valve, sediment buildup in the supply line, or a partially closed shut-off valve. If the tank takes too long to fill, the toilet won’t flush effectively on the next use.
Why does pressing the flush handle harder not make the toilet flush?
The flushing mechanism is internal. Pressing harder doesn’t increase water flow; only the chain tension, flapper lift, and water level affect flush performance. If those components fail, force won’t change the outcome.
Why does the toilet bowl water rise dangerously high before slowly draining?
This is a sign of a partial drain blockage. The restriction slows water movement, causing it to rise before gradually being pulled through the limited opening.
Why does my toilet require multiple flushes to clear waste?
Multiple flushes usually signal weak siphon action due to clogged rim jets, a low water level in the cistern, worn flapper seals, or a partially obstructed trap.
Why can’t I unclog my toilet even after plunging?
If plunging doesn’t create enough suction or the blockage is too deep, a toilet auger may be needed. Wipes, foreign objects, or dense blockages often resist plunging and must be broken apart mechanically.
Why does the toilet hiss or refill randomly, even when it hasn’t been flushed?
This indicates a leak in the flapper or a failing fill valve. Small cistern leaks waste water and reduces the available volume for the next flush, causing flush failure.
Why does my toilet flush weakly after cleaning products were used?
Some cleaning tablets or in-cistern chemicals cause residue buildup that blocks rim jets over time. This restricts water flow during flushing and weakens the siphon.
Why does my toilet stop flushing completely after a storm or heavy rain?
Stormwater infiltration in sewer lines can raise pressure or cause temporary blockages, affecting toilet drainage. This often happens in older properties with clay pipes.
Why won’t my toilet flush after replacing the handle?
Replacing the handle often changes the chain length unintentionally. If the chain is too tight, the flapper won’t seal; if too loose, the flapper won’t lift. Both issues stop the flush from working.
Why does my toilet overflow instead of flushing when I press the handle?
Overflow indicates a blocked trap or main drain line. If water cannot move downward, it moves upward instead, creating an overflow hazard that requires immediate attention.
Why should I call a plumber when my toilet still won’t flush after trying DIY fixes?
If the problem isn’t inside the cistern or trap, the blockage likely sits deeper in the sewer system. Sydney toilet installers with professional equipment, such as CCTV cameras, augers, or jetting machines, are required to remove it safely.
Discover More About Toilet Plumbing Issues:
What Things Should You Never Flush Down the Toilet?
What Causes a Running Toilet and How Can You Fix It?
How Can You Unblock a Badly Blocked Toilet?
What Should You Do When Your Toilet Won’t Flush?
Toilet Leaking at the Base? Troubleshooting Guide
Unclogging a Toilet Without a Plunger: A Complete Guide
Guide to Unclogging a Bathroom Sink
Slow-Filling Toilet? Here’s Why and How to Fix It
Guide to Testing a Toilet Flush Valve for Sydney Homes
21 Nov. 2025
Toilet Leaking at the Base? Troubleshooting Guide
Why Is Your Toilet Leaking at the Base? What It Means and How to Fix It
A toilet leaking at the base means water is escaping from a failed seal, connection, or structural component instead of flowing directly into the drain. When you notice water around the base of the toilet or moisture pooling at the bottom, the leak is usually coming from beneath the toilet rather than from the bowl itself. Even a small toilet leaking from the base can cause hidden floor damage, mould growth, and structural issues if left unattended. Identifying why water is leaking from the bottom of the toilet is the first step toward fixing the problem correctly and preventing repeat leaks.
Why Is My Toilet Leaking at the Base?
A toilet leaking at the base indicates that the watertight barrier between the toilet and the drain has failed or that water is travelling down from another component and collecting at the bottom. The most common reasons include a damaged toilet seal, movement in the toilet base, a compromised flange, or water leaking from above and pooling underneath. In many cases, the leak becomes visible only after flushing, while in others, moisture slowly accumulates around the base over time.
What Causes Water to Appear Around the Base of the Toilet?
Water under the toilet base usually comes from one of three sources: a failed wax seal, a loose or misaligned toilet, or a hidden leak that travels downward before surfacing. A deteriorated seal allows wastewater to escape during flushing, while a shifting toilet breaks the compression needed to keep the seal intact. In some situations, leaks from the tank, bolts, or supply line run down the porcelain and collect at the base, making it appear as though the toilet itself is leaking from the bottom.
Why Does Water Appear Around the Base of the Toilet?
Water around the base typically indicates that the seal between the toilet and the floor is failing, the toilet is loose, or water is escaping from a nearby source and pooling at the bottom. The most common reasons include a deteriorated wax seal, loose tee bolts, cracks in the base, or condensation from the cistern dripping downward. Each cause produces different leakage patterns that help you identify the issue.
How Serious Is a Toilet Leaking From the Bottom?
A toilet leaking from the bottom should never be ignored, even if the leak appears minor. Water that seeps beneath tiles or vinyl flooring can soak into the subfloor, weakening structural supports and causing long-term damage. Because the leak often remains hidden, homeowners may not realise the extent of the issue until flooring becomes soft, tiles loosen, or odours develop. Addressing a leaking toilet base early prevents costly repairs and reduces the risk of ongoing moisture damage.
Why Does the Toilet Base Look Wet but the Bowl Seems Fine?
When the base of the toilet is wet but the bowl shows no visible cracks, the problem is almost always beneath or behind the toilet. The bowl may function normally while water escapes through a failed seal or flange during use. In other cases, water travels along grout lines or beneath flooring before appearing at the base, making the leak location misleading. This is why a toilet leaking at the base often requires inspection beyond the visible water.
Why Is My Toilet Leaking Around the Base When Flushed?
When a toilet leaks around the base when flushed, the problem is almost always related to the seal beneath the toilet. During flushing, wastewater passes through the bowl and into the drain opening. If the wax ring or toilet seal is damaged, misaligned, or no longer compressed evenly, water escapes at the base instead of flowing directly into the waste line. This type of leak usually does not appear between flushes, making it one of the clearest indicators of a failed seal or flange connection.
Why Is My Toilet Leaking From the Base Without Flushing?
A toilet leaking at the base without flushing points to a different source than a seal failure alone. Continuous moisture around the base often comes from a leaking supply line, condensation dripping from the cistern, or a slow leak from tank bolts or gaskets above. Water from these components runs down the porcelain and pools at the bottom, creating the appearance of a base leak even when the toilet is not in use. Identifying whether water appears during flushing or constantly is key to narrowing down the cause.
Why Does My Toilet Leak at the Base Only After Multiple Flushes?
If the toilet leaks from the base only after repeated flushing, the wax seal may be partially intact but no longer capable of handling higher water volume or pressure. Repeated use increases flow through the drain opening, allowing water to bypass a weakened seal. This often occurs when the toilet has shifted slightly, the flange sits too low, or the seal has been compressed unevenly. Over time, these intermittent leaks become more frequent and more damaging.
Why Is Water Pooling at the Front or Back of the Toilet Base?
The location of moisture around the base can help identify the source of the leak. Water pooling at the front of the toilet base often indicates a compromised seal or movement in the toilet that allows water to escape forward during flushing. Water collecting behind the toilet is more commonly linked to tank bolts, the tank-to-bowl gasket, or the supply hose dripping downward. Although the water appears at the base, the leak may originate higher up and migrate along the floor or porcelain surface.
Why Does the Leak Appear and Then Disappear?
A leak that starts and stops usually means the seal beneath the toilet is only partially failing. A weakened wax ring may hold under light use but fail during stronger flushes, heavy use, or slight shifts in the toilet position. Temperature changes and bathroom humidity can also influence how water behaves, especially when condensation is involved. These inconsistent leaks often worsen over time as the underlying issue continues to deteriorate.
Why Is the Leak Worse After a Hot Shower or High Humidity?
After hot showers, condensation can form on the outside of the cistern when cool water inside the tank meets warm, humid air. This condensation drips down the toilet and collects around the base, mimicking a leak even when the seal is intact. While condensation does not involve wastewater, it can still cause floor damage if left unaddressed. Proper ventilation helps reduce this issue, but persistent moisture should still be inspected to rule out a genuine toilet base leak.
Why Is My Toilet Leaking From the Bolts?
If your toilet is leaking from the bolts, the problem usually lies with the seal or stability of the toilet rather than the bolts themselves. Tee bolts secure the toilet to the floor and keep the wax ring evenly compressed. When bolts loosen, corrode, or shift inside the flange slots, the toilet can move slightly during use. This movement breaks the seal beneath the toilet, allowing water to escape around the base during flushing. Rusted or spinning bolts are a strong indicator that the toilet is no longer properly anchored.
Why Is the Toilet Flange Leaking From the Bottom?
A toilet flange leaking from the bottom occurs when the flange is cracked, corroded, installed too low, or no longer firmly attached to the subfloor. The flange is designed to support the toilet and provide a solid surface for the wax ring to seal against. If it sits below floor level or flexes under weight, the wax seal cannot maintain proper compression. This causes wastewater to leak beneath the toilet and appear around the base, even if the toilet bolts feel tight.
What Causes a Toilet Flange Leak to Keep Coming Back?
Recurring toilet flange leaks often happen when the wax ring is replaced without fixing the underlying flange issue. A damaged or sunken flange allows repeated seal failure, no matter how many times the wax ring is changed. In some cases, corrosion around the bolt slots prevents proper anchoring, causing the toilet to shift over time. Permanent repairs may require a flange extender, flange replacement, or subfloor reinforcement to stop ongoing leaks.
Why Is My Toilet Leaking From the Tank Hose?
A toilet leaking from the tank hose can easily be mistaken for a base leak. The water supply line connects the shut-off valve to the cistern and can drip due to worn washers, loose fittings, or corrosion. Water from the hose runs down the back of the toilet and pools at the bottom, making it appear as though the toilet is leaking from underneath. Checking the hose connection and valve area helps rule out this common cause.
Can the Water Supply Line Leak at the Base of the Toilet?
Yes, a toilet water supply line leaking at the base often originates where the hose connects to the shut-off valve or the cistern inlet. Even slow drips can travel along the hose or porcelain surface and collect around the base. These leaks usually continue whether or not the toilet is flushed, which helps distinguish them from seal or flange failures. Moisture behind the toilet or along the wall is a strong indicator of a supply-side issue.
Why Is My Toilet Leaking at the Base of the Tank?
A toilet leaking at the base of the tank is commonly caused by a failed tank-to-bowl gasket or loose tank bolts. When this gasket deteriorates, water escapes each time the tank refills after flushing. The water then runs down the bowl and collects at the floor, mimicking a toilet base leak. Tightening tank bolts evenly or replacing the gasket usually resolves this issue, provided the porcelain is not cracked.
How Can You Tell if the Leak Is From the Drain or Another Component?
To determine whether the toilet drain is leaking or the issue comes from another component, dry the entire toilet and surrounding floor. Flush once and observe carefully. Water appearing immediately at the base points to a seal or flange issue, while delayed dripping from behind or above suggests tank or supply line leaks. Identifying the true source prevents unnecessary seal replacements and repeat repairs.
Why Can a Damaged Wax Ring Cause a Leak at the Base?
The wax ring (or wax seal) creates a watertight connection between the toilet and the flange on the floor. When this ring becomes brittle, compressed, or misaligned, wastewater escapes during flushing and appears around the toilet’s base. A failing wax ring often causes water to seep out only when the toilet is flushed rather than constantly, which helps distinguish this leak from supply line issues.
Why Do Loose Toilet Bolts Lead to Leaks Around the Base?
Toilets are secured to the floor with two tee bolts located on either side of the base. If these bolts become loose, the toilet shifts even slightly when used. This movement breaks the seal created by the wax ring, allowing water to escape. Loose bolts may also cause the toilet to rock or make a slight clicking sound when sat on, indicating the seal has been compromised.
How Can a Cracked Toilet Base Cause Water to Pool on the Floor?
Cracks in the porcelain near the base, whether hairline or visible, allow water to leak from the bowl or trap area. These cracks may develop from impact damage, uneven tightening of bolts, or long-term stress. Even if the toilet still functions normally, a cracked base can cause persistent leaks because water seeps through the fracture whenever the toilet is used.
Why Might the Cistern Be Causing the Leak at the Base?
Sometimes, a leak that appears to come from the base actually originates higher up. A faulty tank-to-bowl gasket, loose tank bolts, cracked cistern, or dripping supply line can create water trails that run down the toilet and collect at the bottom. Condensation from the cistern can also drip onto the floor, especially in humid bathrooms, making it appear as though the base is leaking.
How Does a Misaligned or Damaged Toilet Flange Cause Base Leaks?
The toilet flange anchors the toilet to the plumbing system. If the flange is too low, cracked, or corroded, the wax ring cannot create a proper seal. This causes water to escape during flushing, even when the toilet bolts are tight. A damaged flange often requires professional repair or a flange extender to restore proper height and sealing.
How Can You Diagnose the Source of a Toilet Base Leak?
To identify the problem, start by drying the base completely and flushing the toilet while observing where the water originates. If the water appears only during flushing, the wax ring or flange is likely the issue. If the leak continues without flushing, check the supply line, shut-off valve, and tank bolts. Inspect the toilet for rocking movement, visible cracks, or moisture trails along the porcelain. Shine a light behind the toilet to check for hidden dripping from the tank or hose.
How Can You Replace the Wax Ring to Stop a Base Leak?
Replacing a wax ring involves removing the toilet from the floor, lifting it carefully, cleaning the flange, and placing a new wax ring in position before reseating the toilet. Ensuring the toilet sits evenly and tightening bolts gently prevents future misalignment. Once the toilet is reinstalled, a flush test confirms whether the seal is watertight. A new wax ring solves most base leaks when flange height and toilet positioning are correct.
When Should You Tighten or Replace the Tee Bolts on the Toilet?
If the toilet rocks, shifts, or feels unstable, tightening the tee bolts can restore stability and reduce leakage. However, overtightening can crack the porcelain. If the bolts are rusted, stripped, or spinning loosely, they must be replaced. Stabilising the toilet ensures that the wax ring remains properly compressed and prevents the seal from failing again.
How Can You Tell if You Need to Replace a Cracked Toilet?
If the base or trapway has a structural crack that leaks when the toilet is used, the only permanent solution is to replace the toilet. Temporary adhesives can slow the leak, but cannot withstand long-term pressure or water exposure. A cracked base is considered a permanent failure point.
When Should You Call a Professional Plumber for a Toilet Base Leak?
If the leak continues after tightening bolts, if the flange is damaged, if the toilet rocks significantly, or if the wax ring needs replacement but the toilet is too heavy or difficult to remove, a professional plumber should step in. Persistent leaks, concealed floor damage, or visible rot around the toilet require expert repair to prevent long-term structural issues.
What Should You Know About Preventing Future Toilet Base Leaks?
Preventing base leaks involves ensuring the toilet remains tightly secured, avoiding flushing non-flushable items, and monitoring for early signs of movement. Replacing the wax seal if the toilet becomes loose and checking the supply line for drips helps prevent future leaks. Keeping the bathroom well-ventilated also reduces condensation that can mimic leak symptoms.
Things You Also Should Know About Toilet Leaking at the Base
Why Does Water Only Leak at the Base When I Flush the Toilet?
When water appears around the base only during flushing, the wax ring seal is usually compromised. The force of the flush sends water past the damaged wax ring and into the floor area instead of down the drain line.
Why Does My Toilet Leak at the Base Even Though the Floor Looks Dry at First?
A slow leak may seep beneath the tiles or vinyl before becoming visible. The flooring can temporarily absorb moisture, making it look dry while water continues accumulating underneath.
Why Does My Toilet Rock Slightly When I Sit On It and Then Leak at the Base Afterward?
A rocking toilet shifts the wax ring out of position. Once the seal is disturbed, every flush allows water to escape through gaps around the drain flange.
Why Is There a Sewage Smell Along With the Leak at the Base?
A damaged wax ring not only leaks water but also allows sewer gases to escape. The smell indicates that the air-tight barrier between the toilet and drain has failed.
How Do I Know if the Leak Is Coming From the Base or From the Tank and Running Downward?
Dry the toilet completely, then run a tissue along the underside of the cistern, tank bolts, and supply hose. If the tissue stays dry but the floor gets wet during flushing, the leak originates at the base, not the tank.
Why Is the Leak Worse After a Hot Shower or High Bathroom Humidity?
Condensation forms on the cistern when cooler tank water meets humid air. This condensation trickles down the toilet and collects around the base, mimicking a leak even when the wax ring is intact.
How Can a Misaligned Toilet Flange Create a Leak at the Base?
If the flange is installed too low, warped, or corroded, it prevents full compression of the wax ring. As a result, the seal cannot contain water during flushing.
Why Does Tightening the Toilet Bolts Sometimes Cause More Leakage?
Overtightening bolts can crack the porcelain base or deform the wax ring. Cracks produce continuous leaks, while a crushed wax seal no longer provides even compression around the drain.
Why Does My Toilet Leak at the Base Only After Heavy Use or Multiple Consecutive Flushes?
A weakened wax ring may seal lightly under normal conditions, but fails when higher volumes of water or stronger pressure pass through after repeated flushes.
How Do I Know if the Leak Is Caused by a Cracked Toilet Base Rather Than the Wax Seal?
If water appears even when the toilet is not flushed, or if moisture spreads from a hairline fracture, the porcelain is cracked. Wax ring leaks typically occur only during flushing.
Why Does Water Pool Behind the Toilet Rather Than at the Front?
Leaks from the tank-to-bowl gasket, tank bolts, or supply line often drip down the back and migrate toward the rear of the toilet. Pooling location helps identify the specific failed component.
Why Does the Leak Worsen After Reseating the Toilet?
If the toilet was not lowered evenly onto the wax ring, part of the seal may have folded or shifted. Wax seals cannot be reused once disturbed, so reseating without replacing the ring often makes leaks worse.
Why Does Flooring Damage Appear Even Though the Leak Looks Small?
Small, consistent leaks saturate the subfloor over time. Timber floors absorb moisture, swell, and eventually rot, even if only a small visible amount of water is present.
Why Do Some Wax Rings Fail Sooner Than Others?
Performance depends on wax density, toilet weight, flange height, bathroom humidity, and installation quality. Light-weight rings compress faster and may deteriorate more quickly.
Why Is There Water Appearing Near the Toilet, but the Base Itself Looks Dry?
Water can travel along grout lines or beneath flooring material before emerging in another spot. This is common when the leak originates at the flange area.
Why Does My Toilet Leak Again, Only Months After Replacing the Wax Ring?
Recurring leaks indicate the toilet flange may be damaged, too low, or shifting. Replacing the wax ring without addressing the flange issue leads to repeated failure.
Why Does the Toilet Shift Slightly Even Though the Bolts Feel Tight?
If the flange is broken or the bolt slots are corroded, the bolts cannot anchor properly. The toilet will still move despite tightening, causing leaks at the base.
Why Does the Leak Stop Temporarily and Then Start Again?
A partially sealed wax ring might hold under low pressure but fail during stronger flushes or when the toilet is used more frequently.
Why Should I Call a Plumber if Water Keeps Appearing at the Base Even After Tightening the Bolts?
Persistent moisture indicates deeper issues such as a collapsed flange, structural floor damage, or hidden cracks in the toilet, all requiring professional assessment.
If you need to replace or install a toilet in Sydney, contact Quintessential Plumbing for expert assistance.
Discover More About Toilet Plumbing Issues:
What Things Should You Never Flush Down the Toilet?
What Causes a Running Toilet and How Can You Fix It?
How Can You Unblock a Badly Blocked Toilet?
What Should You Do When Your Toilet Won’t Flush?
Toilet Leaking at the Base? Troubleshooting Guide
Unclogging a Toilet Without a Plunger: A Complete Guide
Guide to Unclogging a Bathroom Sink
Slow-Filling Toilet? Here’s Why and How to Fix It
Guide to Testing a Toilet Flush Valve for Sydney Homes
21 Nov. 2025
A Complete Guide to Unclogging a Toilet Without a Plunger
How Can You Unclog a Toilet Without a Plunger?
A clogged toilet without a plunger nearby can feel stressful, but most household blockages can be cleared safely using simple tools, hot water techniques, or chemical reactions. Understanding what causes toilet clogs and choosing the right unclogging method helps you restore normal flushing without damaging the bowl or pipes. This guide walks you through the most practical plunger-free strategies.
Why Do Toilets Become Clogged in the First Place?
Toilet clogs form when material becomes lodged in the trap, restricts water flow, or builds up in the drainage path. Excess toilet paper can expand and compress into the S-bend. Non-flushable items, such as wipes or sanitary products, resist breaking down and create solid obstructions. Waste can accumulate when water pressure is insufficient, especially in older or low-flow toilets that don’t deliver enough force to move material through the trap. Identifying the type of clog helps you choose the most effective clearing method.
What Household Tools or Materials Can Help When You Don’t Have a Plunger?
Many household items substitute effectively for a plunger. Hot water softens organic material and reduces the density of paper blockages. Dishwashing liquid acts as a lubricant, coating the trap and helping waste slide through. Baking soda and vinegar produce a reactive foam that breaks down organic buildup. A wire hanger can manually dislodge solid clumps, while a toilet brush can push shallow blockages deeper into the drain. Plastic wrap can create a temporary vacuum to mimic plunger suction when used correctly.
How Does the Hot Water and Dishwashing Liquid Method Clear a Toilet Clog?
Hot water loosens and softens material lodged inside the trap, while dishwashing liquid reduces friction by coating the internal surfaces. Heating a pot of water until it’s hot, but not boiling, ensures it won’t crack the porcelain. Adding dishwashing liquid to the bowl introduces a slippery layer that helps the clog slide through. Pouring the hot water from waist height increases the downward force. After waiting ten to fifteen minutes, the water level often drops as the softened material passes through. A flush usually confirms the blockage has cleared.
Why Can Baking Soda and Vinegar Break Down Certain Toilet Clogs?
Baking soda and vinegar create a chemical reaction that produces carbon dioxide bubbles. These bubbles help dislodge lightweight organic material, soften paper buildup, and break apart residue inside the trap. Pouring baking soda into the bowl, followed by vinegar, triggers the foaming reaction. Allowing it to work for thirty to sixty minutes gives it time to loosen the blockage. Adding hot water, not boiling, helps flush the softened material through. This method is ideal for small clogs but may be ineffective on wipes, sanitary products, or solid objects.
How Can a Wire Hanger Help with Stubborn Toilet Blockages?
A wire hanger works as a manual tool to physically break apart or hook onto material stuck in the trap. Straightening the hanger and creating a small hook at the end gives you a flexible reach into the drain opening. Guiding it gently prevents scratching the porcelain. When the hook catches toilet paper, hair, or foreign objects, you can pull them out or break them up. Once the obstruction is loosened, flushing the toilet usually restores normal flow.
When Is It Safe to Use a Toilet Brush to Push a Blockage Through?
A sturdy toilet brush can help push a soft clog deeper into the drain, especially when the blockage is located near the trap entrance. Inserting the brush towards the drain and applying firm pressure can break apart paper-based blockages. When the water level begins to drop naturally, the obstruction has shifted. A flush then confirms whether the drain is cleared. This method is useful when no tools are available, but it is less effective on large or solid clogs.
How Does the Plastic Wrap Vacuum Method Work Without a Plunger?
The plastic wrap method creates an air seal over the toilet bowl. Stretching plastic wrap tightly across the bowl traps air as the toilet fills. Pressing down on the wrap generates pressure similar to a plunger’s suction, forcing air downward into the trap. This pressure can push the clog further into the drain line. Once pressure is applied, removing the wrap and flushing the toilet typically confirms whether the suction dislodged the material.
How Can You Prevent Future Clogs When You Don’t Have a Plunger Handy?
Preventing clogs is easier than fixing them. Limiting excessive toilet paper use reduces paper compression inside the trap. Avoiding the flushing of wipes, cotton buds, sanitary items, and non-degradable materials prevents solid blockages. Pouring hot water and baking soda into the toilet occasionally can slow down organic buildup. Keeping the toilet lid closed stops foreign objects from falling in, especially in homes with children. Routine maintenance ensures the toilet continues to flush efficiently.
When Should You Call a Plumber Instead of Using DIY Unclogging Methods?
DIY methods work for most minor or moderate clogs. However, if the toilet repeatedly clogs, if water backs up into the shower or sink, or if none of the methods reduce the water level, the problem likely sits deeper in the plumbing system. Main line blockages, drain obstructions, foreign objects stuck beyond the trap, or structural pipe issues require professional inspection. A plumber can perform CCTV drain checks, hydro-jetting, or mechanical clearing to fully resolve the issue.
What Should You Know About Keeping a Toilet Functioning Properly Without a Plunger?
Unclogging a toilet without a plunger is achievable using hot water techniques, chemical reactions, or manual clearing tools found at home. Each method targets different blockage types, and understanding how clogs form helps you choose the right approach. Prevention is the most effective long-term strategy, while recurrent clogs are a sign that professional plumbing services may be needed.
FAQ for Unclogging a Toilet Without a Plunger
Why does my toilet clog even when I only flush toilet paper?
Some types of toilet paper absorb water quickly and expand, creating compact masses inside the trap. Older toilets or low-flow models often lack the pressure needed to push bulky paper through, leading to frequent clogs even with normal use.
Why does my low-flow toilet clog more often than a standard toilet?
Low-flow toilets use less water per flush, which reduces the force pushing waste through the trap and drain. If the waste volume or toilet paper amount exceeds the water pressure available, blockages form more easily.
How do I know if my toilet clog is caused by non-flushable items?
If the clog appears suddenly and doesn’t respond to hot water, dish soap, or baking soda and vinegar, the blockage may be caused by wipes, sanitary products, cotton buds, or foreign objects. These items do not break down and usually cause firm, unmoving blockages that require manual removal.
Why does hot water help unclog a toilet without a plunger?
Hot water softens toilet paper, organic waste, and fatty residue, reducing the blockage density. When combined with gravity and water pressure, the softened material is more likely to break apart and move through the trap.
Why must boiling water NOT be poured into a toilet?
Porcelain toilets can crack when exposed to sudden extreme temperature differences. Using boiling water increases the risk of structural damage, leaks, and costly repairs. Hot, but not boiling, water is safer.
Why is dishwashing liquid effective for unclogging a toilet?
Dish soap acts as a lubricant and surfactant. It coats the sides of the toilet trap, reducing friction and helping waste or paper slide more easily through the S-bend. The soap also breaks down greasy residue in the clog.
How long should I let hot water and dish soap sit in the toilet before flushing?
Around ten to fifteen minutes allows the soap to coat the trap and the hot water to soften the blockage. If the water begins to drop on its own, the clog has begun to loosen.
Why might the baking soda and vinegar method not work on every toilet clog?
Baking soda and vinegar dissolve organic material and light debris, but cannot break apart non-degradable items such as wipes, sanitary products, or small toys. The method works best for minor paper- or waste-based clogs.
How can I tell whether the baking soda and vinegar reaction is working?
If fizzing occurs and the toilet water level slowly drops, the mixture is breaking down material. If nothing changes after thirty to sixty minutes, the blockage is likely too solid or too deep for a chemical reaction to fix.
Why does a wire hanger help with deep or stubborn toilet clogs?
A wire hanger can physically break apart or hook onto clumps of toilet paper, trapped wipes, or lodged objects. It gives you control over the blockage, especially when the clog is stuck at the start of the trap.
How do I avoid scratching the toilet bowl when using a wire hanger?
Wrapping the tip of the hanger with a small piece of cloth or electrical tape prevents metal scratches on the porcelain. Gently guiding the hanger also avoids damaging the inner surface.
Why can a toilet brush sometimes clear clogs?
A firm toilet brush can act like a mini ram. Pushing it down into the trap opening generates force that can dislodge paper-based blockages. This works best for soft or shallow clogs.
How does the plastic wrap vacuum technique unclog a toilet?
Creating an airtight seal over the toilet bowl traps air inside. Pressing down on the wrap forces compressed air into the trap, pushing the clog deeper into the drain line, similar to how a plunger creates suction.
Why does the plastic wrap method fail on certain types of clogs?
If the blockage is caused by solid objects or if the drain is completely packed, the vacuum effect may not deliver enough pressure to move the obstruction. It also fails if the toilet bowl cannot form a proper air seal.
Why does my toilet keep clogging even after successfully clearing it with DIY methods?
Frequent clogs can signal issues with the toilet’s design, low-flow water volume, narrow drain lines, partial main-line obstructions, or ongoing use of non-flushable items. A deeper plumbing inspection may be required.
How do I know if the clog is deeper in the sewer line rather than inside the toilet?
If flushing causes water to rise in sinks, the shower, or the bath, the blockage is further down the main sewer line. DIY methods won’t solve this; professional drain clearing is needed.
Why does the water level rise dangerously high before it drains slowly?
This usually indicates a partial clog. The water pushes against the blockage, slowly leaking past it. The toilet appears close to overflowing, but eventually drains because the obstruction isn’t fully solid.
Can flushing repeatedly make a clog worse?
Yes. Multiple flushes add more water and pressure, which can cause overflowing. It can also force soft blockages deeper into the trap, making them harder to remove.
How can I prevent toilet clogs when I have young children?
Keeping the toilet lid closed prevents small toys, brush heads, and objects from being dropped in. Educating kids about what should and shouldn’t be flushed also reduces accidental blockages.
Why should I call a plumber if clogs keep occurring after DIY fixes?
Recurrence indicates deeper pipe issues such as invasive tree roots, collapsed drain sections, sewer-grade blockages, or a malfunctioning toilet mechanism. A plumber can diagnose these problems using CCTV inspections or specialised equipment.
For more serious issues or recurring clogs, it’s essential to contact a professional toilet plumbing contractor in Sydney to ensure that your plumbing system is functioning correctly. By taking the right steps, you can keep your toilet in good working order and avoid the hassle of clogs in the future.
Discover More About Sydney’s Blocked Drain Problems
Step-by-Step Guide to Clearing a Blocked Drain
Blocked Stormwater Drains: Causes, Solutions, and Preventative Strategies
How to Deal with Hair Clogging Your Drains in Sydney, NSW
Secret Tips to Safely Cleaning a Smelly Drain in Sydney Home
10 Essentials Tips to Preventing Blocked Drains
Guide to Unclogging a Kitchen Sink in Sydney
Using a Plumber’s Snake to Unclog Drains in Sydney
Guide to Unclogging a Bathroom Sink in Sydney
Guide to Unclogging Outdoor Drains For Sydney Homes
How to Unclog a Shower Drain in Sydney
A Complete Guide to Unclogging a Toilet Without a Plunger
Using Bleach to Unblock Your Toilet in Sydney
Guide to Clearing Toilet Paper Blockages Without a Plunger
Don’t Be Fooled by Drain Clearing Quotes in Sydney: 2026 Pricing Guide
Should You Use Chemical Drain Cleaners in Sydney
Effective Ways to Get Rid of Drain Flies for Good – A Homeowner’s Guide
Why Does Your Shower Drain Smell? Causes, Fixes, And Prevention Tips
Tips For Clearing Blocked Roof Drains In Sydney
What To Do If Your Drain Overflows In Sydney
How To Unblock A Floor Drain Quickly
Causes of Burst Pipes and How to Prevent Them
Why You Shouldn’t Ignore a Blocked Drain: Key Risks and Solutions
Why CCTV Drain Inspections Are the Future of Plumbing Solutions
How Construction Debris Causes Drain Blockages
Do Blocked Drains Attract Pests in Sydney?
How to Use a Wet-Dry Vacuum to Clear a Blocked Drain
Guide to Solving Common Rainwater Harvesting Drain Problems
How Sediment Build-Up Causes Drain Blockages
How to Retrieve Toys Stuck in the Tub Drain
Understanding Where Stormwater Drains Go
Guide to Common Causes of Low Water Pressure
How to Prevent Costly Storm Plumbing Emergencies
How to Retrieve Items Lost Down the Drain
How Does UV Pipe Relining Provide a Modern Solution to Pipe Repairs?
Step-by-Step Guide for Unclogging a Toilet in Sydney
21 Nov. 2025
Guide to Unclogging a Bathroom Sink in Sydney
Why Is Your Bathroom Sink Clogged, And What Can You Do To Clear It?
A bathroom sink clog usually starts small but becomes inconvenient once water begins pooling or draining slowly. Understanding why the clog forms and how to remove it prevents further plumbing issues and helps you fix the problem safely. With the right tools and correct method, most bathroom sink blockages can be cleared without damaging the pipes.
Why Do Bathroom Sinks Become Blocked In The First Place?
Bathroom sinks commonly clog because of accumulated materials inside the drainpipe. Hair, soap scum, toothpaste residue, shaving buildup, cosmetic products, and other debris often combine into a dense mass that settles inside the pipe or around the P-trap. Over time, this restricts the flow of water until the sink drains very slowly or stops draining altogether. Identifying the type of material causing the blockage helps you select the most effective clearing method.
What Tools Do You Need Before Attempting To Unclog A Bathroom Sink?
Unclogging a bathroom sink is easier when you have the correct tools on hand. A plunger helps create pressure against shallow blockages, while a drain snake reaches deeper into the drain line to pull out or break apart compacted material. Baking soda and vinegar are useful for dissolving minor organic clogs. A spanner helps remove the P-trap if manual clearing is required, and a bucket is essential for catching wastewater when the trap is dismantled.
How Can A Plunger Help You Clear A Blocked Bathroom Sink?
A plunger works by creating suction and pressure that can loosen blockages in the upper section of the drain. To use it effectively, ensure enough water is present in the sink to cover the plunger rim. Position the plunger directly over the drain opening, press firmly to create a seal, and pump it several times. This motion forces pressure against the clog, potentially dislodging it. If the water begins to drain normally, the blockage has been cleared. If nothing changes, the clog may be deeper.
Why Should You Remove The Drain Stopper When The Sink Doesn’t Unclog?
The drain stopper often collects large amounts of hair, toothpaste remains, and residue that contribute to early-stage clogs. If plunging is ineffective, removing the stopper allows direct access to the drainpipe. Some stoppers twist and lift out, while others disconnect from a linkage beneath the sink. Once removed, shining a light down the drain often reveals trapped debris you can manually clear out.
How Does Using A Drain Snake Help With Stubborn Sink Clogs?
A drain snake (also called a plumber’s auger) is designed to reach deeper clogs that form further down the drainpipe or inside the P-trap. Insert the snake into the drain and rotate the handle while slowly feeding it downward. When you feel resistance, you have likely encountered the clog. Twisting the handle helps the snake either break through the blockage or pull it out. Removing the debris often restores proper drainage immediately.
When Should You Use Baking Soda And Vinegar To Dissolve A Bathroom Sink Clog?
For mild blockages caused by soap scum, toothpaste buildup, or light organic material, baking soda and vinegar are an effective combination. The mixture creates a chemical reaction that helps dissolve debris coating the inside of the pipe. Pouring baking soda down the drain, followed by vinegar, and allowing it to foam for fifteen to thirty minutes softens the blockage. Flushing with hot water helps wash loosened material away. This method is gentle, environmentally friendly, and ideal for early-stage clogs.
Why Might You Need To Remove And Clean The P-trap under The Sink?
The P-trap, the curved pipe section beneath the sink, is a common place for clogs to accumulate because its shape allows debris to settle. If all other methods fail, removing the P-trap gives you direct access to the material causing the blockage. Placing a bucket underneath catches any trapped water. Loosening the nuts with a spanner allows the trap to detach so you can clear out debris inside. Cleaning the trap and reattaching it tightly often restores normal drainage.
How Can You Prevent Future Clogs From Forming In Your Bathroom Sink?
Preventing clogs is easier than clearing them. Using a drain cover reduces the amount of hair and debris entering the drain. Regularly removing and cleaning the drain stopper prevents buildup around the retention mechanism. Pouring boiling water down the drain occasionally helps dissolve soap scum and residue before it hardens. Simple maintenance significantly reduces the chance of future blockages.
When Is It Time To Call A Professional Plumber For A Sink Clog?
If the sink remains clogged after using a plunger, removing the stopper, snaking the drain, applying natural solutions, and cleaning the P-trap, the blockage may be deeper in the plumbing system. This can indicate a problem inside the main drain line or pipework beyond the bathroom. A professional plumber can diagnose the issue using CCTV drain inspection equipment or clear severe blockages with hydro-jetting. Calling a professional ensures the blockage is removed safely without causing further damage.
FAQ for Unclogging a Bathroom Sink
Why does my bathroom sink drain slowly, even when I don’t see anything blocking it?
A slow drain usually means debris is building deeper inside the drainpipe or P-trap. Hair, toothpaste residue, and soap scum form layers over time, narrowing the pipe even if the surface looks clear. The blockage may not be visible until you remove the stopper or inspect the trap.
Why does hair cause such stubborn clogs in a bathroom sink?
Hair strands bind easily with toothpaste, moisturiser residue, and soap scum, forming a dense mass that hardens over time. This material catches more debris as water flows past it, creating a stubborn clog inside the drain tube or around the P-trap.
How do I know if the clog is in the P-trap rather than the drain opening?
If clearing the stopper area or plunging doesn’t improve drainage, the clog is likely sitting inside the curved P-trap. This section naturally collects debris due to its shape and often causes slow or standing water even when the upper drain looks clean.
Why doesn’t my plunger work on deeper sink clogs?
A plunger only creates suction within the upper part of the drain. If the blockage is compressed inside the P-trap or further along the waste line, the pressure generated by the plunger won’t reach it. That’s when a drain snake becomes necessary.
Why does my bathroom sink clog more often than the kitchen sink?
Bathroom sinks typically accumulate hair, skincare oils, toothpaste residue, shaving debris, and soap scum, all of which bind together and form blockages faster than food-related kitchen waste. Smaller drainpipes in bathrooms also clog more easily.
How can I tell if the drain stopper mechanism is causing the blockage?
If the stopper feels tight, doesn’t lift smoothly, or brings up hair when removed, the blockage is forming around the stopper linkage. This is one of the most common sources of sink clogs because the mechanism traps strands and residue.
Why does baking soda and vinegar work for some clogs but not all?
The chemical reaction only dissolves organic and light debris, such as soap residue or early-stage buildup. Thick hair clumps, hardened toothpaste clusters, or grease-coated blockages often require physical removal with a snake or by cleaning the P-trap.
What does it mean if my sink gurgles when draining?
Gurgling usually indicates partial obstruction in the drain line or restricted airflow. As water pushes past the blockage, air becomes trapped and released in bursts. Gurgling often appears before the drain becomes completely blocked.
Why does my drain smell bad before it clogs?
A foul smell suggests organic matter is decaying inside the pipe. Hair, soap residue, and moisture create a perfect environment for bacteria. This smell often appears several days before water begins to drain slowly.
How do I know if I used the plunger incorrectly on my bathroom sink?
If water splashes but does not rise and fall rhythmically during plunging, the seal may not be tight. Removing the stopper, covering any overflow opening, and plunging with a full seal ensures proper suction.
Why does the P-trap clog more often than the rest of the pipe?
The P-trap’s curved shape is designed to hold water, but it also catches solids as they flow through. Hair and debris often settle at the lowest point, creating a blockage long before the rest of the pipe becomes obstructed.
Why does the clog return even after using a drain cleaner liquid?
Chemical cleaners often burn a hole through the clog without removing the entire mass. Hair and debris left behind quickly reaccumulate, causing the sink to clog again. Physical removal is more effective.
How do I know if I should snake the drain or remove the P-trap?
If the snake encounters resistance close to the drain opening, the blockage is likely in the vertical drain tube. If the snake passes freely but drainage still fails, the P-trap is the next likely location and should be removed for inspection.
Why does hot water help after using a baking soda and vinegar mixture?
Hot water flushes out softened soap scum and residue loosened by the chemical reaction. Without hot water, the loosened material may settle again further down the pipe.
Why do bathroom products make sink clogs form faster?
Toothpaste, heavy creams, hair oils, face washes, exfoliants, and shaving foam contain thick ingredients that stick to the pipe walls. Combined with hair, these materials create compacted blockages much quicker than water alone.
How do I know if the clog is too deep for DIY methods?
If the clog remains after plunging, snaking, removing the stopper, and cleaning the P-trap, the blockage is further down the main drain line. This requires professional tools like motorised augers or hydro-jetting.
Why does water back up into my bathroom sink when I run the shower?
This usually indicates a shared drain line blockage. The water from the shower travels through the same wastewater line and pushes trapped air and water back up through the sink.
Why does my sink drain slowly only at certain times of day?
Inconsistent drainage can be caused by fluctuating water pressure, intermittent vent blockage, or partial buildup that shifts position inside the pipe. These changes can temporarily improve or worsen drainage.
Why does my sink clog even when I use a drain cover?
Drain covers catch large debris, but do not prevent fine hair, shaving foam, toothpaste, and oils from slipping through. These materials can still combine inside the pipe and form blockages.
Why does my bathroom sink refill slowly after clearing a clog?
If the clog was deep, the pipe walls may still be coated with residue that restricts flow. Additional flushing or cleaning of the P-trap may be necessary to restore full drainage.
What Should You Know About Keeping Your Bathroom Sink Draining Properly?
Unclogging a bathroom sink is usually manageable with basic tools and household methods. Plunging, snaking, and natural cleaning solutions often solve the most common blockages. However, persistent or recurring clogs should not be ignored, as they can indicate deeper issues. Maintaining the sink regularly and addressing early signs of slow drainage help keep the plumbing system working efficiently.
Discover More About Blocked Drain Plumbing Issues:
Step-by-Step Guide to Clearing a Blocked Drain
Blocked Stormwater Drains: Causes, Solutions, and Preventative Strategies
How to Deal with Hair Clogging Your Drains in Sydney, NSW
Secret Tips to Safely Cleaning a Smelly Drain in Sydney Home
10 Essentials Tips to Preventing Blocked Drains
Guide to Unclogging a Kitchen Sink in Sydney
Using a Plumber’s Snake to Unclog Drains in Sydney
Guide to Unclogging a Bathroom Sink in Sydney
Guide to Unclogging Outdoor Drains For Sydney Homes
How to Unclog a Shower Drain in Sydney
A Complete Guide to Unclogging a Toilet Without a Plunger
Using Bleach to Unblock Your Toilet in Sydney
Guide to Clearing Toilet Paper Blockages Without a Plunger
Don’t Be Fooled by Drain Clearing Quotes in Sydney: 2026 Pricing Guide
Should You Use Chemical Drain Cleaners in Sydney
Effective Ways to Get Rid of Drain Flies for Good – A Homeowner’s Guide
Why Does Your Shower Drain Smell? Causes, Fixes, And Prevention Tips
Tips For Clearing Blocked Roof Drains In Sydney
What To Do If Your Drain Overflows In Sydney
How To Unblock A Floor Drain Quickly
Causes of Burst Pipes and How to Prevent Them
Why You Shouldn’t Ignore a Blocked Drain: Key Risks and Solutions
Why CCTV Drain Inspections Are the Future of Plumbing Solutions
How Construction Debris Causes Drain Blockages
Do Blocked Drains Attract Pests in Sydney?
How to Use a Wet-Dry Vacuum to Clear a Blocked Drain
Guide to Solving Common Rainwater Harvesting Drain Problems
How Sediment Build-Up Causes Drain Blockages
How to Retrieve Toys Stuck in the Tub Drain
Understanding Where Stormwater Drains Go
Guide to Common Causes of Low Water Pressure
How to Prevent Costly Storm Plumbing Emergencies
How to Retrieve Items Lost Down the Drain
How Does UV Pipe Relining Provide a Modern Solution to Pipe Repairs?
Step-by-Step Guide for Unclogging a Toilet in Sydney
21 Nov. 2025
Slow-Filling Toilet? Here’s Why and How to Fix It
Why Is Your Toilet Filling Slowly And How Can You Fix It?
A slow-filling toilet is more than just an annoyance when you need to flush again. When the cistern takes too long to refill, it usually points to a specific issue in the plumbing system, such as low water pressure, a worn fill valve, blocked inlet holes, or ageing internal parts. Understanding why your toilet is filling slowly makes it easier to choose the right fix and avoid bigger problems later.
In this guide, you’ll learn the most common reasons a toilet fills slowly, how to diagnose each one, and when it’s time to bring in a professional toilet plumbing expert in Sydney.
What Does A Slow-Filling Toilet Usually Tell You About Your Plumbing?
When the tank consistently takes longer than usual to refill, it suggests that water is not entering the cistern at the correct rate. This can happen because the supply of water is restricted, the mechanism that controls flow is worn or dirty, or water is leaking back into the bowl instead of staying in the tank. Each of these has a distinct cause and solution.
How Can Low Water Pressure Make Your Toilet Tank Refill Slowly?
Water pressure is the force that pushes water through the pipes and into the cistern. If the pressure entering your home is too low, the tank will naturally take longer to reach its normal level. This might be caused by a partially closed shut-off valve behind the toilet, internal restrictions or corrosion in the pipework, or a broader issue with the local water supply.
If your toilet is slow to refill and taps in the bathroom or kitchen also run weakly, the low pressure is likely not just a toilet issue but a house-wide supply or piping problem.
Why Can A Faulty Fill Valve Slow Down The Refill Process?
The fill valve is the component that controls how much and how quickly water enters the cistern after each flush. Over time, fill valves can wear out, accumulate debris, or develop internal faults. When that happens, the flow of water becomes restricted and the tank may take a long time to refill or stop short of the correct level.
A noisy valve, a weak trickle of water into the tank, or a refill that starts and stops erratically are all signs that the fill valve is not working as it should.
How Do Clogged Inlet Holes Affect A Slow-Filling Toilet?
Inlet holes, also referred to as rim holes, run along the underside of the toilet bowl rim. They direct water from the cistern into the bowl during the flush, but they also influence how efficiently water circulates and clears waste. Mineral deposits from hard water can gradually narrow these holes and reduce the flow rate.
When the inlet holes are partially blocked, the flush can feel weak and the tank may take longer to cycle properly, especially if mineral buildup extends into the internal channels between the tank and bowl.
In What Ways Can Float Problems Cause A Slow Or Incomplete Refill?
The float is the device in the tank that rises and falls with the water level. Its job is to signal the fill valve to stop once the water reaches the set height. If the float is set too low, bent, sticking on the side of the cistern, or damaged, the tank may fill slowly or stop filling before it reaches an effective level.
A float set too low creates the impression of a slow fill simply because the volume of water in the tank is not enough to deliver a strong flush. A float that catches on the side of the tank can also delay or interrupt the refill cycle.
Why Does A Leaky Flapper Valve Make The Toilet Seem Slow To Fill?
The flapper valve sits at the bottom of the cistern and acts as a seal between the tank and the bowl. When you flush, it lifts to release water; when the flush is finished, it drops back down to seal the opening. If the flapper is worn, warped, misaligned, or not sealing properly, water will slowly leak into the bowl.
As the tank refills, some of the incoming water is constantly escaping through the faulty flapper. The result is a slow or never-completed refill, along with regular refilling sounds and unnecessary water use.
How Can Debris In The Water Supply Line Lead To A Slow-Filling Cistern?
The water supply line connects the shut-off valve at the wall to the base of the cistern. Over time, small particles of sediment, rust, and debris can collect inside this flexible hose or pipe. When enough material accumulates, it narrows the internal opening and reduces the amount of water that can pass through at once.
Even if the fill valve and float are working properly, a supply line that is partially blocked will limit the flow and slow down refill times.
Why Do Ageing Toilet Parts Make The Tank Fill More Slowly Over Time?
Toilet internals such as fill valves, floats, seals, and flappers are constantly exposed to water, movement, and cleaning chemicals. As these parts age, rubber becomes brittle, plastic can warp, and metal components can corrode. This general wear and tear reduces efficiency, slows down operation, and eventually causes slow filling, weak flushing, or continuous running.
When several components show signs of ageing at the same time, replacing the entire internal assembly is often more reliable than replacing one part at a time.
How Can You Identify Which Problem Is Making Your Toilet Fill Slowly?
To pinpoint the cause of a slow-filling toilet, it helps to move through a simple diagnostic sequence.
Step:1:
Compare the water pressure in other fixtures. If your taps and shower are also running slowly, low water pressure, or a shared blockage is likely the main culprit.
Step:2
Remove the cistern lid and observe the fill valve as the toilet refills. A weak flow into the tank, spluttering, or inconsistent operation suggests a dirty or faulty valve. Listen carefully for hissing or dripping once the tank appears full, as that can point to a leaking flapper or seal.
Step: 3:
Inspect visible surfaces for mineral deposits around the inlet areas and float mechanism. Heavy scale often means water is being restricted inside the system. Finally, consider the age of the toilet. If most of the moving parts are several years old, wear and tear may be contributing to the slow refill, even if no single component looks obviously broken.
When Is It Best To Call A Professional Plumber For A Slow-Filling Toilet?
Some slow-filling problems can be handled as simple DIY tasks, such as gently adjusting the float height or checking that the shut-off valve is fully open. However, if low water pressure is affecting the entire home, if the supply line is severely obstructed, if you are uncertain about dismantling internal components, or if the toilet is older and has multiple faults at once, a professional plumber should inspect the system.
A licensed plumber can check for hidden pipe obstructions, replace the internal cistern fittings, and advise whether it is more cost-effective to repair the existing toilet or install a new, more efficient model.
How Can You Prevent Your Toilet From Filling Slowly In The Future?
Preventing slow-filling problems is mostly about regular inspection and timely replacement of worn parts. Cleaning the cistern interior occasionally, checking that the inlet holes are clear, and watching for early signs such as small hissing sounds or minor refill delays helps you catch issues before they become major faults.
Inspect the water supply line periodically for kinks, corrosion, or damage, and be proactive about replacing ageing fill valves, floats, and flappers. This approach keeps the toilet operating efficiently, saves water, and reduces the chance of unexpected failures.
What Should You Do If Your Slow-Filling Toilet Still Is Not Fixed After Basic Checks?
If you have confirmed that the shut-off valve is fully open, cleaned obvious mineral deposits, inspected or replaced the fill valve, adjusted the float, and checked the flapper, yet the toilet is still refilling slowly, the problem is likely more complex than it appears.
At this stage, contacting a professional Sydney toilet plumber is the safest option. There may be more serious issues within the supply line, the internal passages of the toilet, or the broader plumbing system that need expert tools and experience to diagnose and repair.
FAQs for Slow-Filling Toilet
Why does a toilet take so long to refill after flushing?
A toilet that refills slowly usually has an issue with water pressure, the fill valve, the float height, the inlet holes, or the water supply line. Slow tank filling indicates reduced water flow into the cistern and often highlights a developing mechanical or pressure-related problem inside the toilet system.
What causes a slow-filling toilet in a Sydney home?
Common causes include low household water pressure, a worn fill valve, clogged rim/inlet holes from mineral deposits, a misadjusted float, a leaking flapper valve, debris in the supply line, or ageing toilet components. Hard water areas in Sydney can also contribute to mineral buildup that restricts flow.
Why does low water pressure make my toilet fill slowly?
Low water pressure limits the speed at which water enters the tank. This may happen due to a partially closed shut-off valve, internal blockages, damaged pipework, or issues with your local supply network.
How can I fix a slow toilet refill caused by low water pressure?
Check that the shut-off valve behind the toilet is fully open. If taps and other fixtures are also running slowly, the issue is likely in the broader plumbing system rather than the toilet itself. At that point, contacting a plumber or Sydney Water may be necessary.
Why does a faulty fill valve slow down the tank refill?
The fill valve controls the water entering the tank. When it becomes worn, clogged, or partially obstructed, the water flow weakens, causing a noticeably slow refill time.
How can I tell if my fill valve is the reason my toilet fills slowly?
Remove the tank lid and observe the fill valve when flushing. A weak stream, sputtering sound, or delayed refill indicates the valve needs cleaning or replacement.
Why do clogged inlet (rim) holes slow down the toilet refill process?
Mineral deposits or debris in the inlet holes restrict water flow during both flushing and refilling. When these holes are blocked, water distribution slows and reduces the toilet’s overall efficiency.
How do I clean clogged toilet inlet holes to improve refill speed?
A small tool such as a wire hanger, toothpick, or descaling brush can be used to dislodge buildup. Homes with hard water should periodically use a descaling solution to prevent recurrence.
Why does a misadjusted float cause the toilet to fill slowly?
The float controls when the fill valve opens and closes. If the float sits too low, the tank fills slowly or stops before reaching the correct level. A damaged or sticking float also disrupts the refill cycle.
How do I fix a slow-filling toilet caused by float issues?
Adjust the float height using the screw or arm mechanism. If the float is sticking or cracked, replacing it ensures the tank fills efficiently.
Why does a leaking flapper valve reduce toilet refill speed?
A leaking flapper allows water to escape into the bowl during the refill process. Because water keeps draining out, the tank takes longer to reach its full level or never reaches it at all.
How can I identify whether the flapper valve leak is affecting my refill time?
Listen for ongoing running water or intermittent refilling. Inspect the flapper for cracks, misalignment, or deterioration. A dye test will show if water is leaking past the seal.
Why does debris in the water supply line make the toilet fill slowly?
Sediment or small particles inside the supply line reduce water flow to the toilet. This is common in older plumbing systems or when water quality fluctuates.
How do I clear debris from the toilet water supply line?
Turn off the water supply, disconnect the line from the tank, and flush it out. Reattach and test the refill speed. If debris continues returning, there may be a larger plumbing issue.
Why do older toilet parts cause slow tank filling?
Fill valves, floats, and seals degrade with age. As they wear out, their ability to regulate water efficiently weakens, causing slow or inconsistent refill times.
How can I assess which component is causing the slow refill?
Check water pressure elsewhere in the house, observe the fill valve during operation, listen for leaks, and look for mineral deposits. These steps help identify whether the cause is mechanical, pressure-related, or blockage-related.
When should I call a plumber for a slow-filling toilet?
Call a professional if low water pressure affects the whole home, if the supply line blockage is severe, if the toilet is older and experiencing multiple issues, or if DIY repairs fail to improve refill speed.
How can I prevent my toilet from filling slowly in the future?
Regularly clean the tank, inspect inlet holes, check the supply line, and replace worn parts before they fail. Routine maintenance prevents buildup, leakage, and slow refill performance.
Does a slow-filling toilet mean there may be a bigger plumbing issue?
Yes, it can indicate hidden problems such as pressure loss, internal pipe blockages, deteriorating valves, or long-term mineral accumulation. Addressing the issue early prevents costly repairs and water inefficiency.
Discover More About Toilet Plumbing Issues:
What Things Should You Never Flush Down the Toilet?
What Causes a Running Toilet and How Can You Fix It?
How Can You Unblock a Badly Blocked Toilet?
What Should You Do When Your Toilet Won’t Flush?
Toilet Leaking at the Base? Troubleshooting Guide
Unclogging a Toilet Without a Plunger: A Complete Guide
Guide to Unclogging a Bathroom Sink
Slow-Filling Toilet? Here’s Why and How to Fix It
Guide to Testing a Toilet Flush Valve for Sydney Homes
21 Nov. 2025
Guide to Testing a Toilet Flush Valve for Sydney Homes
A toilet that keeps running, flushes weakly, or leaks into the bowl is often caused by a worn or misaligned flush valve. The flush valve controls how water leaves the tank and enters the bowl, so testing it correctly helps prevent unnecessary water use and ongoing issues that affect efficiency. The steps below explain how to identify a faulty flush valve, how to test it, and what to do if it needs replacement.
Understanding What a Toilet Flush Valve Does
The flush valve sits at the base of the toilet tank and opens when the handle lifts the flapper or flush seal. Water then travels from the tank into the bowl to clear waste. Once the tank empties, the valve reseals so the cistern can refill. Sydney homes often use standard 2-inch or 3-inch flush valves, and although the sizes vary, the inspection and testing principles remain the same.
Identifying Early Signs of a Faulty Flush Valve
A running toilet long after flushing, a weak or incomplete flush, or water constantly leaking into the bowl usually indicates that the flush valve seal isn’t closing properly. Another sign is an unexplained increase in your Sydney Water bill due to slow, continuous water loss inside the tank. These symptoms usually appear gradually, so early testing helps avoid larger repairs.
Tools You’ll Need Before Testing
Testing a flush valve rarely requires specialised equipment. A small flashlight helps illuminate the tank interior, and a few drops of food colouring help detect leaks around the valve seat. Adjustable pliers are optional for stubborn assemblies but are not essential for basic testing.
Step 1: Turning Off the Water Supply
The shut-off valve is located behind the toilet. Turning it clockwise isolates the water connection so the tank does not refill during your inspection. Doing this prevents additional water wastage while testing the valve.
Step 2: Removing the Toilet Tank Lid
Lift the ceramic lid carefully and place it on a level surface. This gives you direct access to the flush valve, flapper, fill valve, and internal fittings inside the tank.
Step 3: Inspecting the Flush Valve Components
The flush valve is connected to the flapper or flush seal. Look for cracks in the flapper, mineral buildup around the valve opening, debris on the valve seat, or anything preventing the flapper from sitting correctly. In many older Sydney bathrooms, limescale or worn rubber seals are common causes of poor sealing.
Step 4: Running a Colour-Dye Leak Test
This simple test determines whether water is seeping through the flush valve. Add colouring to the tank water and wait without flushing. If colour appears in the bowl after ten to fifteen minutes, the flush valve is leaking, and the seal is not holding water properly. This type of leak can run unnoticed for months and significantly increase household water use.
Step 5: Checking the Valve Seal Manually
Press down on the flapper or sealing mechanism. If the sound of running water stops, the seal is not tight enough. A brittle, deformed, or aged flapper often causes this issue. Replacing it prevents water from passing through the valve when the toilet is not in use.
Step 6: Checking the Chain or Lift Wire Adjustment
The chain between the flush handle and the flapper should have just enough slack to allow full movement. If the chain is too tight, the valve cannot fully seal. If it is too loose, the flapper won’t lift high enough for a full flush. Adjusting the hook placement usually solves this issue immediately.
Step 7: Restoring Water Supply and Testing the Flush
Once the inspection is complete, turn the shut-off valve anticlockwise to restore the water flow. Allow the tank to refill. Observe how the flapper lifts and closes during a full flush cycle. A proper flush should release water rapidly into the bowl and should reseal immediately once the tank empties. Any ongoing trickling or delayed sealing indicates a worn valve or an improperly aligned flapper.
When a Flush Valve Needs Replacement
Some valves deteriorate beyond simple adjustments. If the valve body is cracked, the flapper no longer seals even after replacement, or water continues to escape despite adjustments, replacing the full flush valve is the most reliable fix. The process involves draining the tank, disconnecting the flapper assembly, removing the nut underneath the tank, installing the new valve, reconnecting the chain, and testing the new seal.
When to Contact a Licensed Plumber
If your toilet continues leaking after replacing the flush valve, there may be damage to the tank base, issues with the flush mechanism, or problems within the drainage line. A licensed plumber can diagnose deeper mechanical faults and restore the toilet to full working order. Recurrent toilet issues may also indicate ageing plumbing fixtures that need a professional inspection.
Keeping Your Toilet System Efficient
Testing the flush valve is a preventative step that reduces water wastage and helps avoid expensive repairs. Performing these checks whenever you notice weak flushes, bowl leaks, or rising water bills ensures your toilet stays reliable. A small internal leak can waste thousands of litres of water each year, so acting early is always beneficial.
FAQs About Testing a Toilet Flush Valve
Why does my toilet in Sydney keep running after flushing, even when the flush valve looks intact?
A toilet may continue running even if the flush valve appears intact due to hidden attributes such as a worn valve seat, a partially warped flapper, sediment buildup, or a misaligned chain. Sydney homes with older plumbing often have mineral residue that prevents the seal from closing fully.
How do I know if the flush valve seal is leaking water into the bowl at night?
If you hear intermittent refilling, see reflections moving in the bowl, or detect colour during a dye test, your flush valve is releasing water slowly. This usually means the sealing surface has deteriorated or the flapper is no longer sitting flush.
What’s the difference between a worn flapper and a misaligned flush valve seat?
A worn flapper loses flexibility and doesn’t create a tight seal, while a misaligned valve seat allows water to bypass the seal entirely. Identifying which attribute is failing helps determine whether you need a new flapper or a full valve replacement.
Why does my toilet produce a weak flush even when the tank is full?
A reduced flush force is often caused by an incomplete lift of the flush valve, a restricted chain, or an oversized flapper that doesn’t rise long enough. If the valve does not open fully, the bowl won’t receive the necessary water volume for a strong flush.
What causes coloured water to appear in the bowl during a dye test?
Coloured water indicates that the flush valve seal is passing water through the valve seat. This can occur from a brittle flapper, a cracked seal ring, a rough valve surface, or debris caught under the seal.
How often should I test my flush valve for leaks in high-use households?
Busy Sydney households should test flush valves every three to six months. Frequent flushing speeds up seal wear and increases the likelihood of unnoticed leaks.
Why does the flush valve chain need precise adjustment?
If the chain is too short, the valve cannot close fully. If it is too long, the valve won’t open enough to clear waste. Precise adjustment maintains the correct lift height and ensures dependable sealing after each flush.
Can a damaged valve seat cause water hammer or tank noises?
Yes. A damaged or uneven valve seat can cause incomplete sealing, which leads to frequent refilling and occasional hammering sounds as water pressure fluctuates inside the tank.
Why does my toilet refill randomly when nobody has used it?
This condition, often called a “ghost flush,” is usually caused by a slow leak through the flush valve. The tank’s water level drops slightly, triggering the fill valve to top it up. The flush valve is almost always the source.
Does hard water in Sydney affect flush valve performance?
Harder water areas can cause mineral scale to form around the flapper seal and valve seat, causing leaks and reduced efficiency. Homes near the coast often experience faster mineral buildup.
What size flush valve do I need when replacing one in a Sydney home?
Most Sydney toilets use either a 2-inch or 3-inch valve. A smaller valve reduces flushing power, while a mismatched size will not seal correctly. Checking the existing opening helps ensure the new valve matches the tank specifications.
Why does my toilet still leak after installing a new flapper?
If the leak continues, the issue may involve a warped overflow tube, an uneven valve seat, debris preventing full sealing, or an incorrect flapper size. In some cases, the entire flush valve assembly must be replaced.
How long should a flush valve last in a standard household bathroom?
A standard rubber flapper typically lasts two to five years, depending on water quality, usage frequency, and cleaning chemicals. Full flush valve assemblies last longer but still wear out gradually.
Can a faulty flush valve increase my Sydney Water bill significantly?
Yes. Even a slow, silent leak can waste thousands of litres monthly. Continuous leakage from the flush valve is one of the most common causes of unexplained increases in water usage.
Why does my toilet flush better after adjusting the chain height?
Correct chain tension ensures the valve lifts to its full height, releasing the correct water volume. A small adjustment can dramatically improve flush efficiency.
Can a cracked flush valve lead to tank moisture outside the toilet?
A cracked valve body can cause water to escape around the base of the tank, creating moisture, dripping, or small puddles near the toilet. Ignoring this can lead to floor damage.
Why does my toilet take too long to refill after flushing?
While the fill valve usually controls refill speed, a misaligned flush valve that doesn’t close tightly can slow the refill process, as water escapes as quickly as it enters.
Is it normal for the flush valve to make a slight hissing sound?
A constant hissing sound often means the valve is leaking and the fill valve is compensating. The hissing noise is the system trying to maintain the tank’s water level.
Why does my toilet bowl water level keep dropping?
A worn or damaged flush valve can allow a small amount of water to siphon into the bowl, lowering the tank level and triggering unnecessary refills.
What should I do if the flush valve seal keeps failing after replacement?
If seals continue failing, there may be structural damage inside the tank, misalignment of the valve assembly, or deformities in the valve seat. A licensed toilet plumber in Sydney can re-seat the assembly or replace it entirely.