

Blog
16 Mar. 2022
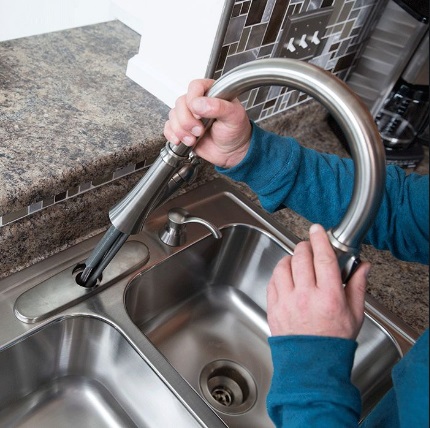
What’s Blocking My Kitchen Sink From Draining in Sydney?
The Quick Answer
Most kitchen sinks stop draining because grease, food particles, and residue collect in the P-trap or the pipe just beyond it. Grease solidifies and blocks the line, food particles accumulate and block, and residue leads to buildup that becomes waste buildup. Waste buildup is the primary cause of a kitchen clog.
What’s Blocking My Kitchen Sink From Draining?
A kitchen sink that won’t drain is almost always dealing with a clog that blocks drainage somewhere in the drain. The drain is the channel in your kitchen plumbing that carries wastewater away through a network called the drainage system, and that drainage system conveys wastewater through each pipe and fitting until it reaches your sewer line (city homes) or septic system (some properties). When the flow slows, a slow drain is often the first warning sign because slow drainage indicates blockage.
The good news: many kitchen clogs can be cleared with careful DIY steps, as long as you take safety seriously, avoid the common traps that make things worse, and work out the blockage location so your effort targets the right spot. Blockage location matters because it identifies the problem area you need to clear. Discover more about Kitchen Sink Installation Services in Sydney.
What Causes a Blocked Kitchen Sink Drain?
The Gross Truth: Grease + Food + Soap
In kitchens, grease is the top offender. Grease solidifies and blocks the inside of the pipe, especially after it cools. Once grease coats the pipe walls, food particles tend to stick. Food particles accumulate and block the drain over time. Add soap scum and the problem escalates because soap scum adheres to pipe walls and traps more debris.
That mix often includes sediment. Sediment contributes to clog formation by packing into greasy sludge and tightening the blockage.
The P-trap Is a Clog Magnet
Under the sink sits the P-trap, a curved section designed to hold a water seal and catch debris. The P-trap catches debris, which is useful for retrieving lost items, but it also makes the trap a common location for clogs.
Behind the P-trap is the trap arm, a short horizontal pipe. The trap arm connects to drain line in the wall, and clogs often sit right there.
Hair Buildup Can Still Happen in Kitchens
Not as common as bathrooms, but hair buildup shows up when hair gets washed from hands, pet washing, or mop buckets. Hair buildup causes blockage, especially when it tangles with grease and soap scum.
Hard Water and Scale
If you have hard water, minerals can form scale. Hard water causes deposits, and scale narrows pipe space, leaving less room for normal flow.
Foreign Object Clogs
Sometimes it’s simply a foreign object (plastic, sponge fragments, a cap). A foreign object blocks flow quickly and can lodge in the drain opening or P-trap.
Why is My Kitchen Sink Not Draining But Not Clogged?
It can feel “not clogged” when water still moves a little. A partial clog can create a slow drain, and a slow drain still indicates blockage.
Two other issues can mimic a clog:
Venting and Air Pressure Issues
A home’s vent stack is designed so air can enter the drain system. The vent stack allows proper drainage by preventing suction and gurgling. If there’s a blocked vent, that airflow restriction affects drainage and can make the sink drain slowly or back up.
Some homes also use an air admittance valve under the sink. An air admittance valve balances pressure to support proper draining.
Pipe Slope and Diameter
If the pipe slope is wrong, water doesn’t carry debris well. Pipe slope affects flow. If the pipe diameter is too small, that limitation influences clog likelihood.
2 Common Signs of Kitchen Sink Blockages
1) Standing Water or a Rising Water Level
A rising water level in the sink bowl usually means the clog is close and strong. Water level indicates flow issue.
2) Gurgling, Odour, or Foul Smells
Gurgling is a big clue. Gurgling signals blockage, often combined with venting trouble. Odor often indicates buildup in the trap or waste line. A foul smell is a stronger warning; foul smell is a symptom of clog.
If sewer smells are noticeable, sewer gas can be involved. Sewer gas sometimes escapes through trap problems (like a dry trap or poor venting).
Understanding kitchen drain clogs
Where the Blockage Usually Sits
- At the drain opening near the stopper/strainer
- Inside the P-trap
- In the trap arm
- Deeper in the waste line or waste line branch
Your waste line is the pipe path that carries waste away from the sink and connects toward the main system.
Immediate Steps to Try (Before Spending Money)
Step 1: Stop Adding Water
More water increases pressure and mess. It also raises the water level and can lead to a backup.
Step 2: Check the Stopper/Strainer Area First
A clog right at the top is the easiest fix. A strainer blocks solids, but food can still pack beneath it. A sink basket also traps solids, and it can be clogged underneath.
Also, look at the sink flange (the metal ring at the drain opening). The sink flange seals the drain entry, and gunk can collect around the edges.
Step 3: If There’s Standing Water, Remove Some
Scoop or use a cup to lower the water level into a bucket so you can work on the trap without flooding the cabinet.
Step 4: Set Up Safety and Spill Control
Safety matters most if you’ve used chemical cleaners already.
- Gloves protect skin
- Eye protection shields the eyes
- Place a bucket under the pipes; a bucket catches spills
- Know where the main shutoff valve is; the main shutoff valve isolates plumbing if something goes wrong
How to Fix a Blocked Kitchen Sink Drain
Method 1: Plunge the Right Way
A plunger can help by moving pressure through the line. A plunger dislodges blockage when you get a solid seal and control the airflow.
If it’s a double sink, block the other side. If you have a garbage disposal (also called a waste disposal unit), keep it off while plunging. A garbage disposal processes food waste, and a waste disposal unit processes food, but they don’t solve a blocked pipe on their own.
Method 2: Clear the P-Trap and Trap Arm (Kitchen Sink Blocked Past U-Bend)
This is often the best “bang for effort” fix because the P-trap catches debris.
You’ll typically need an adjustable wrench; an adjustable wrench loosens fittings. If a metal fitting is stubborn, a pipe wrench helps; a pipe wrench tightens bolts and grips firmly.
Once the trap is off, this is where manual removal shines. Manual removal removes blockage directly, grease sludge, food particles, hair tangles, or a foreign object.
When reassembling, check seals:
- A gasket retains seal
- An O-ring prevents leaks
- Every pipe joint must seat properly because a pipe joint connects pipe segments
If a threaded join seeps, use Teflon tape; Teflon tape seals threads. You may also hear it called plumber’s tape, plumber’s tape prevents leaks.
If water drips after reassembly, you’ve got a leak. A leak indicates failure of a seal, joint, or alignment, tighten gently and reseat.
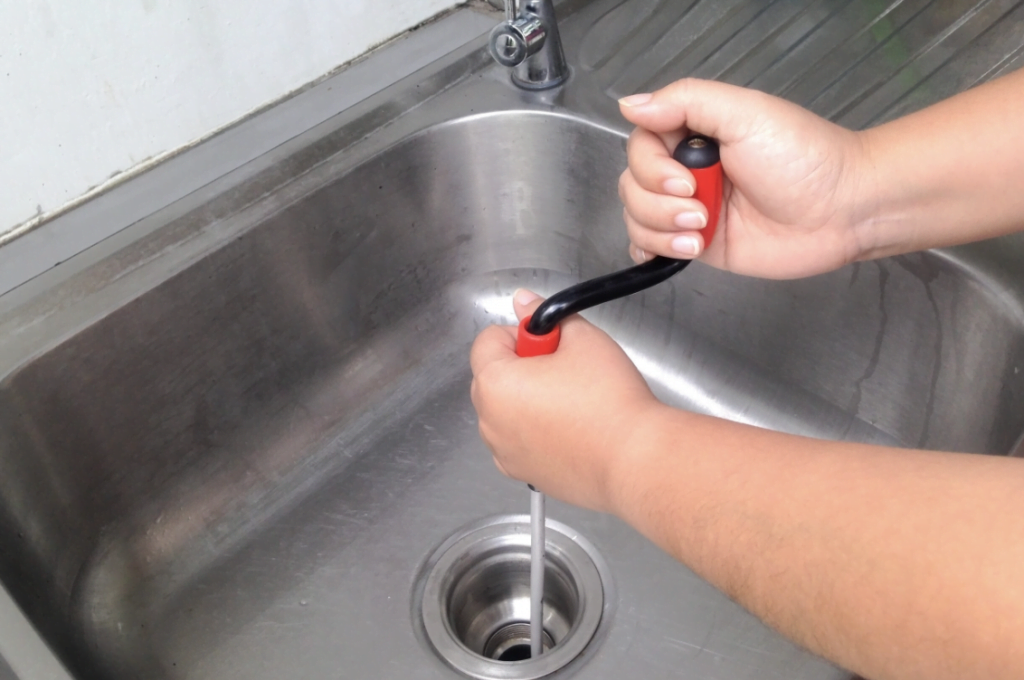
Method 3: Use a Drain Snake (Best for Kitchen Sink Clogged Far Down)
A drain snake is one of the most effective budget tools. A drain snake extracts blockage that plungers can’t reach. Feeding it into the trap arm and wall line often works better than snaking from the top.
Method 4: Wet Vacuum for Standing Water and Loose Clogs
A wet vacuum can pull water and debris out quickly. A wet vacuum sucks obstructions and helps you lower the water level before trap work.
Method 5: Boiling Water, Dish Soap, and Grease Reality
Boiling water can help when the clog is soft grease. Boiling water melts grease, but it’s unreliable against thick fat plugs or packed food.
Baking Soda and Vinegar: When They Help and When They Don’t
Baking soda helps dissolve residue in light build-up situations. Vinegar reacts to clear residue when paired with baking soda. For standing water clogs caused by grease and food, mechanical clearing (trap + snake) usually wins.
Why Should You Never Use Baking Soda and Vinegar to Unclog a Drain?
Because the reaction often can’t contact the thick clog surface effectively, especially when grease has solidified. It’s fine as a mild cleaner after the drain is flowing again, but not the best primary fix when the sink is completely blocked.
Chemical drain cleaner vs enzyme cleaner
A chemical drain cleaner dissolves organic material, but it can be harsh and risky. If you use it, safety is non-negotiable.
An enzyme cleaner digests organic matter more gently and is better as a maintenance tool after flow is restored.
How to fix a kitchen sink that is backing up?
A backup is when wastewater returns into the sink. Backup reverses flow. If it spills out, that’s an overflow, and overflow indicates blockage that’s severe or downstream.
Dishwasher Drainage and Backflow
Many setups connect dishwasher drainage to the sink drain. Dishwasher drainage ties into drain piping, so a restriction can cause the dishwasher to push water back into the sink.
If present, an air gap stops contamination by preventing dirty water from back-siphoning into the dishwasher.
Double Sinks and Crossover Pipes
A crossover pipe links basins. If the clog is after the crossover, both bowls can back up together.
Disposal Reset
If you have a disposal and it’s stalled, try a disposal reset. Disposal reset restores function after overloads. A functioning disposal doesn’t fix a clogged waste line, but it’s a helpful check.
Kitchen Sink Clogged Tried Everything: What if It Still Won’t Budge?
A Simple Troubleshooting Checklist
This is a fast way to narrow blockage location and prevent repeat attempts that don’t reach the clog:
When the Blockage Is Beyond the Kitchen: Sewer Line or Septic System
A sewer line is the main pipe that conveys waste to the city system. A deep clog there can affect multiple fixtures.
A septic system processes waste through a tank and soil absorption area. If wastewater returns on a septic property, that’s a septic backup. Septic backup indicates clog or overload in the septic system.
Root Intrusion
Some deep clogs are caused by root intrusion. Root intrusion blocks sewer flow by entering cracks and catching debris. In those cases, root cutting may be required; root cutting restores flow.
Pipe Material Can Change the Story
A PVC pipe is common and PVC pipe conveys wastewater while resisting corrosion.
Older homes may have cast iron pipe. Cast iron pipe is durable but rusts, and rust can narrow the inside of the line.
That narrowing is pipe corrosion, and pipe corrosion narrows pipe, increasing clog frequency.
Tools for clearing kitchen drains (budget-friendly)
These tools match the DIY methods above:
- Bucket (catches spills)
- Gloves and eye protection (protect skin, shield eyes)
- Plunger (dislodges blockage)
- Drain snake (extracts blockage)
- Adjustable wrench (loosens fittings)
- Pipe wrench (tightens bolts / grips metal fittings)
- Wet vacuum (sucks obstructions)
- Optional: Teflon tape / plumber’s tape (seals threads / prevents leaks)
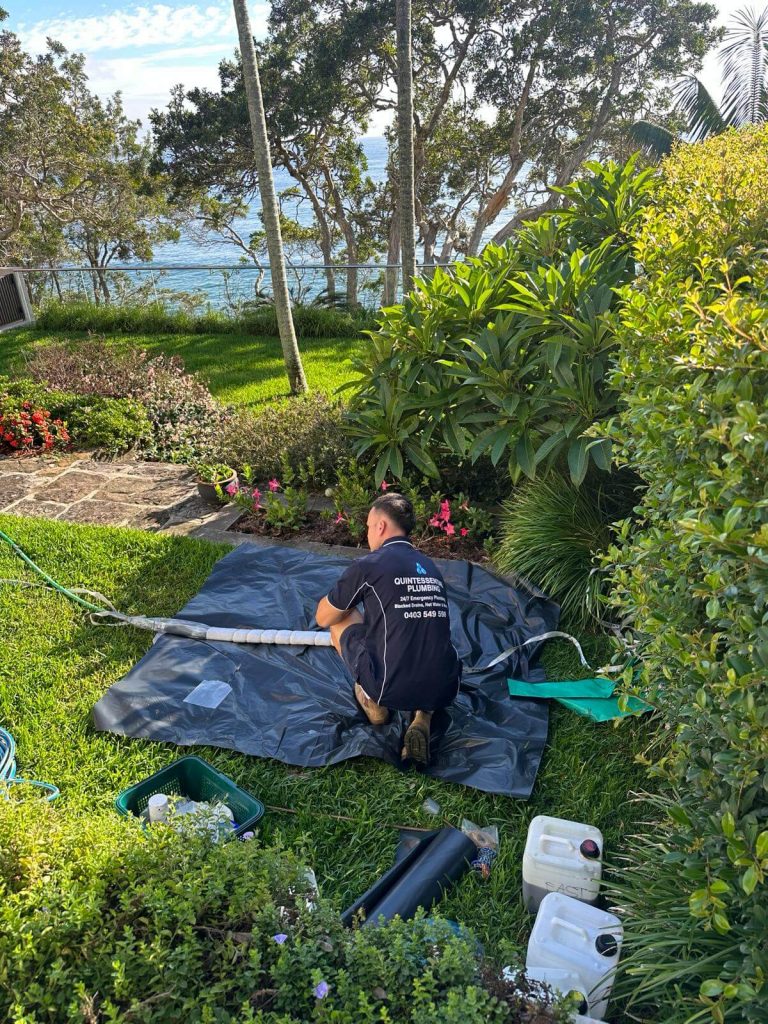
When to Call a Professional Plumber

A professional plumber resolves complex clogs when the blockage is deep, recurring, or tied to venting, sewer, or septic issues.
For accurate diagnosis, plumbers may run an inspection camera. An inspection camera visualizes blockage. A thorough inspection by a qualified person can also help because inspection detects clog cause.
For heavy build-up, hydro jetting is sometimes used. Hydro jetting clears build-up by scouring grease, residue, and sediment from the line.
For stubborn deep clogs, a rooter service may be recommended. Rooter service removes blockage using heavy-duty equipment.
If the sink is overflowing or multiple fixtures are backing up, you may need an emergency repair. Emergency repair fixes urgent issue situations like overflow risk or sewage exposure.
Cost and coverage notes
A plumber’s charge is the fee for repair; plumber’s charge fees for repair vary by access and method.
If you have a home warranty, it sometimes covers plumbing within policy limits. A separate warranty can also cover failures for some fixtures or recent installs.
Prevention Strategies That Work (And Stop Fat Clogs Coming Back)
If overflow causes damage, an insurance claim can sometimes help; an insurance claim may reimburse repairs depending on your policy terms and cause.
Kitchen Hygiene
Good kitchen hygiene reduces clogs. Wipe grease from pans, bin scraps, and avoid washing heavy fat into the drain.
Strainers, Baskets, and Grease Control
Use a strainer because it blocks solids. Use a sink basket because it traps solids before they enter the system.
If applicable, a grease trap can help. A grease trap intercepts fats before they reach the waste line.
Preventive Maintenance
Preventive maintenance reduces clogs by stopping residue from becoming waste buildup. A periodic hot water flush helps because flush routines remove debris before it packs into a plug. An enzyme cleaner can support ongoing maintenance after flow is restored.
Extra Notes So You Don’t Chase the Wrong Problem
A sink clog rarely has anything to do with water pressure. Water pressure is typically unaffected by sink clog, because the issue is in drainage, not supply.
A pressure gauge is sometimes useful for supply checks, but it’s not directly clog related.
If drainage problems started after a renovation, a kitchen remodel might be relevant. A kitchen remodel can change slope, diameter, or introduce a cross-connection. A cross-connection can cause issues and may violate plumbing code. Plumbing code governs installation standards.
Your fixture (sink and attachments) matters because a fixture connects to drain parts like the sink flange, basket, and trap. A countertop mostly supports sink, but access and sealing can influence how easily you can service the trap.
Even kitchen sink brand can affect durability. Kitchen sink brand sometimes determines quality of baskets, seals, and hardware.
How to Fix a Blocked Kitchen Sink Drain?
Start with diagnosis to identify blockage location. Lower the water level, use a plunger correctly, then remove and clean the P-trap. If it’s still blocked, use a drain snake through the trap arm into the wall line.
Why Is My Kitchen Sink Not Draining but Not Clogged?
It may be a partial clog (slow drain indicates blockage), a blocked vent affecting drainage, or poor pipe slope/diameter causing debris to settle.
How to Fix a Kitchen Sink That Is Backing Up?
Backup reverses flow and can lead to overflow. Check shared connections like dishwasher drainage and the crossover pipe. Clear the P-trap and snake the trap arm. If multiple fixtures are affected, the issue may be in the sewer line or septic system.
Why Should You Never Use Baking Soda and Vinegar to Unclog a Drain?
They can help with light residue, but they usually don’t break down thick grease clogs effectively—especially with standing water – so mechanical clearing (trap cleaning/snaking) is often required.
Kitchen Sink Blocked Past U Bend – What Should I Do?
Remove and clean the P-trap first. If the P-trap is clean, snake the trap arm and wall line to reach a deeper blockage.
How to Unblock Sink Stopper Quickly?
Remove the stopper or basket assembly if accessible, clean out trapped residue and food particles, then flush with hot water. If water still doesn’t move, the clog is likely beyond the opening.
Kitchen Sink Clogged Far Down – What’s the Next Step?
After confirming the P-trap is clear, use a longer drain snake into the wall line. If it keeps returning or affects other drains, a plumber with an inspection camera or rooter service may be needed.
The Simplest Plan if Nothing Has Worked Yet
To fix a blockage, clear the P-trap and snake the wall line. If gurgling persists or the clog returns, professional help is required for tasks like hydro-jetting or rooter service. For expert assistance, contact Plumbers for Clogged Sinks in Sydney to resolve complex sewer or septic issues.

09 Mar. 2022
STORM ALERT IN SYDNEY: What to Do If You Have a Plumbing Emergency
Our La Nina weather pattern has begun, as forecast by Australia’s Bureau Of Meteorology, with Australia’s wettest Summer downpours in decades coming down the east coast. Sydney is on the receiving end of a barrage of bullets. With the heavy rains comes an increase in household plumbing problems such as clogged drains, gutters, stormwater drains, and leaks. If you don’t deal with problems like this right away, they can have a big impact on your life.
If you are dealing with a genuine Sydney plumbing emergency, (One that puts you and your home in danger) You’ll need a 24-hour lockdown. A Fast-Responding Sydney Plumber! Please contact our customer service department. Call Quintessential on 0290 027 385 for a licensed plumbing team!
Over the phone, we’ll be able to assess the severity of your emergency and diagnose the problem, as well as provide you with helpful hints until our team arrives. During this Sydney weather event, we’re available 24/7 and staffed around the clock. We’ll also be able to tell you if the problem can be fixed during regular business hours, saving you money on the emergency callout cost.
What is the meaning of a plumbing emergency?
Some of the most typical plumbing situations that require the intervention of a professional plumber are flooding, leaking gas, blocked pipes, and a blocked drain.
Most of us in Sydney are accustomed to a comfortable lifestyle with plenty of mod-cons,’ and as a result, we tend to take certain things for granted, such as our plumbing. It is only until “the plumbing goes out” that you realize how critical it is and how quickly it must be repaired.
The following is an example of a true plumbing emergency:
• Your home and property have been flooded.
• The property’s water supply must be restored.
• Preventing water damage to the property must be taken into consideration.
• A clogged drain must be unclogged in order for water to flow freely.
• There is a gas leak.
• To preserve public health, a sewage system/waste connection must be restored.
It is the responsibility of the property owner to contact an emergency plumber if any of the following points impact them. Knowing when to call an emergency plumber in Sydney and when to call a regular plumber is crucial.
Our team of experienced professionals at Quintessential Plumbing is on the go all throughout the east coast. For all of your plumbing problems in Sydney, we are the go-to emergency plumber.
When you’re caught off guard by a plumbing emergency, our staff is here to help! We have the necessary skills and experience to quickly fix your plumbing system.
The following are some of the services that Quintessential Plumbing can provide:
• Toilet that is leaking
• Blocked toilet, drain, or pipe
• Leak caused by a damaged gutter, roof, or downpipe
• A malfunctioning cooling or heating system
• Pipe burst
• Blackouts are not included in the definition of a power outage.
• Leaks in the dishwasher
• A burst showerhead or a dripping faucet
• A gas leak has occurred.
If you require an emergency plumber, please contact our staff immediately at 0290 027 385.
Plumbing Problems You Can Fix Yourself
You can handle some basic plumbing troubleshooting yourself if you have a basic understanding of plumbing systems, are handy with DIY, and don’t mind having your hands (dirty) or wet.
Roofs, gutters, and downspouts that are clogged
Gutters are a necessary part of most Australian homes and structures. The primary purpose of your home’s gutters is to direct rainwater away from the foundation of your house. This channeling prevents water from seeping beneath the foundation of your property, weakening it and causing significant problems in the future. Moisture can weaken and destroy sections of your home’s structure if it is exposed to it for long periods of time.
That’s not what we want!
You can clean the debris out of your gutters on your own. Please take measures and, if feasible, work with a partner.
Sink Drains Blocked
Food crumbs, hair, soap, or dirt may have clogged the drains in your kitchen sink or bathroom. You can try natural cleaning methods or use a drain snake to get rid of the buildup before calling the professionals.
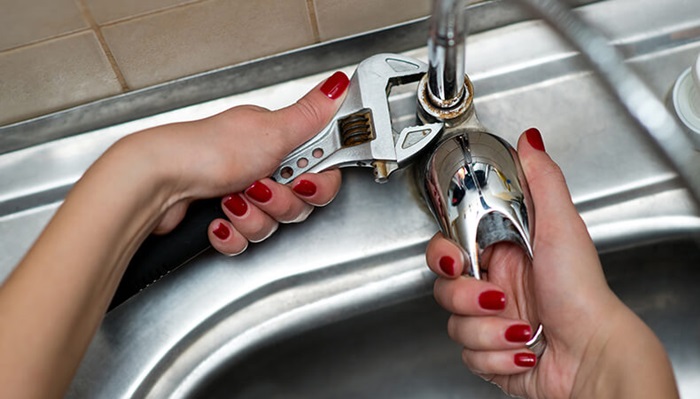
Leaking Tap
You can change the washer, install a new fixture, and fix the leaky tap yourself if you are handy with a wrench.
Toilet that is clogged or jammed
Get a plunging if you have a handy home plunger.
What Should You Do If You Have A Plumbing Emergency?
To avoid more damage, plumbing crises should be addressed IMMEDIATELY. If you have a plumbing emergency in Sydney, you can take certain preventative measures until a skilled and qualified Sydney Emergency Plumber arrives. You can rest confident that everything will be taken care of properly with the help of an experienced emergency plumber.
In an emergency (especially if there is leaking/flooding water), the goal of the game is to turn off the water supply. Then, if possible, contact Quintessential Plumbing for assistance.
When you have a plumbing emergency, follow these steps:
1. Turn off the water supply right away.
If you have a significant problem with your home’s plumbing system, such as a burst pipe, you should immediately switch off the main or water valve. The water main, also known as the value, is usually seen outside on the water meter. Water meters are normally located at the property’s front-side boundary line. If you are renting a unit, the water main may be hidden around the toilet or beneath a basin. When you move into a new apartment, you should inquire about the location of the water main so that you know where to go in the event of an emergency. It will not solve the plumbing problem if you turn off the main water supply. It will, however, prevent unwanted water run-off and floods on your land.
Depending on where the problem is in the house, shutting off the main water valve isn’t always essential. If you have a water leak from a toilet or a tap in your home, for example, you can only switch off the water supply to that system. It will allow you to get water in other parts of your house until emergency assistance arrives.
2. In the event of an emergency, contact Quintessential Plumbing.
That’s us if you live in the eastern suburbs. Call us right now at 0290 027 385 to speak with one of our representatives. We have a competent plumber on standby to help you at any time of day or night. We’ll also give you some time-saving advice while we’re driving. Within the eastern United States, we provide a 30-minute on-site guarantee.
Suburbs.
3. Do the best you can to clean up the mess
You can just clean the area if it is damp by the time the plumber arrives at your home. It is suggested that the floor be kept dry. As a result, our plumbers may get right to work as soon as they arrive.
4. Quintessential Plumbing Emergency Plumbers will assess the damage.
Examine the situation to the point where you can explain the problem to the local plumber. If you have burst pipes, you must turn off the water immediately. Then you should examine what occurred. When you hire a plumber, the more information you have, the easier it will be to determine the main issue. The plumbers will arrive well-equipped with the necessary plumbing equipment to assist you. After your local plumber has dealt with the emergency situation, he or she will explain why the problem arose and provide ways to ensure it does not happen again.
5.Maintenance
There will be some ongoing maintenance once the Sydney emergency plumber has departed and the problem has been rectified to help prevent any future emergencies.
6. Convey Your Concerns to Your Insurer
Your insurer may cover the cost of the emergency plumbing call out as well as the cost of any repairs, depending on your policy. Flood damage is covered by most home and contents insurance policies in Australia, however, you should double-check with your insurer and your specific policy.
Prepare for the worst-case scenario by planning for the best-case scenario.
It’s wise to hope for the best but be prepared for the worse during our current weather event. You are ahead of the game if you are prepared for a severe weather disaster. You and your family can talk about and plan what to do in the event of an emergency. You can prepare things like:
- Candles, matches, drinks, snacks, and blankets in a blackout bag.
- A Grab-And-Go Bag with items such as drinking water, food, blankets, toiletries, a fresh change of clothes and shoes for everyone in the house, as well as essential papers (ID, birth certificates, passports), your wallet/cash, and anything else you sees important.
- A Pet Plan: What if you need to evacuate with your pets? Do you have a carry case, food, and water ready to go for them?
- An Escape Plan in case you need to safely depart your home or building. Share this with your family so that everyone is aware of the situation.
- A Safe Place To Hide: Are you familiar with the community shelters in your area? Is there a friend’s or family member’s house where you could go?
- An Emergency Contact List: Now is the time to save phone numbers for the SES, your emergency plumber, your emergency electrician, and your insurance company.
If you require assistance or have any queries, we are here to assist you. Please contact us at 0290 027 385
04 Mar. 2022
Which Hot Water Heater Is Best for Your Home?
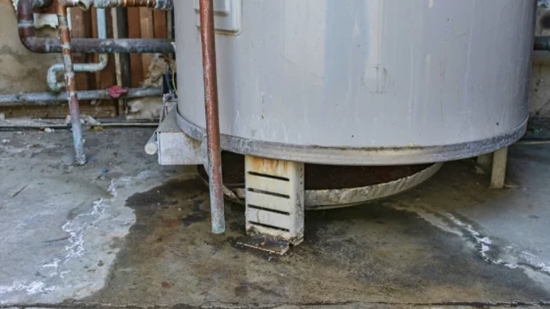
Don’t wait until your old tank bursts to get a new hot water system; instead, prepare ahead!
When a hot water system breaks, it frequently happens suddenly and without notice, with a blow, a howl, or flooding the area. Unless you can handle cold showers, you won’t have time to read evaluations of the various options if this happens. As a result, you’ll order a similar-type replacement hot water system and have it delivered to your home as soon as possible, then forget about it until the next time. What if you missed out on a better product in the process?
Which Is The Best Hot Water System: Gas, Electric, Heat Pump, Or Solar-Powered?
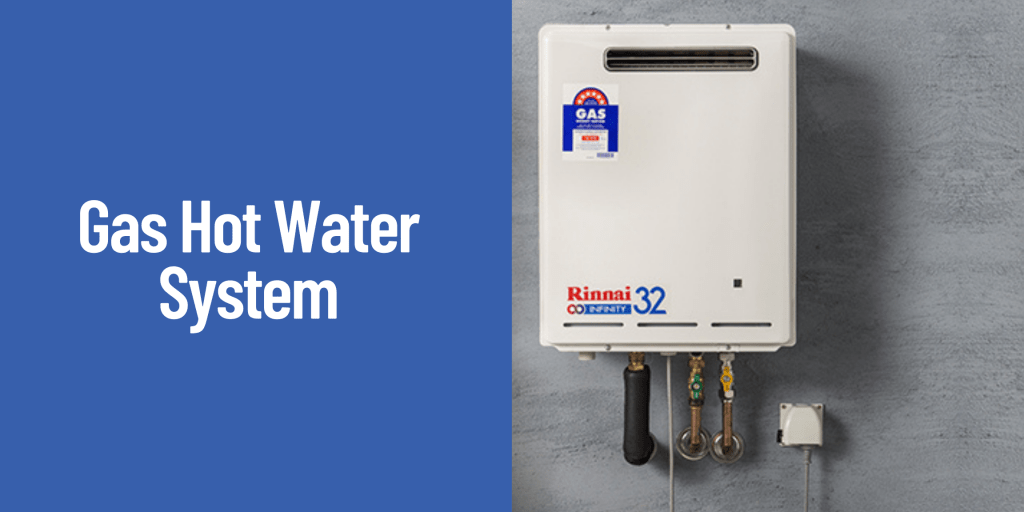
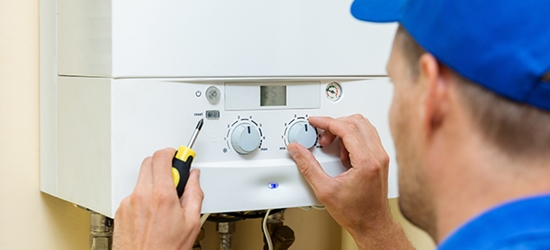
1. Gas Hot Water System
- It will simply take about 2 to 3 hours to replace and install an identical gas hot water system.
- Look for a star rating for energy efficiency.
- It is a wonderful choice if you can secure a natural gas hookup. Furthermore, it will be less expensive than electricity. Gas hot water systems can heat water as needed because gas prices do not fluctuate throughout the day.
- A storage tank of roughly 140 to 180 litres is required for a family of four. You also have the option of installing a continuous-flow hot water system.
- A pilot light that utilizes a tiny amount of gas is included in some models. Despite the fact that electric ignition is less expensive, you may lose your hot water supply if there is an electricity outage.
- The gas hot water system is often located outdoors due to venting requirements; however, it can be installed within using a flue.
- LPG (liquid petroleum gas) bottles are an alternative to natural gas, however, they may be more expensive to operate.
- The price of a gas hot water system ranges from $950 and $2050. (excluding hot water installation cost).
2. Electric Hot Water System
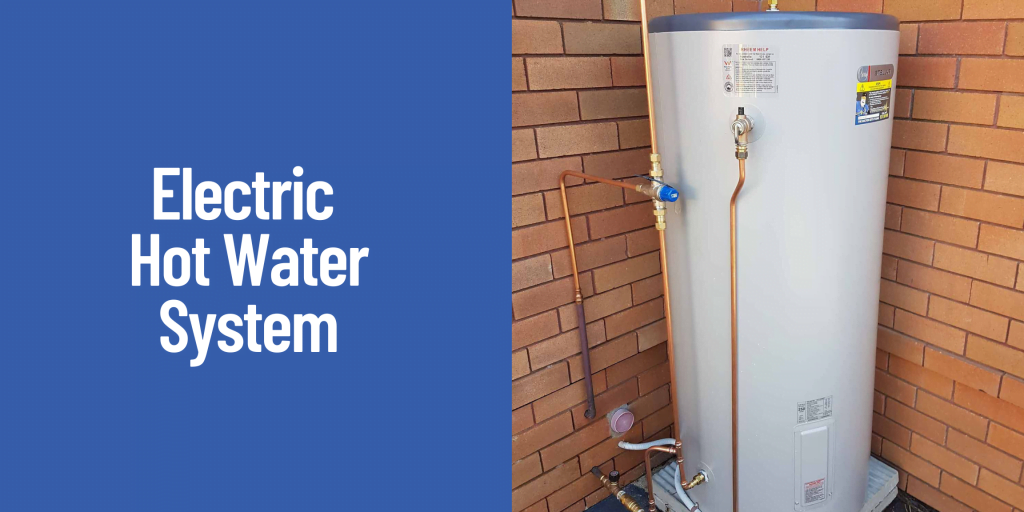
- It will take approximately 2 to 3 hours to replace and install an identical electric hot water system.
- Off-peak electricity systems are less expensive to run, but they require a large tank because the water heated overnight must serve you with hot water all day. Furthermore, not every household has access to off-peak electricity.
- Electric hot water systems can be installed both indoors and outside.
- For a continuous system, a household of four people needs roughly 130 to 165 litres of storage, or 255 to 320 litres for off-peak use.
- Electric water heaters with instantaneous or continuous flow are also available.
- An electric hot water system might cost anything from $350 to $1550. (excluding hot water installation cost).
- Your electric hot water system, for example, could account for a significant percentage of your power cost. As a result, it’s a good idea to double-check that you’re on the best electricity plan for your needs.
- An electric hot water system with a storage tank is cheap to buy and install, but it’s the most expensive to run, especially if it’s on a continuous (24-hour) rate.
3. Heat Pump
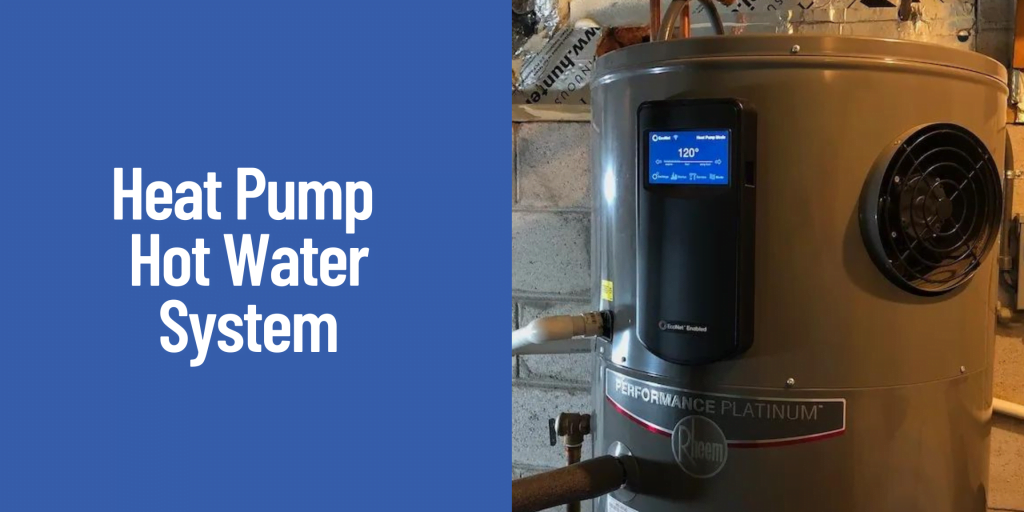
- The heat pump is a more resourceful electric storage tank device that operates similarly to a refrigerator or air conditioner. It extracts heat from the atmosphere and transfers it to the water tank.
- Only 2 to 3 hours are required for direct replacement and installation of an equivalent heat pump or electric storage hot water system.
- They must be installed in a well-ventilated environment, which is usually outside.
- A storage tank of between 275 and 320 litres is normally required for a family of four.
- Government rebates and other incentives may be available to help offset the purchase price.
- Units that include a tank and compressor are the most common; however, split units are also available (separate tank and separate compressor).
- Heat pump hot water systems perform best in warm and mild settings, but there are versions that work well in colder climates as well. In addition, most of the units come with a booster component for days when there is a lot of water demand or when the weather is chilly.
- The compressor on the heat pump, like your outdoor air conditioning unit, will make noise, so don’t put it too close to your neighbour’s house.
- The cost of a heat pump hot water system ranges from $2550 to $4050. (excluding hot water installation cost).
4. Solar-Powered Water Heater
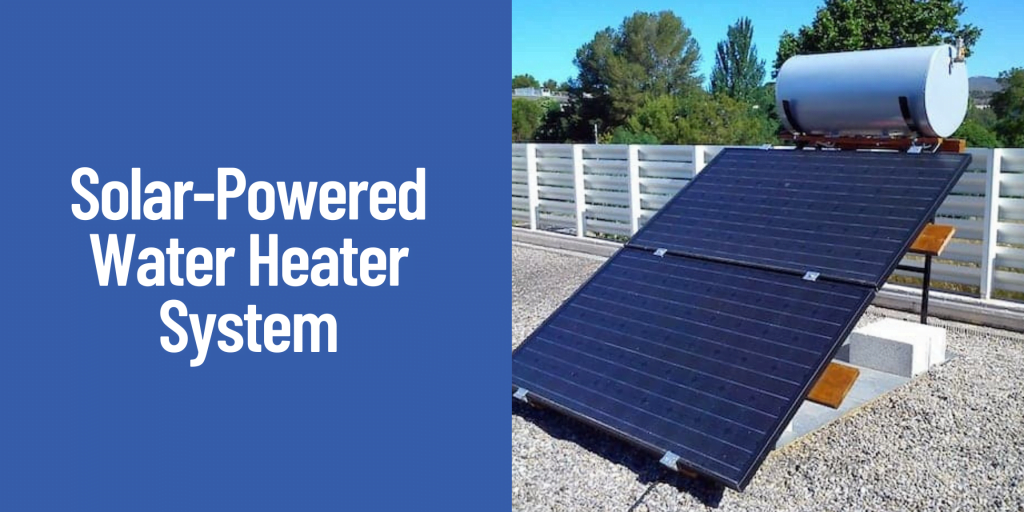
- A solar collector area of 4 square metres (two panels) plus a storage tank of 310 to 370 gallons is typically required for a family of four. If you wish to take more hot showers than normal or on days when the sun isn’t shining, you’ll need a huge tank.
- A storage tank and solar collector panels make up a solar hot water system. They may be less efficient if you don’t have the correct position for installing panels, and you’ll need a large collection area.
- Installing a solar hot water system is more expensive and time-consuming. To plan for the installation, the installer will need to inspect the available space within and around your property. The actual installation, on the other hand, usually takes a day or less.
- The electric or gas booster component within the storage tank will help keep the water heated on days when there is less sunlight.
- For its lower operating costs, a reputable brand solar hot water system will pay for itself in the long term.
- The cost of a solar hot water system ranges from $2050 to $7050. (excluding hot water installation cost).
- Rebates from the government and other incentives might assist offset the initial equipment cost.
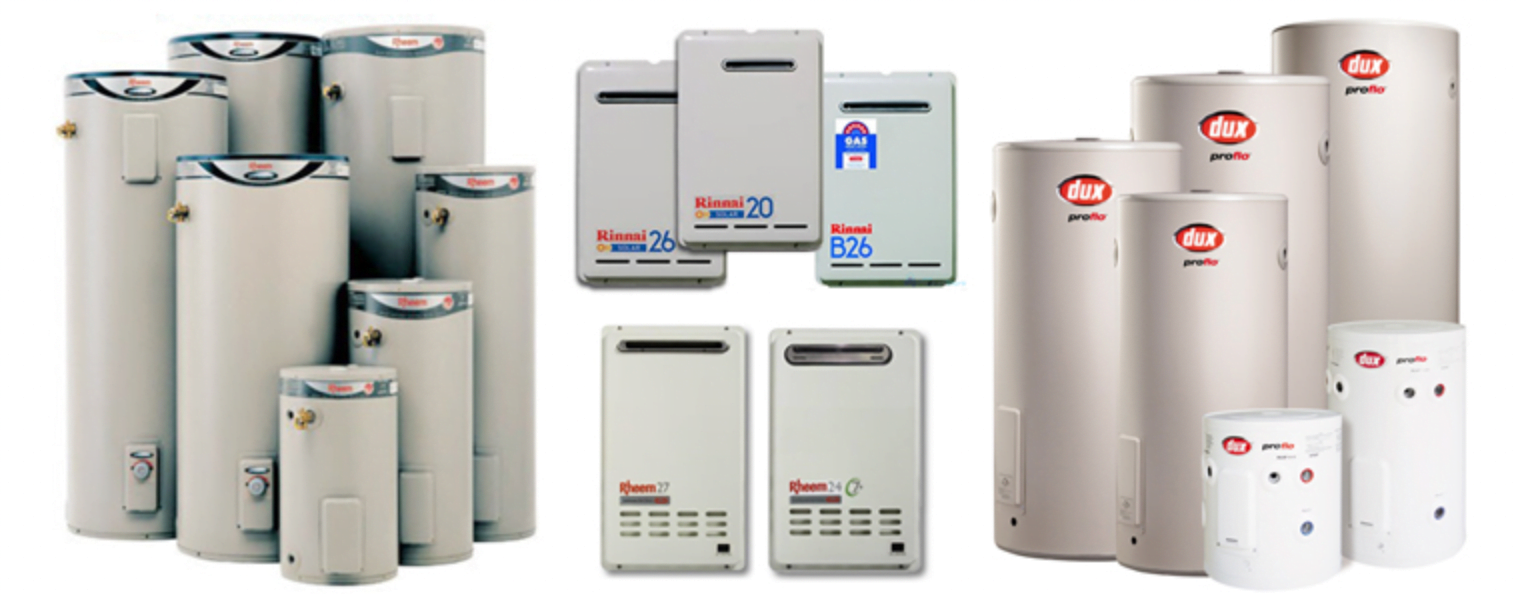
Planning to Install your Hot Water System? Contact Quintessential Plumbing Today!
Contact Quintessential Plumbing to speak with one of our licensed and experienced plumbers. We install and repair hot water systems from all major manufacturers, including Rinnai, Rheem, Dux, Bosch, and others. Call us on 0290 027 385 or visit www.quintessentialplumbing.com.au for hot water system prices and installation quotes for various heating systems such as gas, electric, heat pump, or solar.

25 Mar. 2021
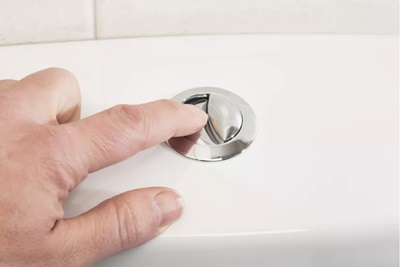
10 Easy Steps On How To Fix The Toilet Flush Button
The flush button on the toilet got somehow smashed and you just need to go back now to that old bucket of water style. But do not be miserable. Replacing a faulty flushing method will not be that hard. It will be taught in this post about how you can fix the toilet flush button by using few simple steps.
Tools you might need in replacing the toilet flush
Here is the list of a tool that you will need to fix the key button toilet flush issues. Also, the moment you unlock a toilet cistern, discover whether you are dealing with the flex mount dual flush valve or the top press dual flush valve!
- Flathead screwdriver
- Pair of grips
- Towel

How to adjust the toilet flush – The detailed bit-by-bit guide
In spite of whether the toilet has the water-saving or the standard flushing mechanism, changing a faulty button will work in the same manner. On that note, the task will differ though from that manner you approach and fixed the toilet that will not flush at all. From there, follow those steps:
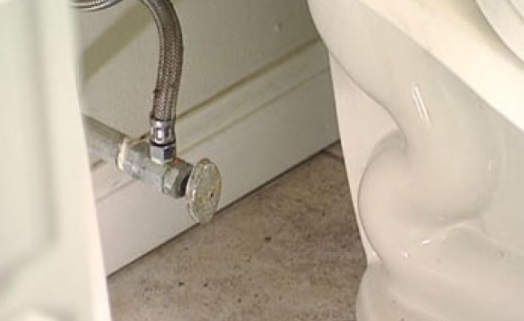
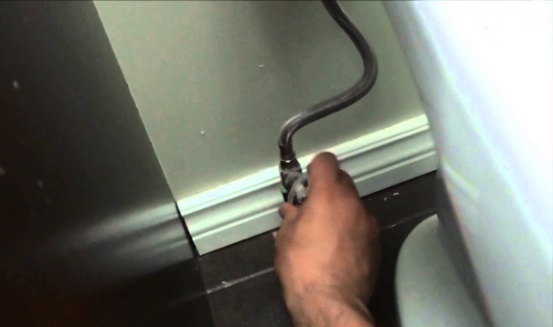
1. Switch off your water supply
When the toilet had an isolation valve, then, can switch off the water with no need to stop the supply into the other parts of the house. Where there is no such thing as a valve close to your toilet, you have to switch off your water at the stopcock beneath the kitchen sink. Search for the plate with the sign “water” or a “W”.
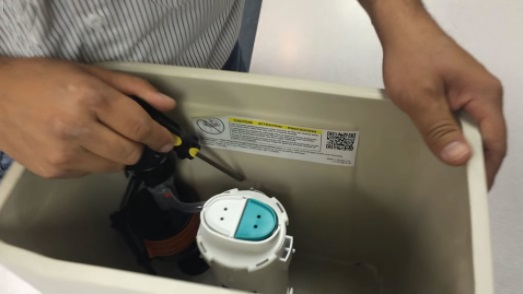
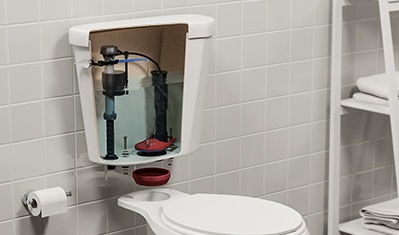
2. Open your cistern
Remove your cistern lid cautiously and disconnect its refill tube. Place a lid somewhere safe then take out its old button. You must be able to make this easily through undoing its back nut which holds a press button in place. Cleat a rim of a hole so it will be prepared when you needed to fit a new button.
3. Drain your water
Level down a system to empty a cistern out of your water. That will allow you to take out the entire cistern. There are so many ways to complete this and this will all rely on the kind of mechanism you have got. Do not worry if there will be small water left inside and you may deal with it afterwards.
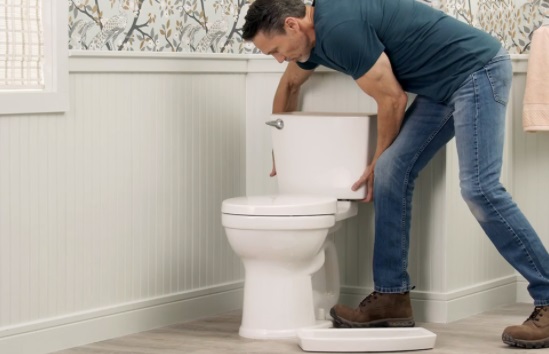
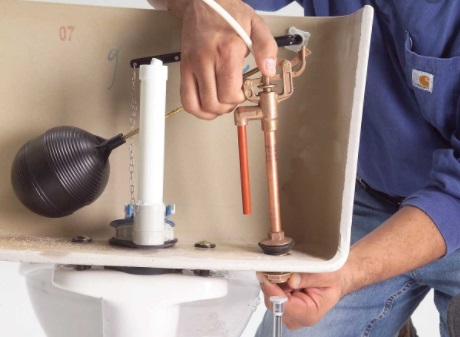
4. Detach your cistern
You can’t do the push button replacement job without taking out the toilet tank, initially. Get the screwdriver and take out the two screws which holds the tank connected to a wall. Locate the 2 wing nuts beneath the cistern and then undo them, so you’ll lift it away coming from a toilet bowl. Put each nuts and bolts into a side. Remove a pipe that feeds a tank with water. Empty any left over water from a tank and then close your toilet lid down. Slowly place your cistern over the top after you have placed the towel on a lid. Wipe the water from its place where a cistern goes.
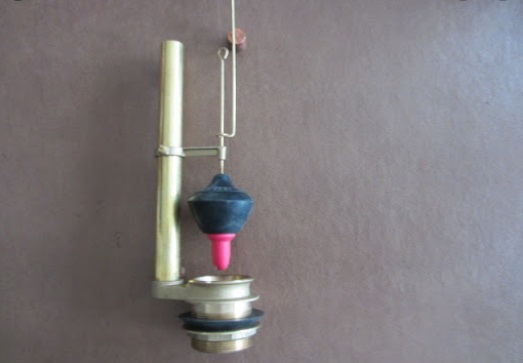
5. Take out an old flush valve
Below your cistern, you will see the rubber doughnut-formed gasket. Remove it gently and utilize the grips so it can undo a back nut which will hold a flushing mechanism in its place. Remove a metal clamp and place it to a side, just for that. Check if a doughnut washer will be in the best state. You may re-use this again, even when the new system will come with the washer. In the end, take out your old flush valve coming from inside your tank. You will need to have it a little of the wiggle so it slides more simply through a silicon about a hole.
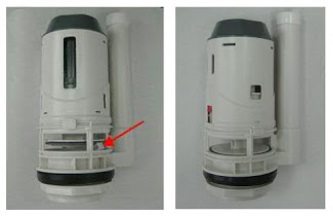
6. Fit the latest flushing mechanism
It is best to locate here that replacing the other kinds of flushing systems would be a little of a work sometimes. Right then, have the latest mechanism out of a packaging. Remove a doughnut washer and then undo a nut by the hands. Move a new seal upward, so it will sit tight and nice at the lower part of a unit. Pop a valve by the cistern and then secure it in its place. Fit a metal clamp back, then tightened a nut by hand or with your grips. Place back the new and old doughnut gasket it will depend on whether an old one will be reusable.
7. Install your cistern back
Put on the 2 bolts back in the slots in its lower tank part and gradually situate it in a place. Strengthen a wing nut to secure a cistern to your toilet bowl. Grab the screwdriver and then tighten the screws which will hold a tank fixed in its place to a wall. Check whether all things seemed to be steady and nice, as with the last things you’ll need some toilet drips and leaks. Finally, connect the back of the feed of the cold water.
8. Check and then adjust your flush valve
Be sure that you have set your fill valve to the position which allows the float in moving unobstructed down and up. Double-check with an instruction that will come with a unit to create any water-saving floating adjustments. You may try the outcome the moment you connect your toilet to your supply of water again.
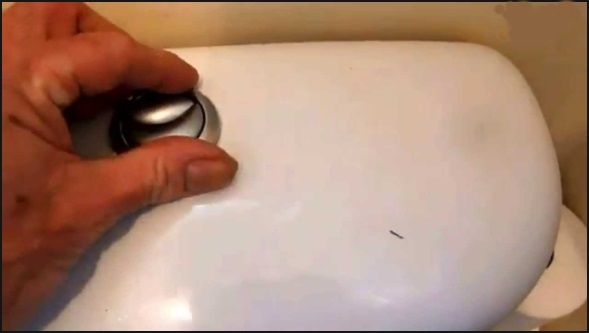
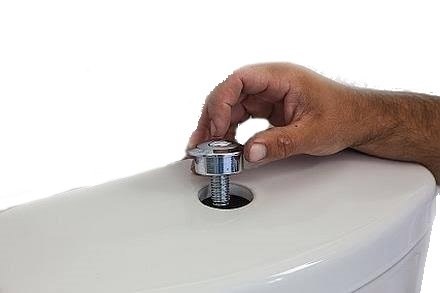
9. Replace your flush button
Fitting your push flush button will be that easy. Just unscrew your back nut, fit in your button and tighten your nut. If the button comes with the shroud, use this when you wish. You can simply discard your shroud if a button fits fine. Attach your button to a system, close your lid and you are done.
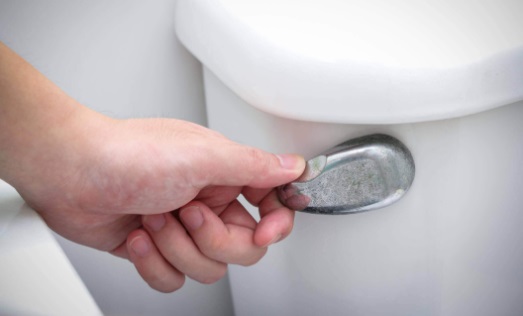
10. Switch on your water supply
Connect your toilet and your supply of water. Flush the toilet for so many times to try when everything functions as it should. You can check for any leaks and drips. Consider taking out the toilet and getting the latest one when the flush issues continue to take place.
Final thoughts
As you’re witnessing, to fix the flush button of a toilet will not be that complicated. You’ll need some professional orders at hand and with the perfect tools for the task. Still, take note that our advices are just your guidance, as we can’t be held liable to any damage caused, due to lack of expertise. It is always best to phone in the plumbing expert, who will give you with the total guarantee on their work done.
Related post:
16 Feb. 2021
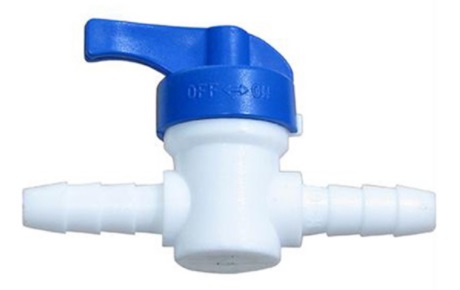
Types of Water Shutoff Valves
You have to trust us when we say that a local water supply shutoff valve is considered as your friend and knowing the types of water shutoff valves can help you at home. You will understand it when you have to change the faucet or repair the toilet and then discover that the plumber, give no way to closely shut off the water to the plumbing fixture.
However, local shutoff valves may also be the maintenance issue. The older valves, particularly the cheaper one multi-turn valve may leak if you go in shutting them off right after the long time of use.
The primary time you go in a plumbing store or by the big box house repair store to purchase the shut-off valve you will be faced with the seemingly endless choices. And so it is best to understand the different kinds of valves that can be availed and how to choose the appropriate kind of valve for the kind of water supply lines you had in your house.
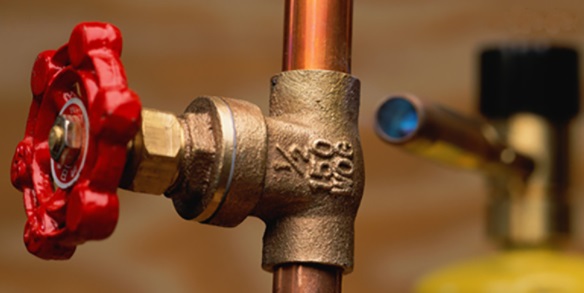
The Quarter Turn and the Multi-Turned Water Stop Valves
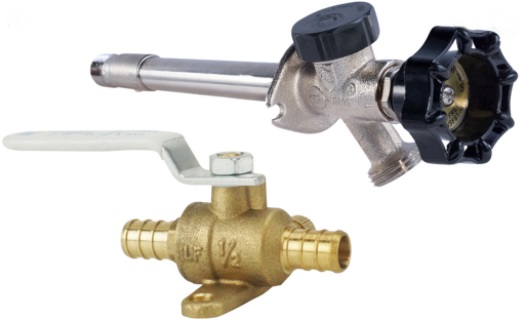
The shut off valves had been named as the ‘stop’ valves and it comes in 2 versions; the ‘Angle’ (90-degrees bend) edition and the straight ‘Stop’ version. The image of the quarter turn valve and the multi-turn valve look similar, however, you will see the difference in a valve neck/stem area.
Types:
Aside from the angled and the straight version of a valve stop, a multi-turn and a quarter alternatives within the valve itself, there’d been a variety of the water supply line alternatives that affect the kind of valve you have to buy.
Here are the common valve stops that you may find:
- Copper pipe supply line
• Compression fit / quarter turn or multi-turn valve stop / angled or straight
• Sweat fitting / quarter turn or multi-turn valve stop / angled or straight
• Push-fit / quarter turn valve stops / angled or straight - Iron pipe supply lines (threaded)
• FIP threaded fitting / quarter turn or multi-turn valve stop / angled or straight - CVPC supply lines
• Threaded fitting / quarter turn or multi-turn valve stop / angled or straight
• Push-fit / quarter turn valve stops / angled or straight - PEX supply lines
• Barbed fitting / quarter turn or multi-turn valve stop / angled or straight
• Compression fit / quarter turn or multi-turn valve stop / angled or straight
• Push-fit / quarter turn valve stops / angled or straight
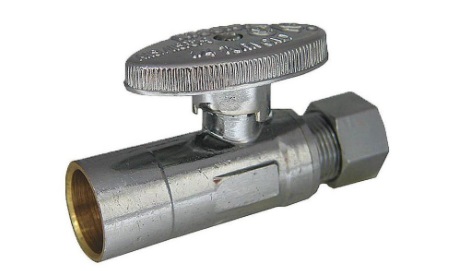
Compression Fit Stop Valve
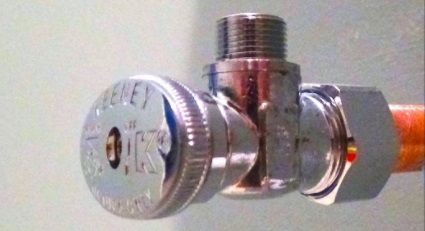
The compression fit stop valve is used with PEX and copper water supply line. It comes in quarter turn and multi-turn options.
This multi-turn valve stops are marginally affordable than the quarter turn valves and are made with the compression washers and the plastic stems. It requires some more turns of a stem to shut-off that water flow. When the valves are getting older and are fixed at the ‘on’ place, they seemed to leak when really used in shutting the water-supply off.
These quarter-turn valve stops are slightly more costly than the multi-turn valve, however, are better made and much more reliable. This uses the positive action ball valves in control the water flow and shutting water on and also off with the quarter turn valve handle. Very problem free, and very reliable and for the price differences, we do not know why anybody would buy the multi-turn valve, and both these valves have been readily available in any hardware stores.
The PEX or the copper water supply line may have the compression nut initially fitted above a supply line and the copper compression sleeve can slide above a supply line. The sleeve is being compressed by a compression nut as a nut is being tightened to stop valve.
If choosing the proper supply line sizes for its fitting you have to be attentive of the term being used to illustrate an inlet size. This term is the NOM Com or the ‘Nominal Compression’ sizing.
This NOM term pertains to the construction trade dimension conversion of the copper pipe’s inside the diameter (ID) and the outside diameter (OD). And so the 5/8″ copper pipe OD can have the 1/2″ ID. The 1/2″ COM fit is sized for the 5/8″ OD pipes.
Sweat Fitting Stop Valve
The sweat fitting water shut-off valve is designed to become useful as one non-leaking, non-removable connection to the copper water supply lines. The sizing of water supply lines had been COM dimensions also where the 1/2″ COM fittings are sized for the 5/8″ OD pipe.
The fittings require some of the skill when installing as they should be soldered onto a copper pipe and can require the propane torch, copper tube cutter, emery cloth sandpaper, solder, and flux.
Push Fit Stop Valves
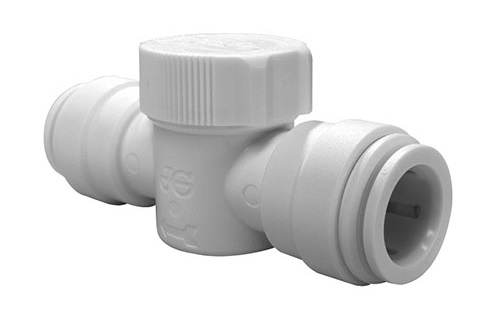
The push-fit valve stop is the latest technology that you can avail and are the simplest to install and also the most versatile. It used to be expensive, but you may take the press-fit shut-off valves for an almost similar price as the normal quarter-turn compression valves.
The valves can work with PEX, even CPVC and copper pipe water supply lines. It can be installed simply, just make sure the square cut on a supply line and then press on.
Female Iron Pipe or FIP Threaded Fitting Shut off Valves

The female iron pipe or FIP shut off valve is used with the threaded galvanize steel pipes water supply line. It is requiring the pipe thread compound that will simply screw off and on a supply pipe.
Barb Fitting Stop Valves
The barbed water shut-off valve is the kind of valve being used with the PEX water supply tube. PEX can also use the compression fitting that allows standard tools for the installation. The barbed fitting can require the crimp ring and the exclusive crimping tool to overall the PEX connection.
Related post:
7 Insider Tips That You Need When You Are Hiring Your Residential Plumber Within A Budget
06 Jan. 2021
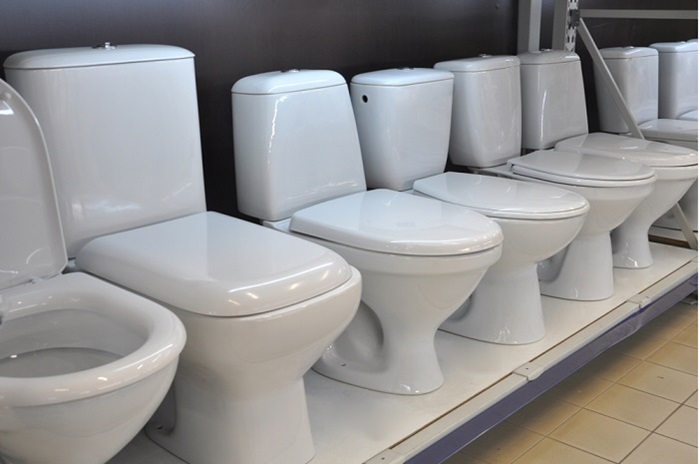
Eight Types of Toilets
Depending with the present conditions of your house and your choices, there are quite some of the different types of toilets to take into consideration before your final choice of the unit. The procedure could easily become crushing. So we have the listed of the most preferred types of toilets.
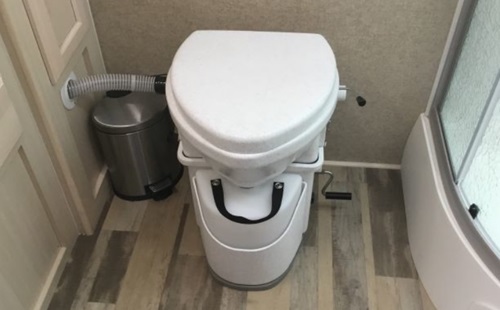
1. Upflush Toilet
This toilet eliminates the need to drill holes into the bathroom floor and to install complex plumbing systems. Practically, they are totally mobile and will fit anywhere in the property.
The basic difference between the standard fixtures and the upflush toilets is a discharge method. The mechanism consisted of the macerator toilet unit with the small pipe. A macerator processes the solid materials such as toilet paper and human waste. The resulting combination of flush water and materials moves by the upward pipe to the sewage. A discharge pipe that is as little as 3/4″ across solved lots of structural problems. The well slurry, transferred by the pump, goes by the sewage system, holding tank or the septic tank.
2. Waterless Toilet or “Dry Sanitation”
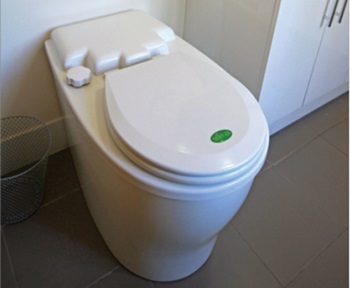
The toilet does not use any water when flushing. A composting toilet in its nature, the waterless toilet and this is very suitable for places with underdeveloped infrastructure, water or environmental deficiency problems.
The waterless toilet is not that famous among households however are frequently utilized at workplaces and the outdoor event sites and camping areas.
3. Pressure Assisted Toilet
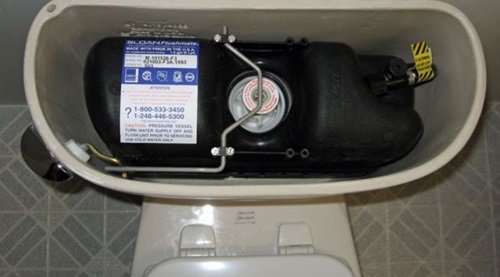
The biggest advantage of the pressure-assist toilet has been the powerful flush. A mechanism uses the pressurized air in forcing the water into a toilet tank. It means almost no duo flushes. Pressure assisted the toilet is fitted for households with lots of members, where a toilet is being used more regularly. There is a disadvantage to take consideration though – they’re noisy.
4. Portable Toilets
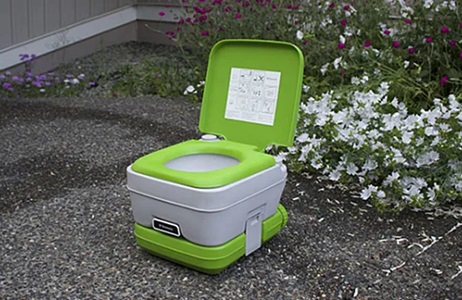
These types of toilets had been small toilets that will be simply transported from a place to another. These are the best for camping, festivals, hiking and with some other outdoor tricks. You can carry the tiny portable toilet simply and make your part in maintaining the surroundings protected and clean.
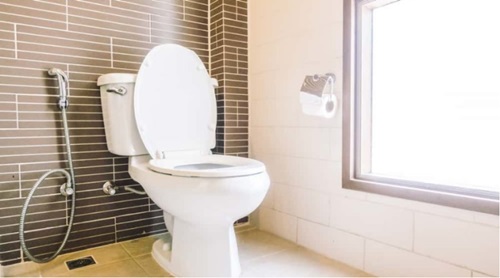
5. Gravity-Flush Toilet
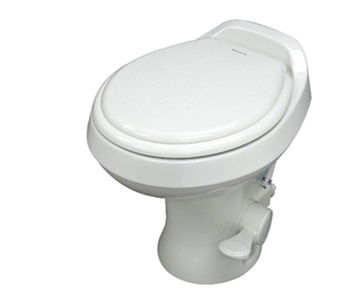
The gravity-flush toilet I usually used in domestic property all throughout the world. A toilet tank is holding the water which dropped into a bowl the moment that you press a flush button. Its water then pushed every waste through a trap way. The gravity-flush toilet is silent, had fewer parts, and had extremely easy maintenance through the years. It is no wonder that they had been a huge hit over the market. With just one of these, then, you almost never had the clogged toilet that you can deal with.
6. Dual-Flush Toilet
As its name suggests, they had two flushed button options – the half flush and the full flush. This half flush had been used for the liquid waste, while the full flush is being used for the solid wastes. One of the best benefits of the dual-flush toilet will be the water efficiency. The price is higher, but, they must be good for your budget and the environment. Lots of countries have adopted the kind of toilet that can deal with the shortage of water.
7. Double Cyclone Flush
The double cyclone flush toilet is the latest alternative that you can see in the market. These are using lesser water in every flush while having that similar power as the full flush. Even though not as the water-efficient as the dual-flush toilet, they are still being considered as an eco-friendly one. Buying one most will definitely have that positive outcome on the monthly water bills.
8. Composting Toilets
Its biological procedure named as composting treats human wastes, and that is where this kind of toilet got its identity. Most of the toilets use bulking resources like wood chip, sawdust, coconut coir, or the peat moss after every use.
When the human waste is composted properly, the final product is easy and safe to handle, there’s no foul odor and every liquids evaporates. The compost works really well on the plants, decreasing the need for the commercial fertilizers and also preserving the local water quality. Maintained and used correctly, composting toilets will be an elegant add-on to the modern bathroom.
Suggested articles:
06 Jan. 2021
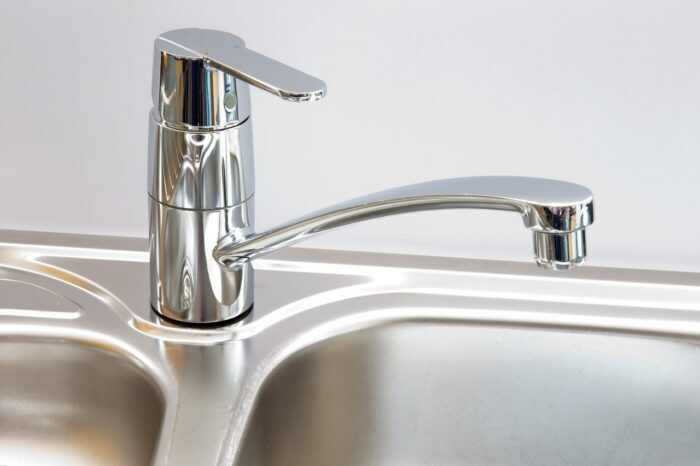
How To Change The Kitchen Tap In Simple Steps
Below is the detailed information about how you can change the kitchen tap.
Steps on how you will remove the kitchen tap
1. Turn off the supply of water
In turning off the supply of water to change the kitchen tap, you have to situate the isolating valves of the supply system of the pipe. You may locate it fitted at the hoses’ outputs. Turn the valve now with only a quarter in turning off the water. Also, try streaming the water to witness is you have turned it off correctly. If the system does not have the independent isolation valve, turn off your water supply from its main stopcock. The moment that you are 100% sure that there’ll be no circulating water, then, you may proceed to its next level.
2. Prepare an area
Lay the towel beneath the sink and then prepare every instrument you’re planning to use. When you still have the old kitchen tap manual instruction guide, keep it near. You will need to have a look of it while you’re trying to take out that old tap.
3. Discontent your tap from its main supply of water
There are 2 kinds of connections of the water pipes–flexible and standard. When you have the standard hose method, loosen up a screw which is connecting the joints to a pipe with an assistance of the open-handed spanner. Most of the water will come out the moment that you have disconnected a tap. For the flexible pipe connections, you have to unlock the nuts wherein they join its main pipe connections or the fitted isolator valves. When you are doing this, use the pair of modifiable pliers to maintain the connection or the valve into place. Take note that you can have the hard time loosening a nut, since they can get stiffed over time.
4. Take out the existing taps
It is now time to take away the tap. Start through loosening the nuts which will keep the tap connected to the facade. Grab the tap, then, secure it in place. Be sure it does not rotate as you’re trying to unscrew a nut. The thought is by taking it out from the stud, and so you may be able to detach the tap together with those flexible hoses. Be very careful when taking out the said hoses, particularly when they’re stainless steels. You do not want to hack yourself on a pointy, sharp edge. Once you have removed everything, then, take the time in cleaning any nasty residues or buildup from an open main pipe connections beneath the sink or basin.
How To Fit The Kitchen Tap
1. Clean a mounting surface
Clean your old surface where the old kitchen tap has been used to be. There are some build-ups that can be harder to take out, remove, and so have all the time. Do not use any harsh brushes or chemicals, so you do not damage the area.
2. Mount a new kitchen tap
Installing the kitchen tap has been easier than taking it out. So, if you have bought the normal individual bridge or the pillar combination one, then, you must apply about five layers of the PTFE tape into the mains link lower threads beforehand. Drape a tape in the clockwise way to secure it in the right way. The moment it is done, you may fit the new tap. Lots of models come with the pre-fitted hoses, then, if yours are not, grab a manufactures’ manual then connect them by yourself. Feed the mains link hoses by the hole you have made for the former tap. You can take someone to assist you out through holding a tap into the place. It should not rotate as you’re handling the hoses beneath the sink. Lastly, screw the retaining nuts by hand and then secure it tightly by the similar pair of bending pliers you used in removing the old unit. When you suspect that the new unit is really heavy for the sink, better install the tap brace. It is an additional, small investment that reserves lots of trouble.
3. Reconnect a mains supply
Since you are close to the final line, to reconnect the mains source, begin the threads through hand to evade cross-threading. Lots of tap units had the thread length standard together with the present connection alignment assured. And so, when you have started the thread, tightened it, but do not overdo it. Coil-in the connector nut to the pipe connections of the mains or the fitted isolator valves. And then tighten it again with the bendable open-ended spanner. Be certain when holding on to a connector or valve in eliminating the excess pressure.
4. Switch on a water supply
For that you have installed everything, it is time to switch on the supply of water. All you need to do is to adjust an isolating valve to the original position or in turning on the water coming from the stopcock. Experiment the tap by switching it on and then check the hose for drips and leaks. When all is fine – you’ve change the kitchen tap successfully!
Suggested article:
24 Dec. 2020
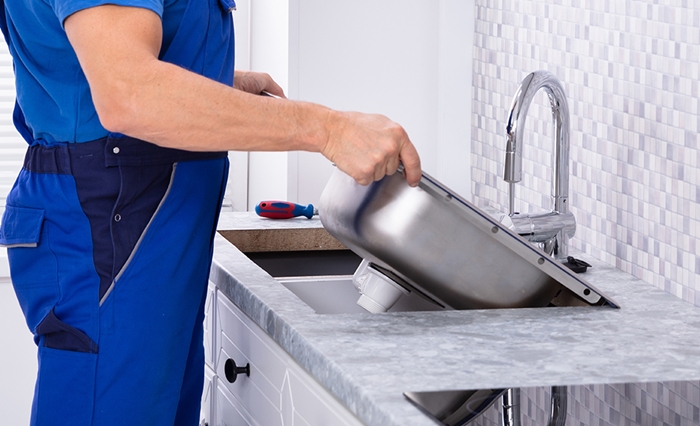
How to Replace The Kitchen Sink
Replacing the kitchen sink is really straightforward, but also this is a time-consuming job. There are sinks with all the sizes, shapes and materials, where some of it is trickier to perform with than the others.
How long will it take to change the kitchen sink?
On the average, for the standard kitchen sink, it will take the professional installer between 2h and 1,5h. However, there are some factors that came into play together with this task in your hand. An example is how easily an old sink is being taken out, whether the pipes needed to be changed as well and how much work that they needed on the hole.
How to take out the kitchen sink?
The primary step to replace the kitchen sink is just to take out the old one. The task needs to be controlled gingerly, so that you will not damage a new sink or a countertop. If you are not 100% sure with your DIY plumbing knowledge, it is advised that you call the professional plumbing service giver and let them change your sink.
Tip: Before disconnecting the pipes under your sink, take a picture, so you will have it simpler when you install a new unit.
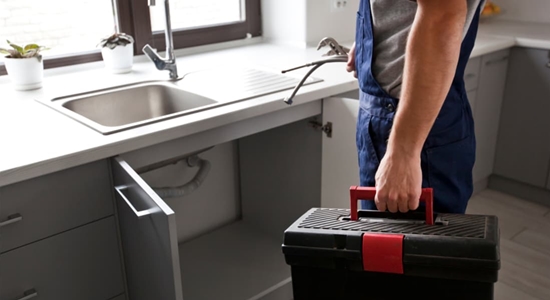
Equipment and other tools you will need:
- A bucket and old towel
- Adjustable wrench
- Pliers
- Stanley knife or the like
- Screwdriver
STEP 1 – Turn off your water and disconnect your supply lines
In removing the kitchen sink, initially, stop both the hot and the cold water supply to your sink. Then use an adjustable wrench in disconnecting the drain pipe and the supply lines which are connected to the drainage system of the house.
STEP 2 – Drain your remaining water and then situate the bucket under the sink.
It is likely that sum total of water can be left within the pipes, and so drained them really well. Place the bucket under your sink and allow the water to run. When there is nothing left, switch off the tap, then take out the bucket.
STEP 3 – Detach the garbage disposal item and the dishwasher.
When you have the garbage disposal beneath the sink and the dishwasher, disconnect them too. If you have the water filtration system, cut off it from a tap, too, in doing so for either of the appliances, you will then want to check the instructions first.
Tip: When you are separating any kind of appliance, keep the bucket and the rag nearby since there can be leaks.
STEP 4 – Disconnect the p-trap pipes and the drain pipe
When you have not done this already, then, today is the time. Disengage the drain pipe and the p-trap pipe from underneath your sink. Also, be to take out any other parts of the kitchen sink before going on with the changing of your kitchen sink.
STEP 5 – Unscrew its metal clips and then cut the caulk
You need to unscrew its metal clips. They’re situated under the sink for mutually under-mount and top sinks. After you take out the clips, you have to cut a caulk. The variation in between the 2 kinds of sinks is the location of the caulk. For the under-mount sinks, it is situated under the sink where its metal clips are, wherein, for the top-mounted sinks, it is over the top where the broader part of a sink met the counter.
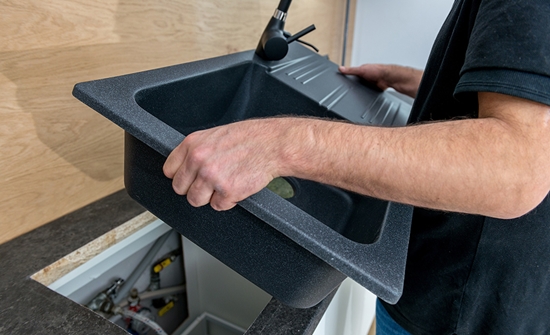
STEP 6 – Take out an old sink and then scrape off with any caulk
If you are finished with the cutting of caulk, remove a sink and then scrape off that remaining caulking and cleaning of the worktop.
24 Dec. 2020
How to Decrease Boiler Pressure That Are Too High
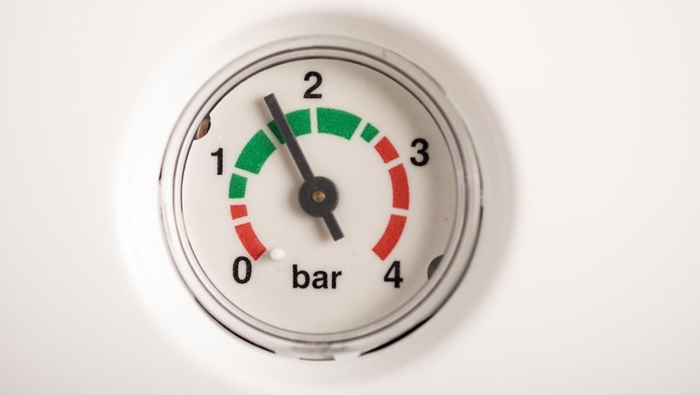
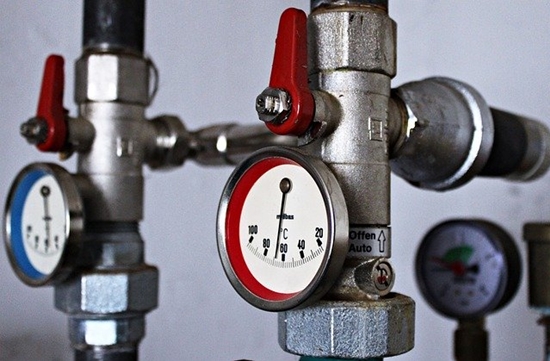
The boiler pressure is a balance between air and water that runs inside the heating system. Every system had the pressure gauge in a panel underneath it that shows the precise readings. When a gauge on the boiler shows the alarming error system on the digital display, you may be dealing with the boiler pressure too low or too high.
But First: How to know when the Central Heating/Warming Boiler Pressure is too high?
The high boiler pressure is being considered when an arrow points in a red zone exceed 2 bars. The truth is that is not dangerous, but will lead to costly harms to the heating system, and when it is high enough, it will decrease the efficiency of the boiler. Unless the boiler had the faulty pressure gauges or totally lacks it all, looking at it is just enough to recognize that the appliance is in a mess.
Here are the methods to do to decrease the boiler pressure:
1. Drain the overfilled central heating structure
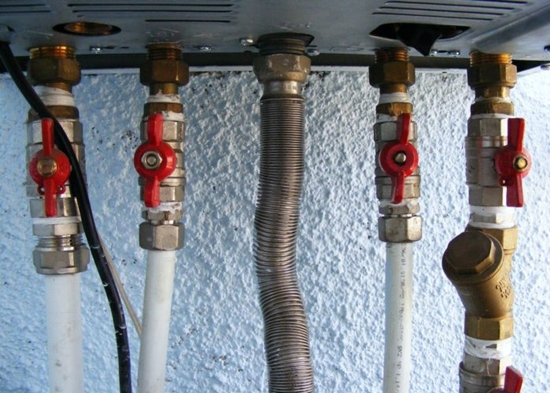
This is one of those simple things that you can make to decrease the pressure and that is by draining the leftover water from the main heating system. Search for your drain cock on your system and allow some water out. Arrange the bucket to gather the water and the mop, in case there will be accidental spills.
When draining the water, maintain an eye on your boiler pressure gauge in tracking any changes which will take place.
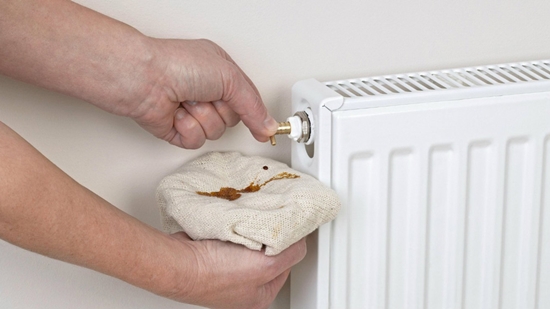
2. Bleed radiators to let go of the airlocks
Does bleeding radiator affect the boiler pressure? The answer is yes, if the issue is the water and air ratio inside the system. When the issue causing the force to rise is a bit of something, then the bleeding will not attain anything.
To bleed the radiator helps release the air out from the system and takes the water’s flow to be back on track. A release valve is normally on the top on the right side of a radiator and you needed to turn it together with the bleed key to allow the air out.
And you can do it by yourself, but bear in mind that at times this is the messy job, and you’ll need the bucket and some mops or towels to gather the water that will come out.
Tools that you will need: cloth or bucket, radiator bleed key.
What to do: Rotate the release valve and so that the air and the excess water may get out of a system.
Costs: Some do-it-yourself enthusiasm and about 15 min. of your time about how many radiators you’ll need to bleed.
- Troubleshoot boiler problems, if any
At times when there is a high pressure, the boiler may leak at similar time. In such instances, it’s important for troubleshooting the problem and identifying what is the reason and what is the effect. An example is a high boiler pressure that will cause leaks and the overfilled leaking appliances will cause high pressure.
The moment you spot an increased pressure with leaking water make sure to:
1. Switch off the supply of water.
2. Turn off its heating.
3. Wash every mess.
4. Have the boiler checked by the gas safe engineer.
- Replace and tightened up defective valves
At times, one of the causes behind the high boiler pressure will be the faulty valve. The defective valve will cause the water that will spill into a heating circuit that, in turn, makes the pressure within the system to increase. When the valve is loosened, try thinning it and when it will not help, you’ll need to change it. Only the Gas Safe engineer will do the latter.
22 Dec. 2020
Boiler Kettling – What Is It And How You Can Stop it
When you think that something weird is occurring with the boiler or you had been hearing uncommon or strange sounds coming out of it, the cause could be what had been called as boiler kettling.
Define Kettling Boiler
Do not worry if you have never heard this word before or are not sure what it really means, our team is here to explain this all to you.
The boiler that is making some noise like with the kettle, or either like with the mix of whistling, rumbling, bubbling, and popping usually heard while the appliances are working. It is happening when something inside the boiler is slowing down or intruding the flow of the process. The water inside the boiler must not get to a hundred degrees Celsius and should not boil, because if this will happen and the water is boiling, you will begin hearing the sounds.
Is it precarious?

Most, if not totally all, the modern boilers have their built-in safeguards that are supposed to identify overheating and so switch off the system to become your preventative measure before it begins kettling.
When you have your old boiler that is making strange noises, you better switch it off. When it reached the kittling stage, it has the possibility to be hazardous, since theoretically, its high internal pressure would cause its internal pipe to burst, which will lead to steam emissions or electrical hazards.
Why is the Boiler Kettling?
There have been some causes why the boiler makes the kettling sounds. There are some that are just some that are simpler to fix when compared with the others, but whatever the cause maybe, you have to transact with it immediately. You must look for the trusted company for such emergencies like the boiler repairs in the best possible time.
Here are some of the reasons why boilers are kittling:
1. The leak in a boiler system – one of the most common problems that cause the boiler to make that whistling sound is that the central heating system is leaking. You need to look carefully and find out where your boiler leak is coming from, since it may be on any side of your system, even those hard-to-spot areas. Also, do not forget to examine the pipeworks and the radiators all throughout your house.
There are different causes for the boiler leak and the most common had been poorly installed pipeworks, corrosion that typically comes with over-pressurisation and older units and others.
2. The system is overheating – when there are zero leaks, the cause for the kettling sounds can be the overheating boiler. This could be due to wrong thermostat settings or overall, there is a malfunctioning thermostat. Whatever the cause will be, the water in the boiler is really hot enough to switch into steam, and that is what makes an odd sound.
3. Limescale and mud build-up – the build-up of limescale is the third ordinary reason for the boiler to make that weird sound. The build-up limescale and ‘sludge’ everywhere in the heating scheme is an issue that will cause various problems to your appliances and the pipework. And also, often that is the cause why the radiators have those cold spots.
The limescale increasing in the pipes close to your boiler will also make it construct gurgling sounds due to its blockage in the water flow.
4. A faulty thermostat – if you have an old system, maybe your boiler thermostat isn’t working in the right manner. After some time, it is usually the case that a thermostat or a diverter valve has been worn out, and with most cases, the specialist must change the damaged part. Bear in mind that when the boiler is old, it can be more cost-effective to purchase the new energy-saving boilers than spending that much money on expensive repairs.
When the boiler and the thermostat are not communicating, then, you have to get the appliance inspected by the Gas Safe Engineers. They will just adjust its settings or alter the entire regulator when needed.
5. Issues with the boiler pump – The main heat pump, usually located close by the boiler itself, can be damaged. This will work through pressurizing the water, then pumping it back into the system, and at times, the procedure does not go as initially planned. The faulty boiler pump cannot be pushed quickly the water enough from the heat exchanger that will cause it in making weird sounds.
Suggested posts:
9 Reasons Why Your Boiler is Not Warming Up
Should You Turn the Boiler Off or Not When Going on Holiday?